What Does the “Noindex in HTML and HTTP Header” Issue Mean?
A “Noindex in HTML and HTTP header” issue in a site audit indicates that a webpage has conflicting directives for search engines regarding indexing. Specifically, it means that the page is marked with a noindex directive both within the HTML meta tags and in the HTTP headers. Here’s a breakdown of what this entails:
1. HTML Meta Tag Noindex
The HTML <meta> tag in the <head> section of the webpage includes a robots directive with the value noindex. This tells search engines not to index the page.
<meta name="robots" content="noindex">
2. HTTP Header Noindex
The HTTP header sent by the server includes a X-Robots-Tag with the value noindex. This also tells search engines not to index the page.
X-Robots-Tag: noindex
When both directives are present, it can cause confusion or redundancy. Although both methods aim to achieve the same result (preventing indexing), having both can be seen as unnecessary duplication.
How to Check the Issue
Using any browser is enough to check the issue. Open the source code of the flawed page. To do this, click the right mouse button at any spot of the page and choose “browse the code” option, or apply an online tool https://codebeautify.org/source-code-viewer.
Find a directive <meta name=”robots” content=”noindex” />. If the value of the content = noindex, there is an issue at the page.
To check the server’s response, use a tool https://redbot.org/ or any similar tool. The presence of an X-Robots-Tag: noindex in the server’s response means there is an issue at the page.
Detailed directive description
https://developers.google.com/search/reference/robots_meta_tag?hl=en
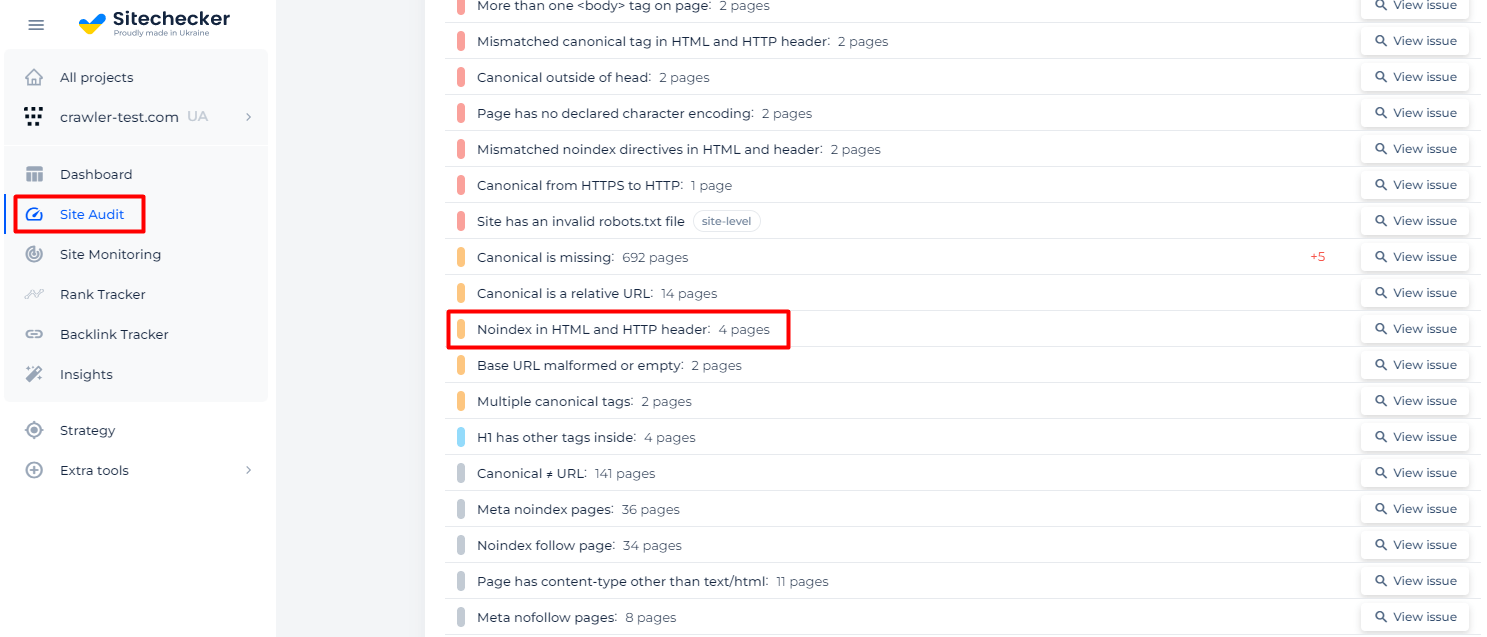
Another way to check the problem is to use services like Sitechecker. It will scan your website and provide you with a list of issues, including pages where a ‘noindex’ directive is specified in the meta tag and in the HTTP response header (X-Robots tag).
Additionally, you will receive a list of all affected pages.
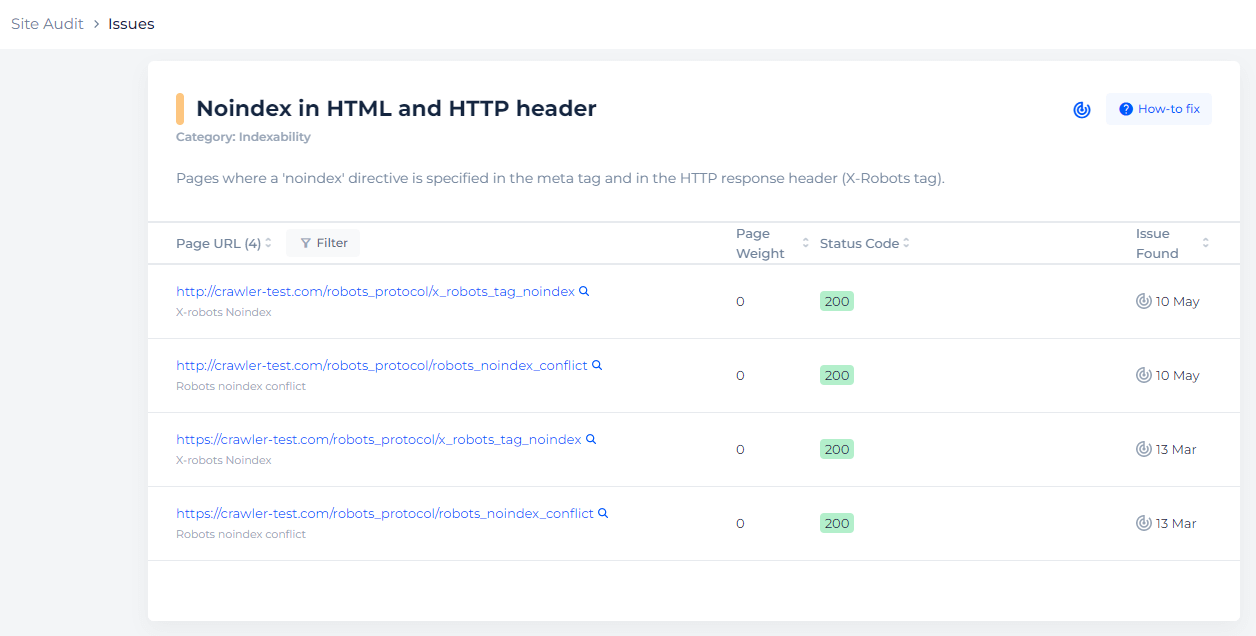
Detect pages with noindex directive
Crawl the website to collect all pages with noindex directive in HTML and HTTP header
How to Fix This Issue
To fix the “Noindex in HTML and HTTP header” issue, you need to choose one method to implement the noindex directive and remove the other. Here’s a step-by-step guide on how to do this:
Step 1: Decide on Your Preferred Method
You can use either the HTML meta tag or the HTTP header to apply the noindex directive. The choice depends on your site’s setup and management preferences.
- HTML Meta Tag: Easier to manage if you are comfortable editing HTML files.
- HTTP Header: Useful for more dynamic or server-side managed sites.
Step 2: Remove the Unnecessary Directive
Removing the HTML Meta Tag
If you choose to keep the HTTP header directive, follow these steps:
- Locate the HTML file(s) where the noindex meta tag is set.
- Remove the noindex meta tag from the <head> section.
  <!-- Remove this line -->

  <meta name="robots" content="noindex">
Removing the HTTP Header Directive
If you choose to keep the HTML meta tag, follow these steps:
- Locate the server configuration file or the code that sets the HTTP headers.
- Remove or comment out the line that sets the X-Robots-Tag: noindex header.
This could be in:
Apache configuration (.htaccess or httpd.conf):
  # Remove or comment out this line

  Header set X-Robots-Tag "noindex"
Nginx configuration:
  # Remove or comment out this line

  add_header X-Robots-Tag "noindex";
PHP code:
  // Remove or comment out this line

  header('X-Robots-Tag: noindex');
Step 3: Verify the Changes
- Clear your site’s cache to ensure the changes are reflected immediately.
- Check the page headers to confirm the removal of the noindex directive using browser developer tools or online tools like httpstatus.io.
- Run site audit again to ensure the issue is resolved.
