Basic Favicon Setup
A favicon is a small, iconic image that appears in a browser tab next to a website’s title, bookmarks, and search results. Typically 16×16 or 32×32 pixels, it serves as a visual identifier for a site, helping users quickly recognize it among multiple open tabs or saved bookmarks. Essential for branding, favicons add professionalism and credibility to a website, enhancing user experience by making it easier to locate and remember a site visually, especially when users return later.
Supported Formats and Sizes
Favicons are most commonly in .ico, .png, and .svg formats. While .ico files are standard for browsers, .png offers higher-quality transparency, and .svg is scalable for various devices. For best results, use multiple sizes: 16×16 pixels for browser tabs, 32×32 for bookmarks, and 180×180 for Apple devices. Including various formats and sizes ensures your favicon displays correctly across all platforms and devices.
Proper File Naming and Directory Placement
Place your favicon file directly in the root directory (e.g., https://example.com/favicon.ico) for browser recognition. Naming it “favicon.ico” is a widely accepted standard, though linking in HTML can allow custom names. Proper naming and placement help prevent errors and improve visibility, as browsers often look for this file by default.
Setting Up Favicon in HTML and Headers
To ensure your favicon displays correctly, it’s essential to include the appropriate HTML code in the <head> section of your webpage. Add this tag to link the favicon:
HTML <link> Tag for Favicon
To integrate a favicon, add the following <link> tag in the <head> section of your HTML document:
<link rel="icon" href="path/to/favicon.ico" type="image/x-icon"/>This line tells the browser where to find the favicon. Replace “path/to/favicon.ico” with the actual path to your file. You can use different file types (.ico, .png) by adjusting the type attribute accordingly.
Platform-Specific Favicon Settings
For a consistent favicon experience across devices, add specific meta tags:
- Apple Devices: Use <link rel=”apple-touch-icon” href=”path/to/apple-touch-icon.png”> for iOS and Safari.
- Android Devices: Set up a web app manifest file with <link rel=”manifest” href=”path/to/manifest.json”> for Android.
These tags help ensure your favicon is displayed correctly on all platforms, enhancing your site’s user experience across devices.
Common Troubleshooting Steps
If your favicon isn’t displaying correctly or isn’t showing in Google search results, try these troubleshooting steps to identify the issue:
File Path and Naming Issues
Ensure the favicon file path is correct and the name is exact, such as favicon.ico. Small discrepancies in naming or directory location (e.g., it must be in the root folder for some browsers) can prevent browsers from recognizing the favicon.
Clearing Browser Cache
Browsers may store a cached version of the site, including the favicon, which can lead to display issues. To ensure the latest favicon version is loaded, clear your browser cache. This step is essential after making changes to your favicon.
Chrome
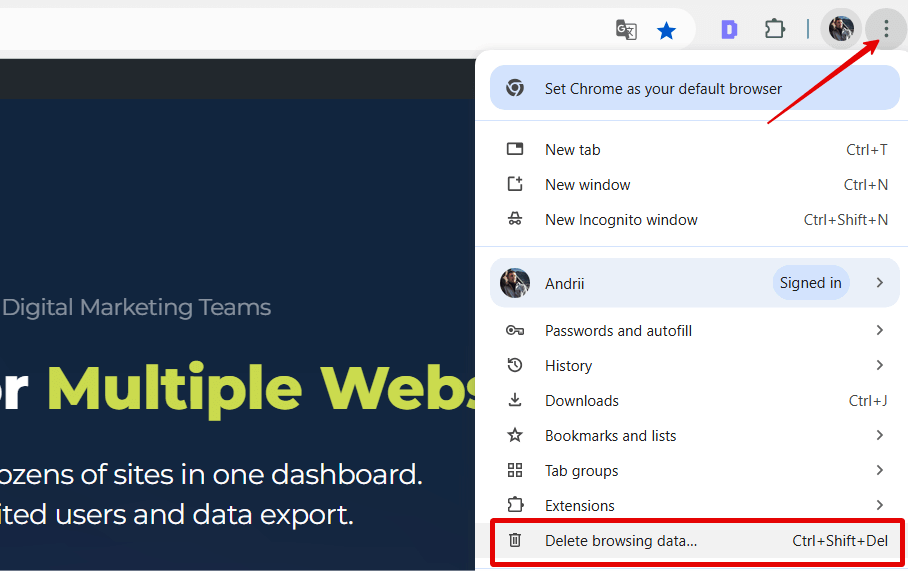
- Access Chrome Menu: Click on the three dots in the upper right corner of the window to open the Chrome menu.
- Go to “Delete browsing data”: Select “Delete browsing data…” from the menu.
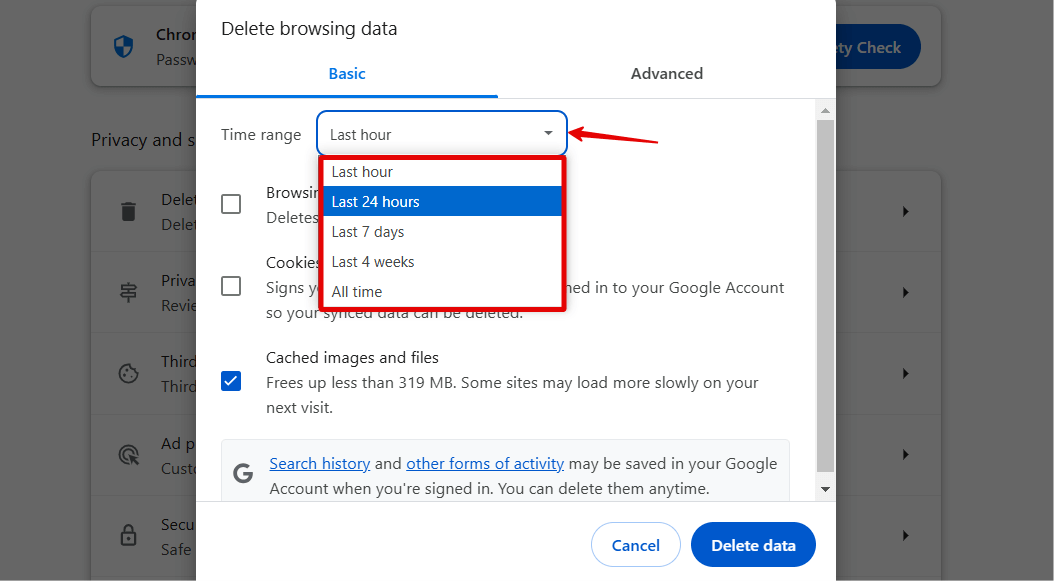
- Select the Time Range: In the “Clear browsing data” window, you’ll see the option to choose the time range for which you want to clear cached images and files. You can select “Last hour,” “Last 24 hours,” “Last 7 days,” “Last 4 weeks,” or “All time.”
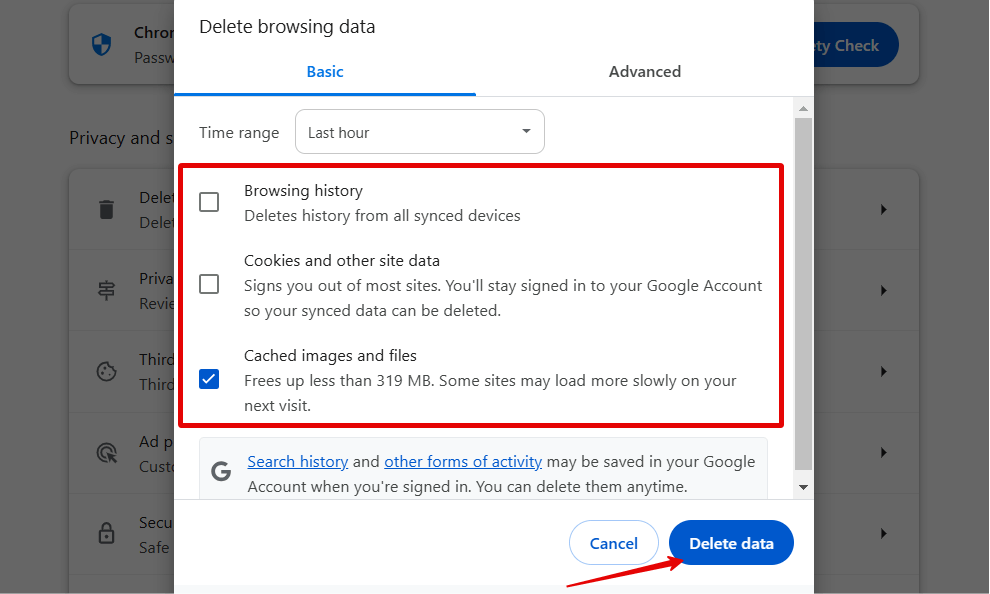
- Choose What to Clear: Ensure that the checkbox next to “Cached images and files” is checked. You can also clear other browsing data such as cookies and browsing history here if needed.
- Clear the Cache: Click on the “Clear data” button to clear your selected cache files.
Firefox
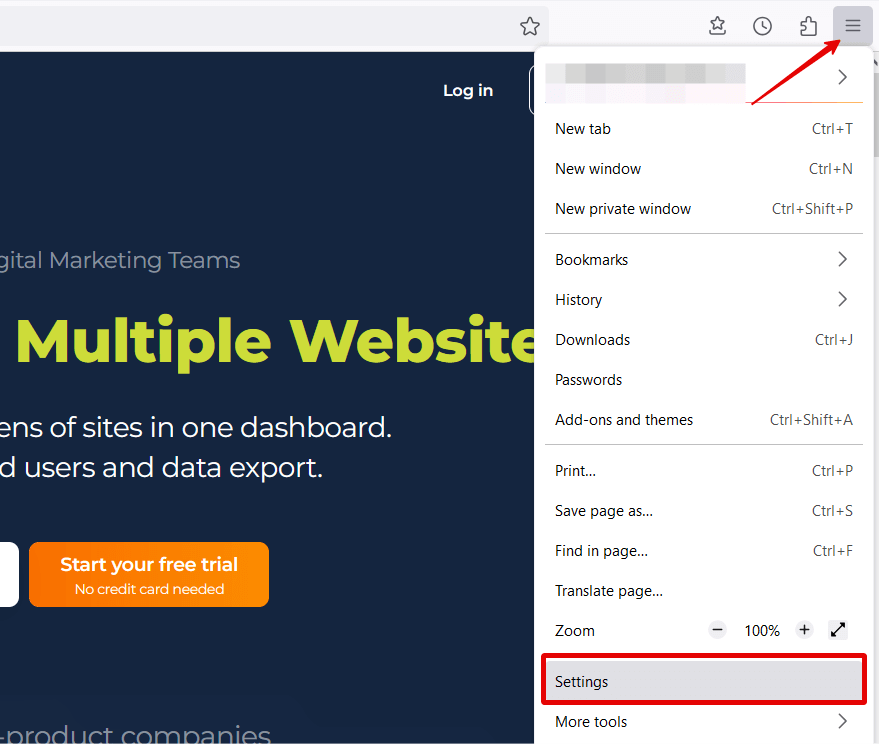
- Open Menu: Click on the three horizontal lines in the upper right corner to open the Firefox menu.
- Go to Settings: From the menu, select “Settings” to open the settings tab.
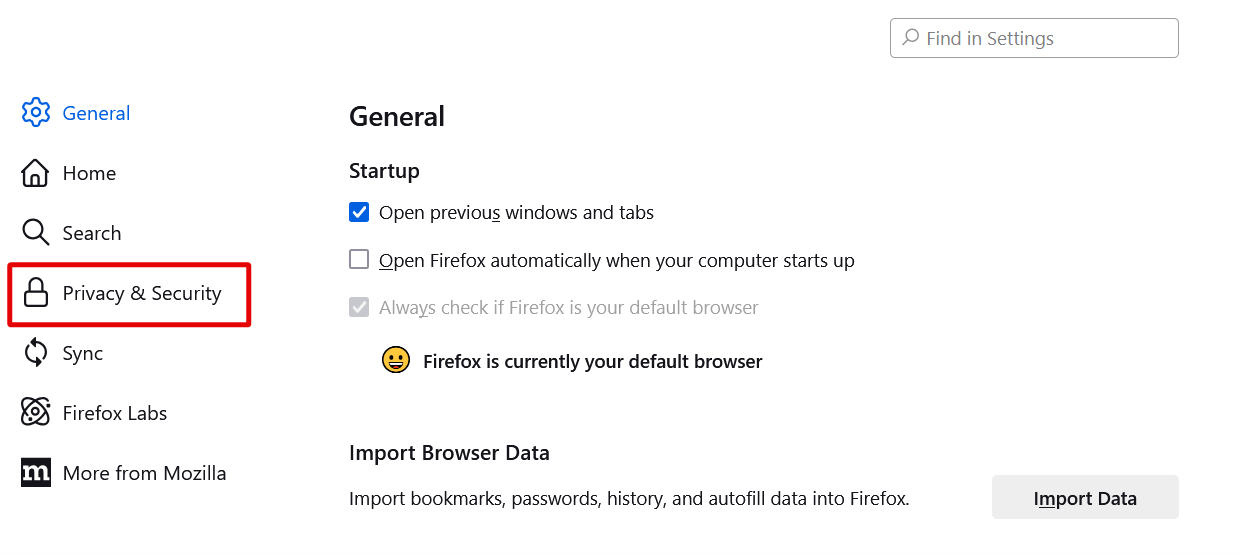
- Access Privacy & Security: On the left side of the screen, click on “Privacy & Security” to navigate to the privacy settings.
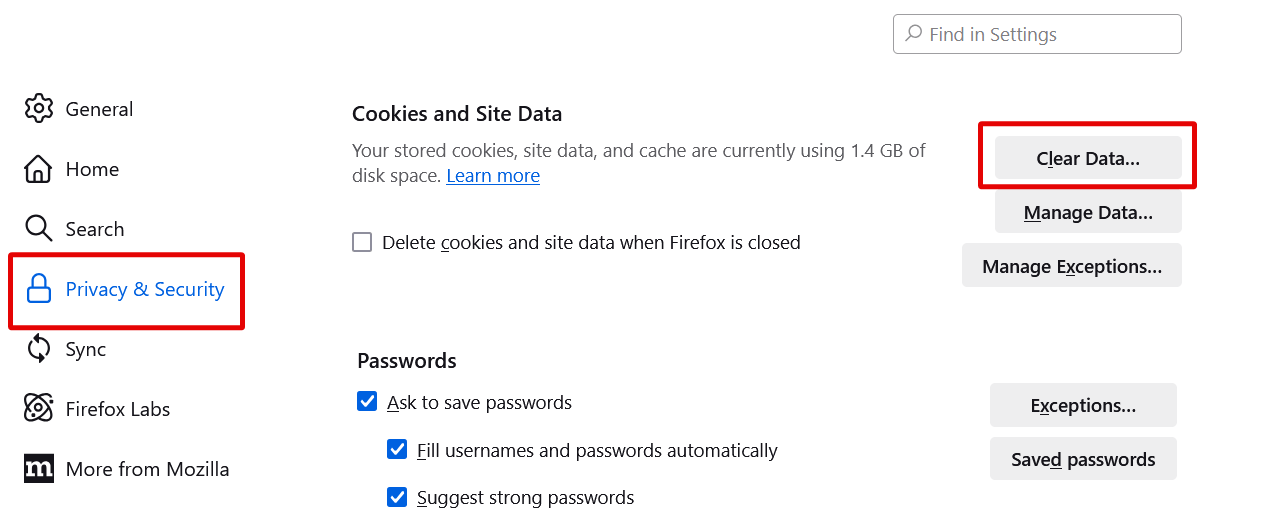
- Clear Data: Scroll down to the “Cookies and Site Data” section and click on “Clear Data…”
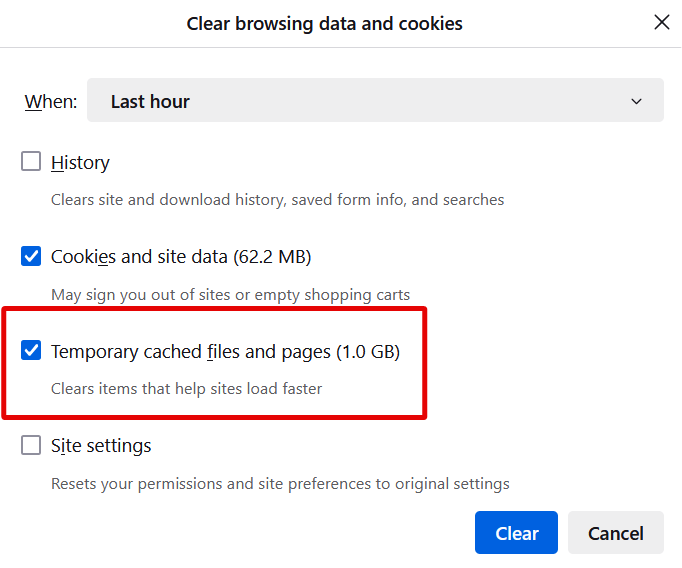
- Choose Cache to Clear: In the clear data window, check the box next to “Cached Web Content.” You can also choose to clear cookies and site data if needed.
- Confirm and Clear: Click on the “Clear” button to remove the selected cache data.
Safari
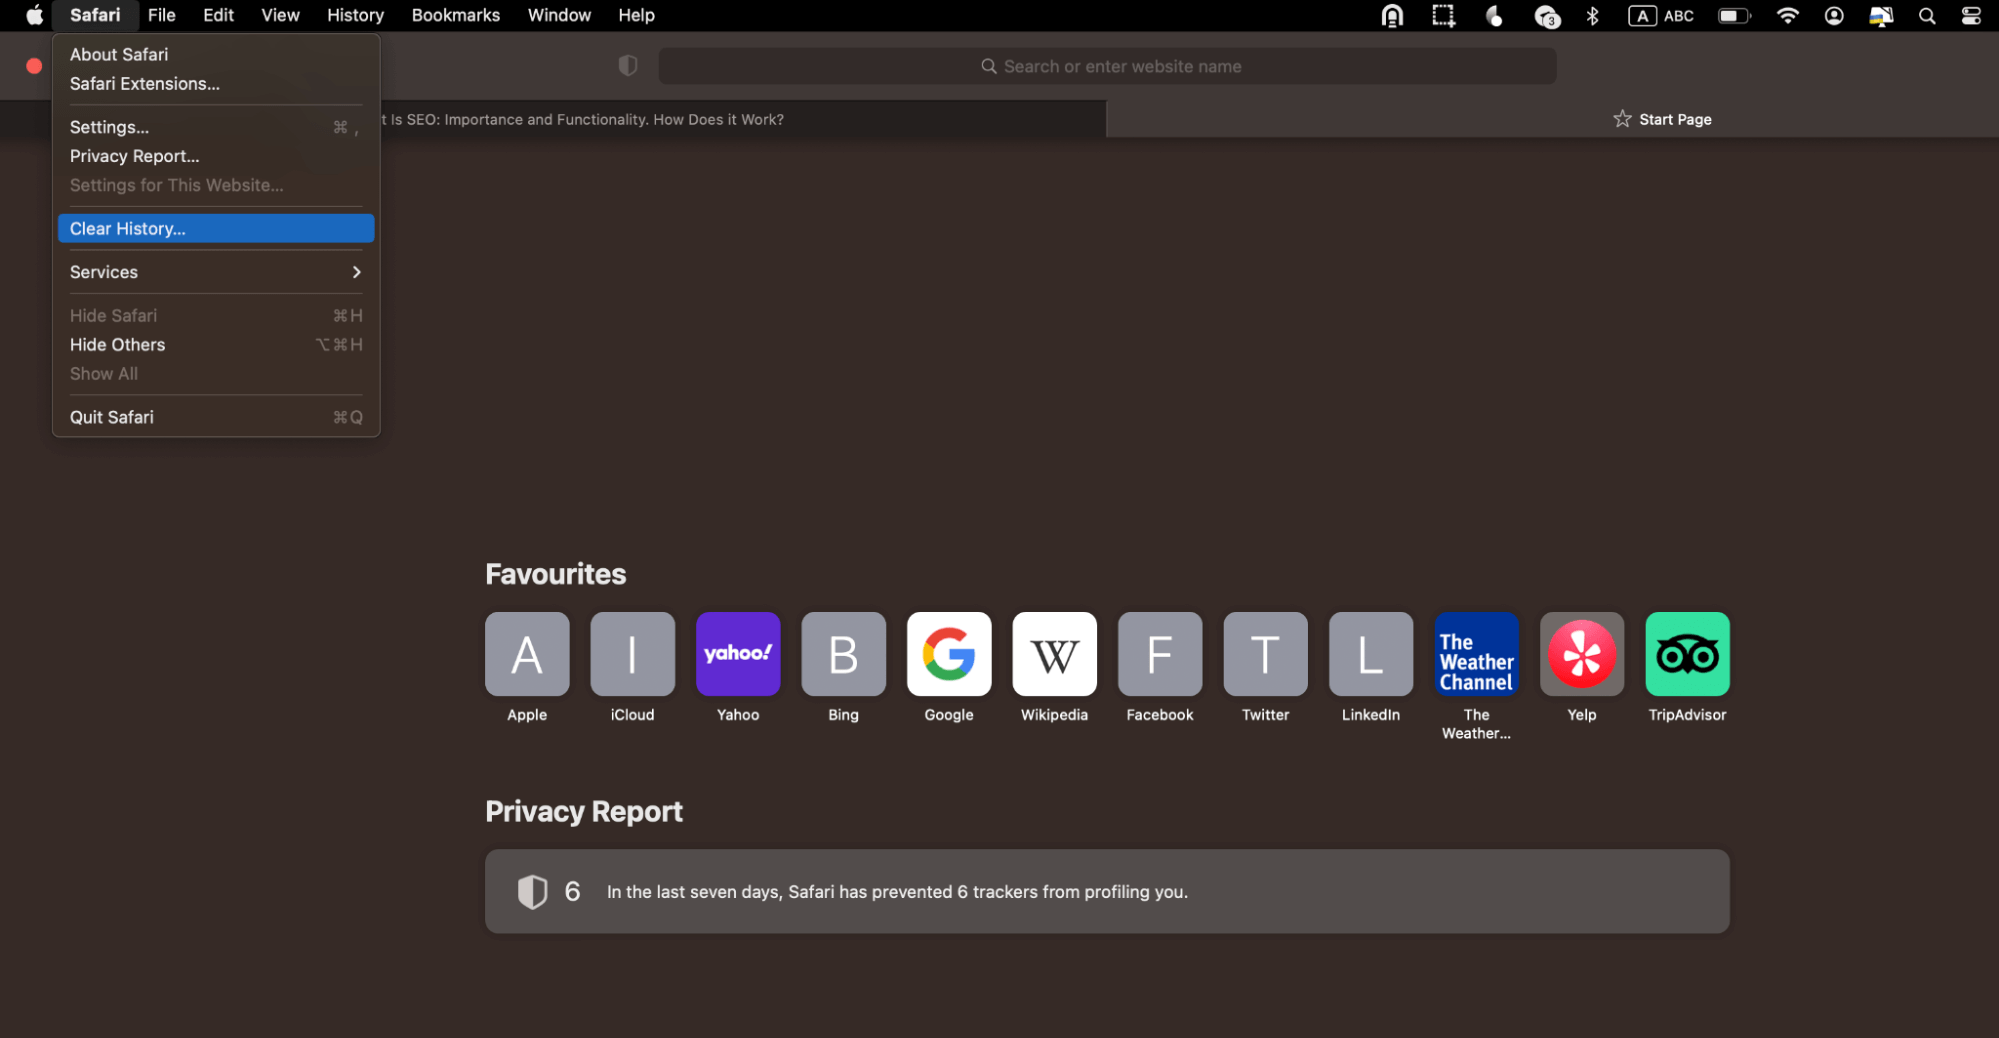
- Open Safari: In the Safari menu at the top left, select History.
- Choose “Clear History…”: This option will be available in the History menu.
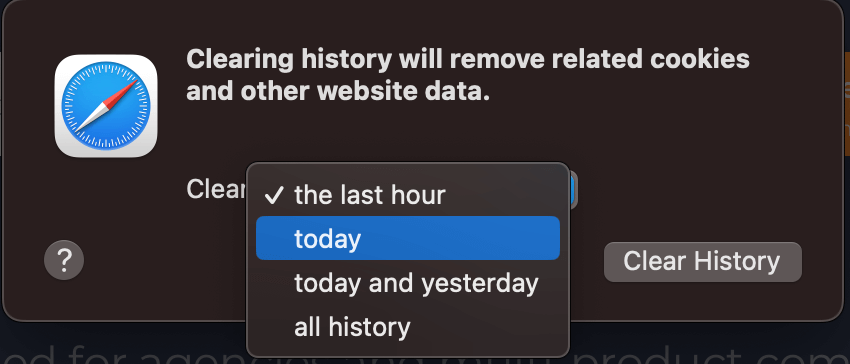
- Select Time Range: In the pop-up window, choose the time range to clear (e.g., “the last hour,” “today,” “all history”).
- Clear Cache: Click Clear History to confirm and remove the cached data.
HTML Validation for Syntax Errors
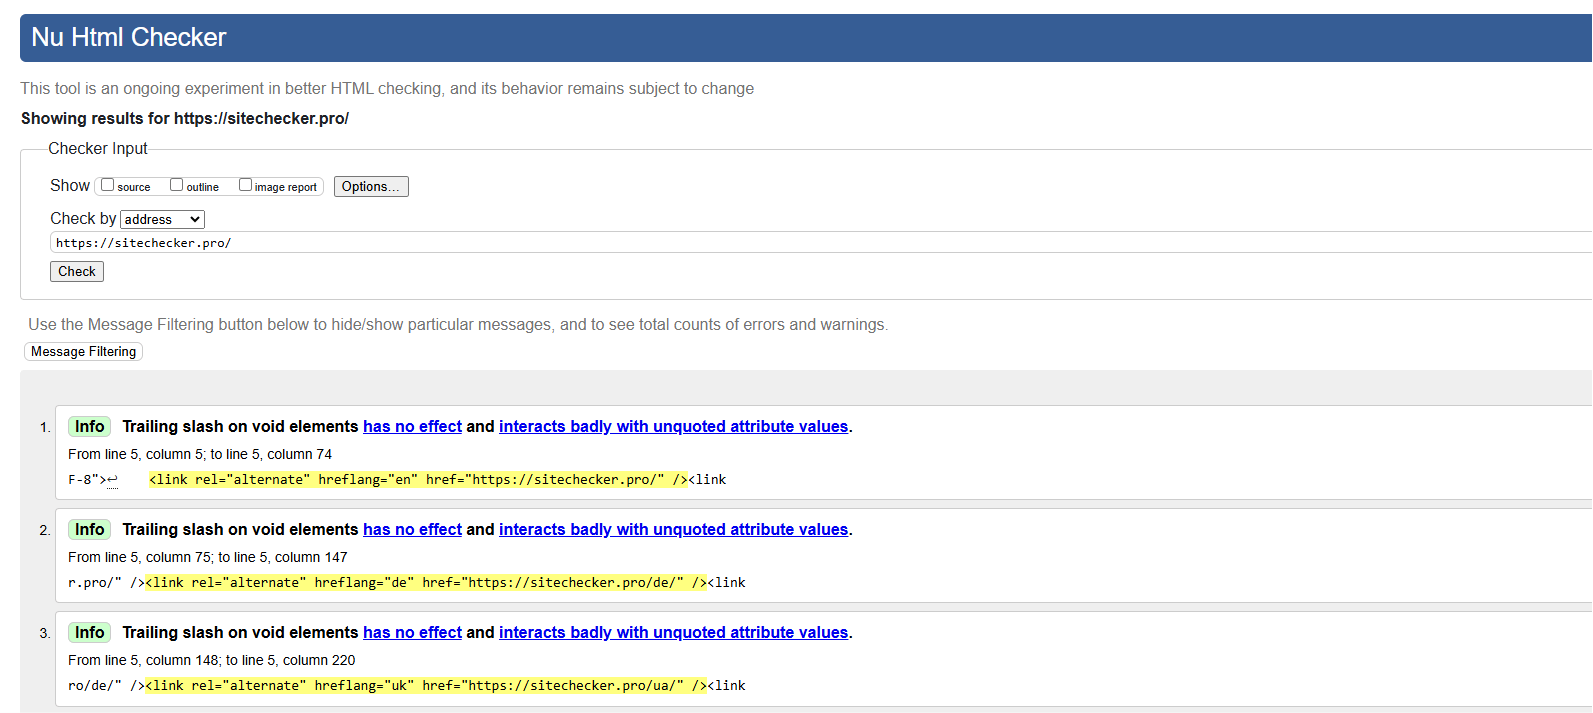
A missing or misplaced <link> tag in your HTML can lead to favicon display issues. Use an HTML validator to check for syntax errors, ensuring your favicon code is correctly embedded in the <head> section. This simple check can often resolve display issues.
Advanced Solutions
If basic troubleshooting doesn’t resolve your favicon issue, these advanced steps can help identify the root cause.
Server-side caching and CDNs
Caching by your server or CDN can prevent favicon updates from displaying. Adjust caching settings to force updates, or clear the cache manually. This step ensures that all users receive the latest favicon version.
Cross-Browser Compatibility
Different browsers can handle favicons differently. Test your favicon across browsers like Chrome, Safari, Firefox, and Edge, as each may interpret the favicon setup uniquely, revealing compatibility issues.
Using Inspect Element for Debugging
The Inspect Element tool can help you diagnose favicon issues in browsers. Open Inspect Element and navigate to the Network tab to see if the favicon loads properly. This tool provides insights into any file path or loading issues.
Checking Favicon in Search Results
For your favicon to appear in search results, follow Google’s guidelines. A favicon that meets Google’s size and format requirements helps display it next to your site’s link, boosting brand visibility. Ensure the favicon is accessible via a valid URL and is explicitly linked in the HTML <head>. Structured data can also improve how favicons appear in search results. Once updated, check your site’s presence in Google Search Console to confirm that your favicon displays correctly in search results.
How to Check the Issue?
The easiest way is to enter the URL of the site into the browser and see if the logo is displayed next to the site URL. You need to check this for different browsers and devices.
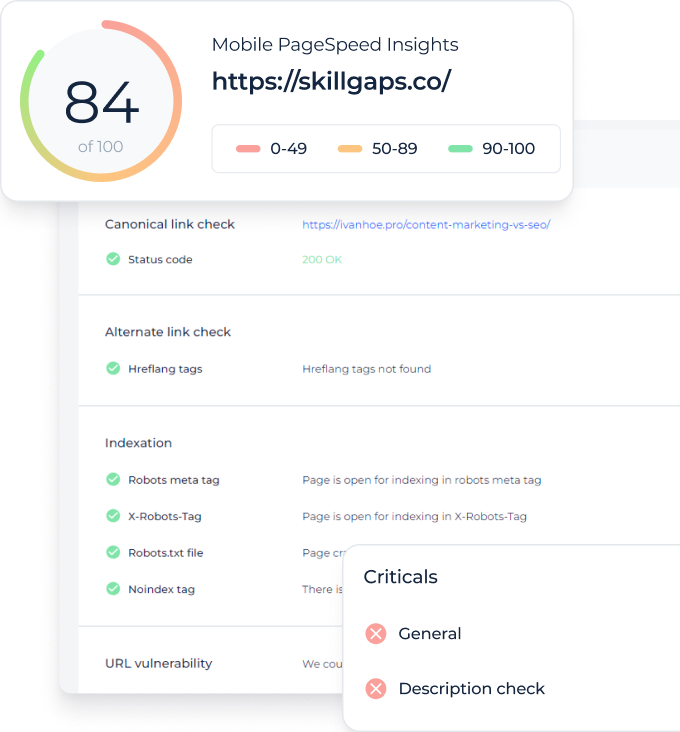
Or you can use Sitechecker, and it will check favicon presence in different browsers. If everything is okay, you will get a notice that “Site has a favicon”.
Conclusion
Setting up a favicon is essential for a polished and recognizable website. By choosing the right formats, sizes, and HTML tags, and ensuring proper file placement, you enhance user experience and brand visibility across devices. Troubleshooting steps and cache management help resolve display issues, while testing across browsers ensures consistency, boosting your site’s professionalism and credibility.


