Error")


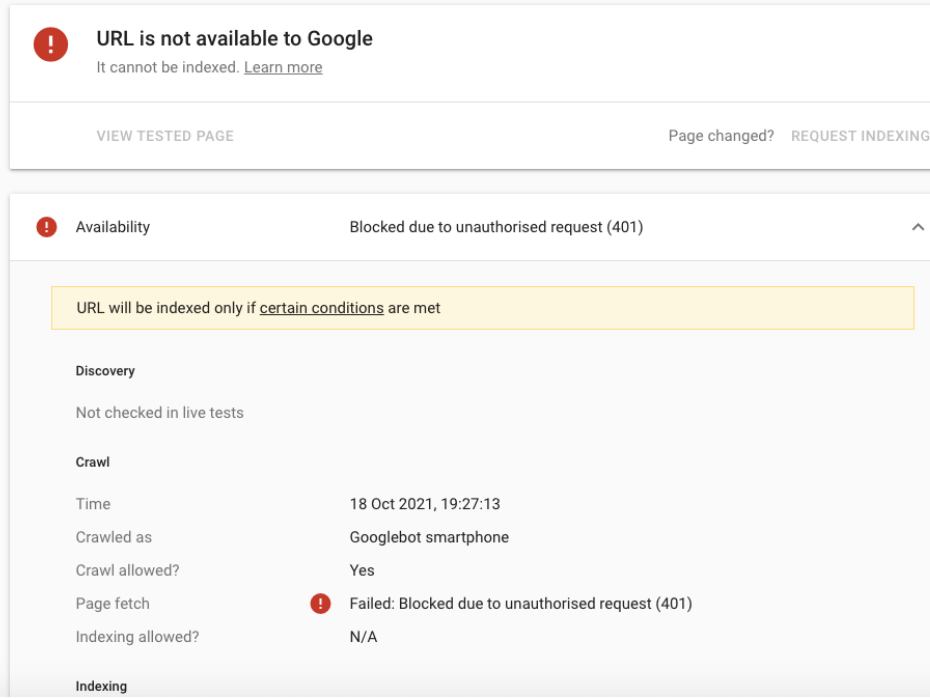
What does ‘Blocked due to unauthorized request (401)’ mean?
The error “Blocked due to unauthorized request (401)” typically appears in Google Search Console when Googlebot tries to access a page but is denied due to missing or invalid authentication credentials. In other words, the server requires a login or special permissions, and since Googlebot doesn’t have them, the request is blocked.
Launch Sitechecker’s GSC Dashboard to boost your Search Console reporting!
Expand GSC Data Limits
Bypass Google’s 1,000-row cap and unlock up to 36 months of Search Console history in a single dashboard.
Common causes of 401 errors for Googlebot
🔐 1. Password-protected areas
Pages that require a username and password (like staging environments or admin panels) will always return a 401 if Googlebot tries to access them.
Example:
A staging site for testing (staging.example.com) that’s not meant to be indexed.
🔑 2. Pages behind login forms or HTTP authentication
Pages that rely on form-based login (e.g., member dashboards, course platforms) or HTTP basic authentication won’t allow Googlebot in unless credentials are provided, and bots can’t log in.
🧱 3. Firewalls or security plugins blocking crawlers
Security tools like Cloudflare, Sucuri, or Wordfence may block unknown or bot-like traffic, including legitimate crawlers. If misconfigured, these can mistakenly serve a 401 to Googlebot.
⚙️ 4. Incorrectly configured .htaccess or server rules
Rules in your Apache or NGINX configuration might restrict access unintentionally:
- IP restrictions.
- Directories protected by .htpasswd.
- Broken rewrite rules.
🏠 5. Hosting settings (Squarespace, Kinsta, etc.)
Some platforms automatically protect certain pages or environments (e.g., Squarespace under construction mode, Kinsta staging sites). Googlebot might be blocked by default.
🔒 6. CAPTCHA, WAF, or rate-limiting
Advanced protection systems like reCAPTCHA, Web Application Firewalls (WAFs), or aggressive rate-limiting can assume Googlebot is suspicious activity:
- If Googlebot sends too many requests quickly.
- If IPs aren’t properly whitelisted.
- If bot detection is too strict.
Should these pages be indexed?
Not every page that triggers a 401 needs to be indexed – and that’s fine. Ask yourself: Is this content meant for the public, or private eyes only?
You probably don’t want it in search results if it’s a staging site, login page, admin panel, or customer dashboard.
But if it’s a blog post or product page that accidentally got protected, then yes – fix the issue and let Google in. It all comes down to intent.
✅Public pages? Open the gate.
🔐Private ones? Keep the lock.
Blocked by 401? Scan Your Site Now
Quickly detect 401 errors that stop Google from indexing your pages.
How to fix the ‘Blocked due to unauthorized request (401)’ error
If the error already affects your site and Googlebot is blocked, don’t worry. Below are clear, actionable steps you can take to fix it and restore proper indexing.
1. Remove or modify authentication requirements
If Googlebot hits a login wall, it stops cold. Pages protected by passwords or login forms simply can’t be crawled. If the content is meant for public viewing, remove the authentication. Keep protected areas private, but make sure your leading site is freely accessible.
Here’s a clean code example showing how to remove basic HTTP authentication for a specific section of your site on an Apache server using .htaccess:
# .htaccess – DISABLE AUTHENTICATION FOR A PUBLIC SECTION
<Directory "/var/www/html/public-section">

    AuthType None

    Require all granted

</Directory>
Or, if your site uses HTTP authentication and you only want to let Googlebot bypass it, you can try:
    SetEnvIfNoCase User-Agent "Googlebot" allowbot

    Order Deny,Allow

    Deny from all

    Allow from env=allowbot
🛠 Explanation:
- The first snippet completely disables authentication for the specified directory.
- The second one allows access only for requests with a User-Agent containing “Googlebot.”
⚠️ User-Agent strings can be faked. This method is a workaround, not a long-term security solution. It’s best to remove authentication or serve it from a separate, unrestricted URL for public content.
2. Use server whitelisting (if necessary)
If you need to keep a page behind authentication but still want Googlebot to see it, server whitelisting is your next best move. It lets you give Googlebot special access while keeping everyone else locked out.
Here are two practical code examples for server whitelisting – one for Apache and one for NGINX – to allow Googlebot to go through while keeping pages protected from the public.
    SetEnvIfNoCase User-Agent "Googlebot" allowbot

    Order Deny,Allow

    Deny from all

    Allow from env=allowbot
📌 This allows only requests from user agents containing “Googlebot.” Be cautious: User-agent headers can be faked, making them not foolproof.
✅ Apache Example (IP-Based Whitelisting for Googlebot)
    <RequireAll>

        Require valid-user

        Require ip 66.249.64.0/19

    </RequireAll>
🔐 This setup lets Googlebot be based on its known IP ranges, which is more secure than relying on the User Agent alone.
✅ NGINX Example (IP Whitelisting)
    location /protected-path/ {

        satisfy any;

        allow 66.249.64.0/19;  # Googlebot's IP range

        deny all;

        auth_basic "Restricted Area";

        auth_basic_user_file /etc/nginx/.htpasswd;

    }
This NGINX config keeps the path password-protected but lets Googlebot bypass it if it’s crawling from an allowed IP.
Always verify before updating server configs.
3. Adjust firewall or security plugin rules
Sometimes, your page is not the problem –it’s your security setup. Firewalls, security plugins, or anti-bot systems might see Googlebot as a threat and shut it out. If that happens, it’ll trigger a 401 error. You’ll need to tweak your settings to let legitimate crawlers through without opening the door to spam or abuse.
Here are code and configuration examples to help adjust firewall or security plugin rules and allow Googlebot to crawl your site safely:
✅ Cloudflare firewall rules – Allow Googlebot
If you’re using Cloudflare:
- Go to Security > WAF > Tools > Firewall Rules.
- Create a custom rule:
    Field: User Agent → contains → Googlebot

    Action: Allow
This ensures default WAF settings don’t block requests from Googlebot.
✅ ModSecurity (Apache) – Allow Googlebot
ModSecurity is a common firewall on Apache. You can allow Googlebot like this:
SecRule REQUEST_HEADERS:User-Agent "Googlebot" "phase:1,nolog,allow,ctl:ruleEngine=Off"
📌 This turns off rules only for Googlebot, preventing false positives without disabling protection for everyone.
✅ Wordfence (WordPress plugin) – Whitelist Googlebot
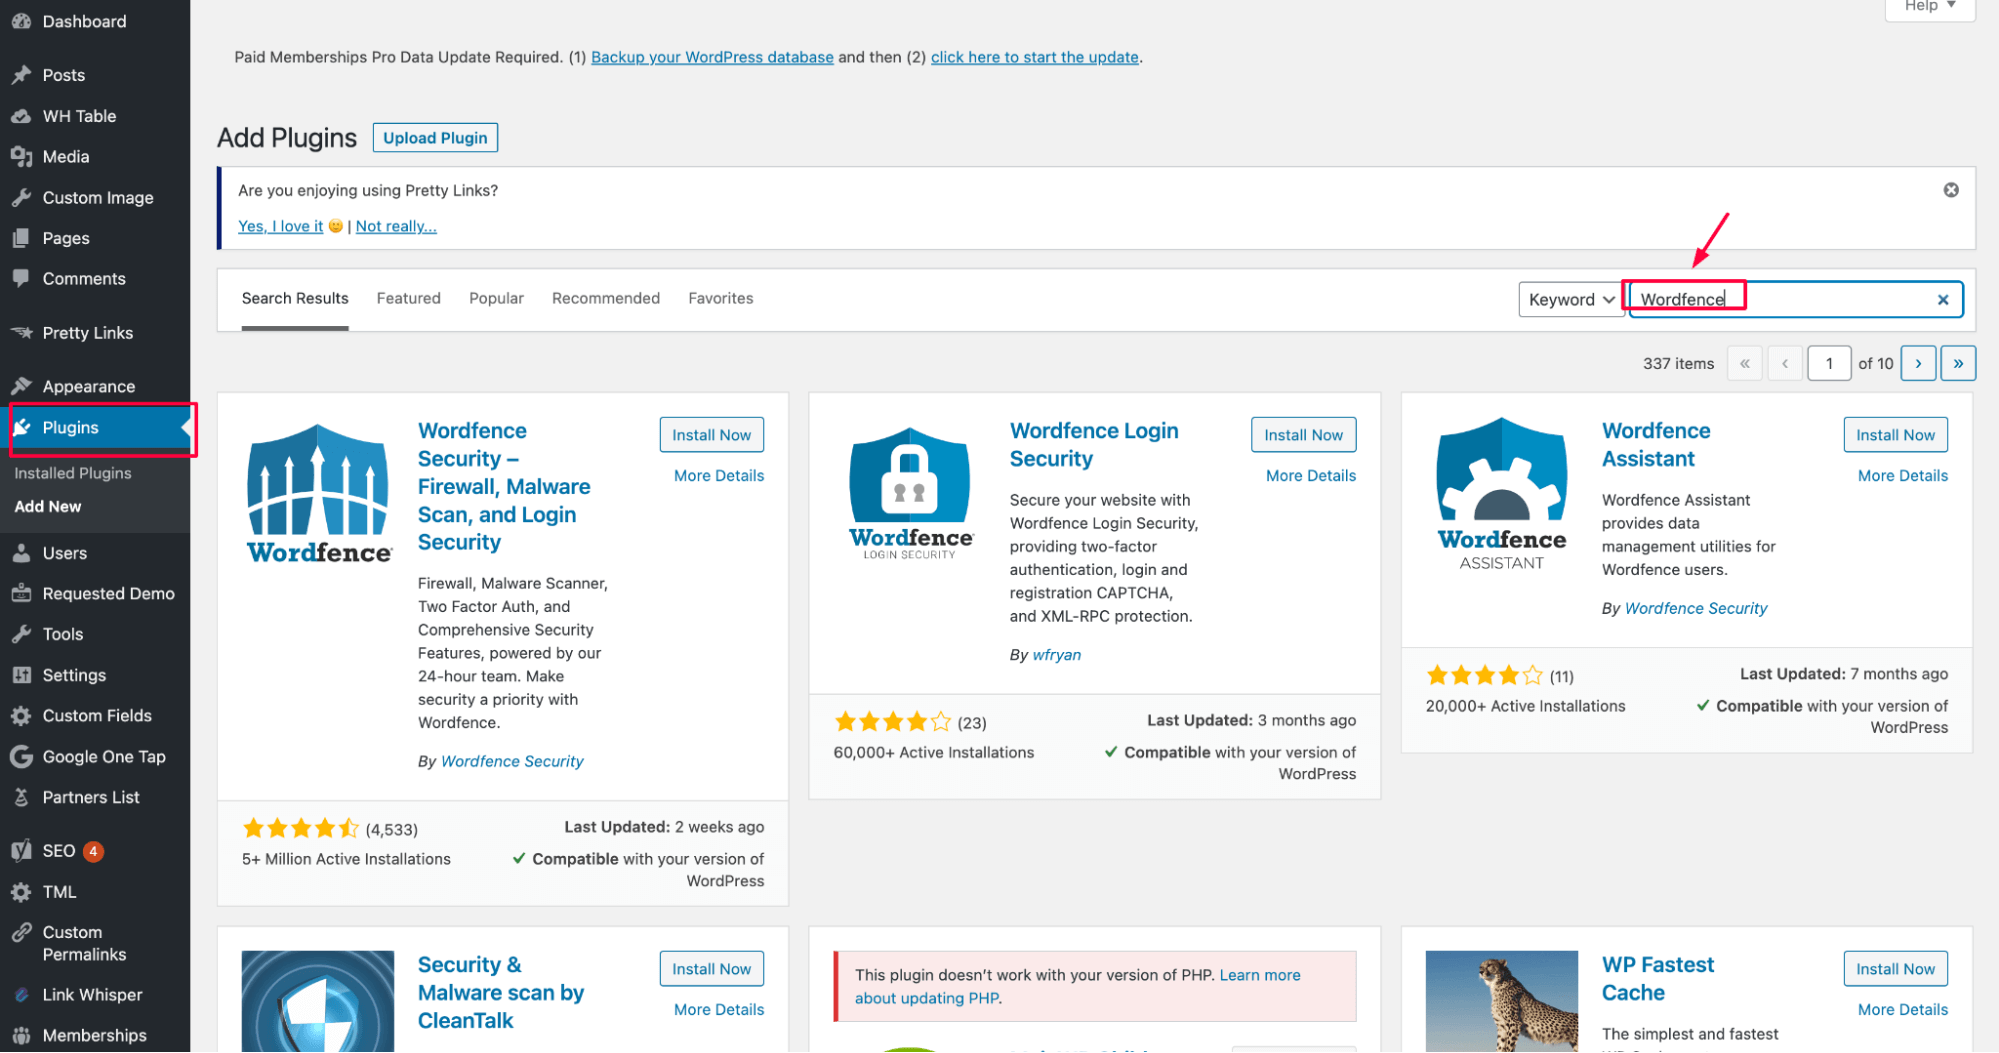
If you’re using Wordfence:
- Go to Wordfence > Firewall > Blocking.
- Add a rule to whitelist the User-Agent: or allow known Googlebot IPs.
Under the ” Rate Limiting ” section, ensure you don’t accidentally block bots – turn down aggression if necessary.
✅ Sucuri firewall – Allow search engine bots
Go to FirewallFirewall > Access Control > Whitelisted User Agents.
Add:
Googlebot
This makes sure security rules don’t interfere with indexing.
4. Update CMS or hosting settings
Sometimes the issue isn’t in your code or firewall – it’s hiding in your CMS or hosting panel. Platforms like WordPress, Squarespace, or Kinsta may block Googlebot by default in staging environments, password-protected pages, or maintenance modes.
To fix the 401 error, you must check these settings and ensure Googlebot can get through without running into a login screen.
Preventing future 401 indexing issues
Set up a testing environment without authentication
If you’re working with staging or development versions of your site, avoid using login walls to block Googlebot. Instead, keep those environments on a separate subdomain (like staging.yoursite.com) and block them from indexing using robots.txt or meta tags, not passwords.
# /robots.txt on staging.yoursite.com
User-agent: *

Disallow: /
This tells all bots (including Googlebot) not to crawl any pages on the staging site – no passwords needed, no 401 errors involved.
Use robots meta tags to control indexing instead of login walls
Want to keep pages out of search results without blocking access entirely? Use the <meta name=”robots” content=”noindex”> tag. It tells search engines not to index a page, but still allows them to crawl it – no 401 required.
<!-- Place this inside the  section of your staging pages -->

    <meta name="robots" content="noindex, nofollow">
This tag prevents search engines from indexing the page or following its links – again, without needing to block access with authentication.
To find out exactly which pages on your site are using the <meta name=”robots” content=”noindex”> tag, Sitechecker makes it simple:
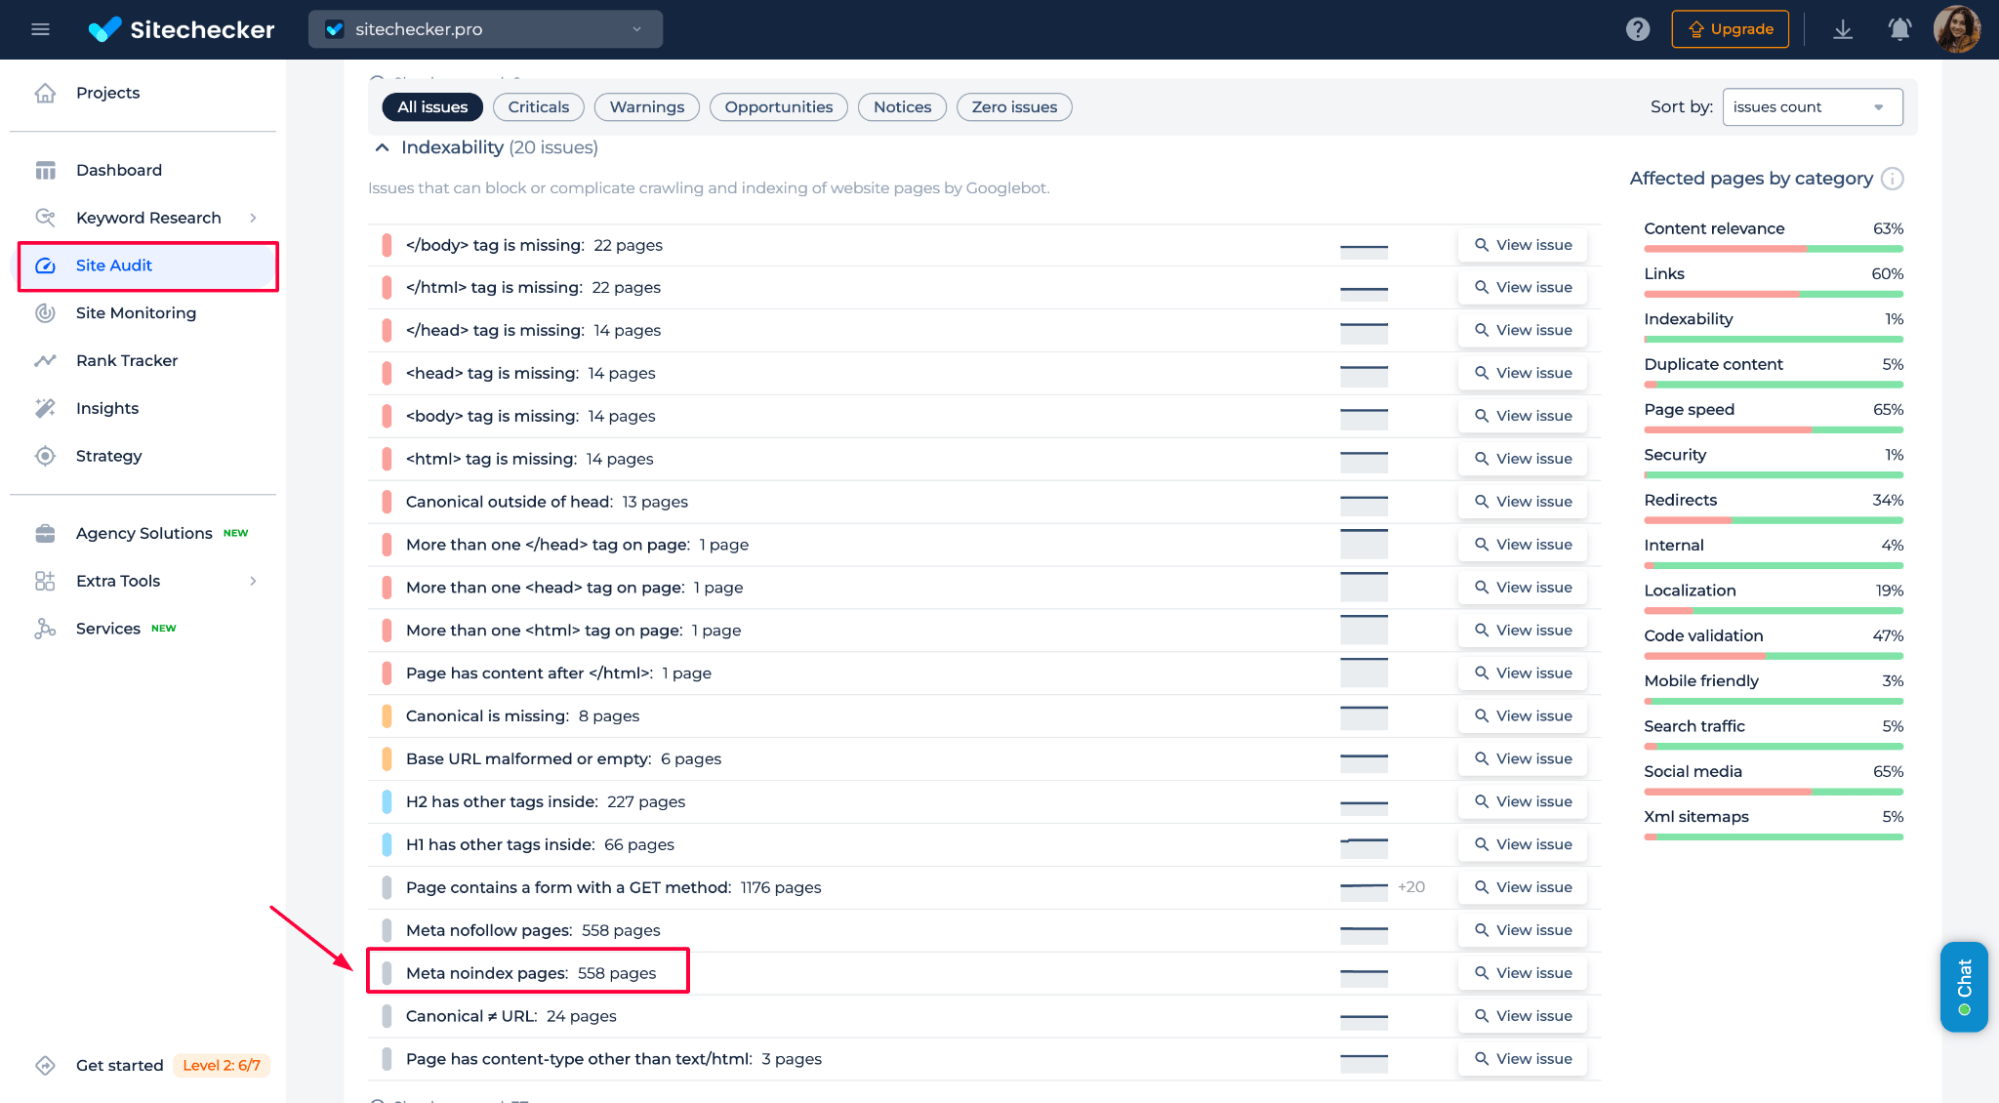
Click “View issue” to see the complete list of affected URLs. This helps you quickly confirm whether you’re intentionally excluding the right content from search results, and ensures you’re not blocking anything important by mistake.
📌 Use these simple methods to safely work in staging, without putting up walls that Googlebot might run into by mistake when you go live.
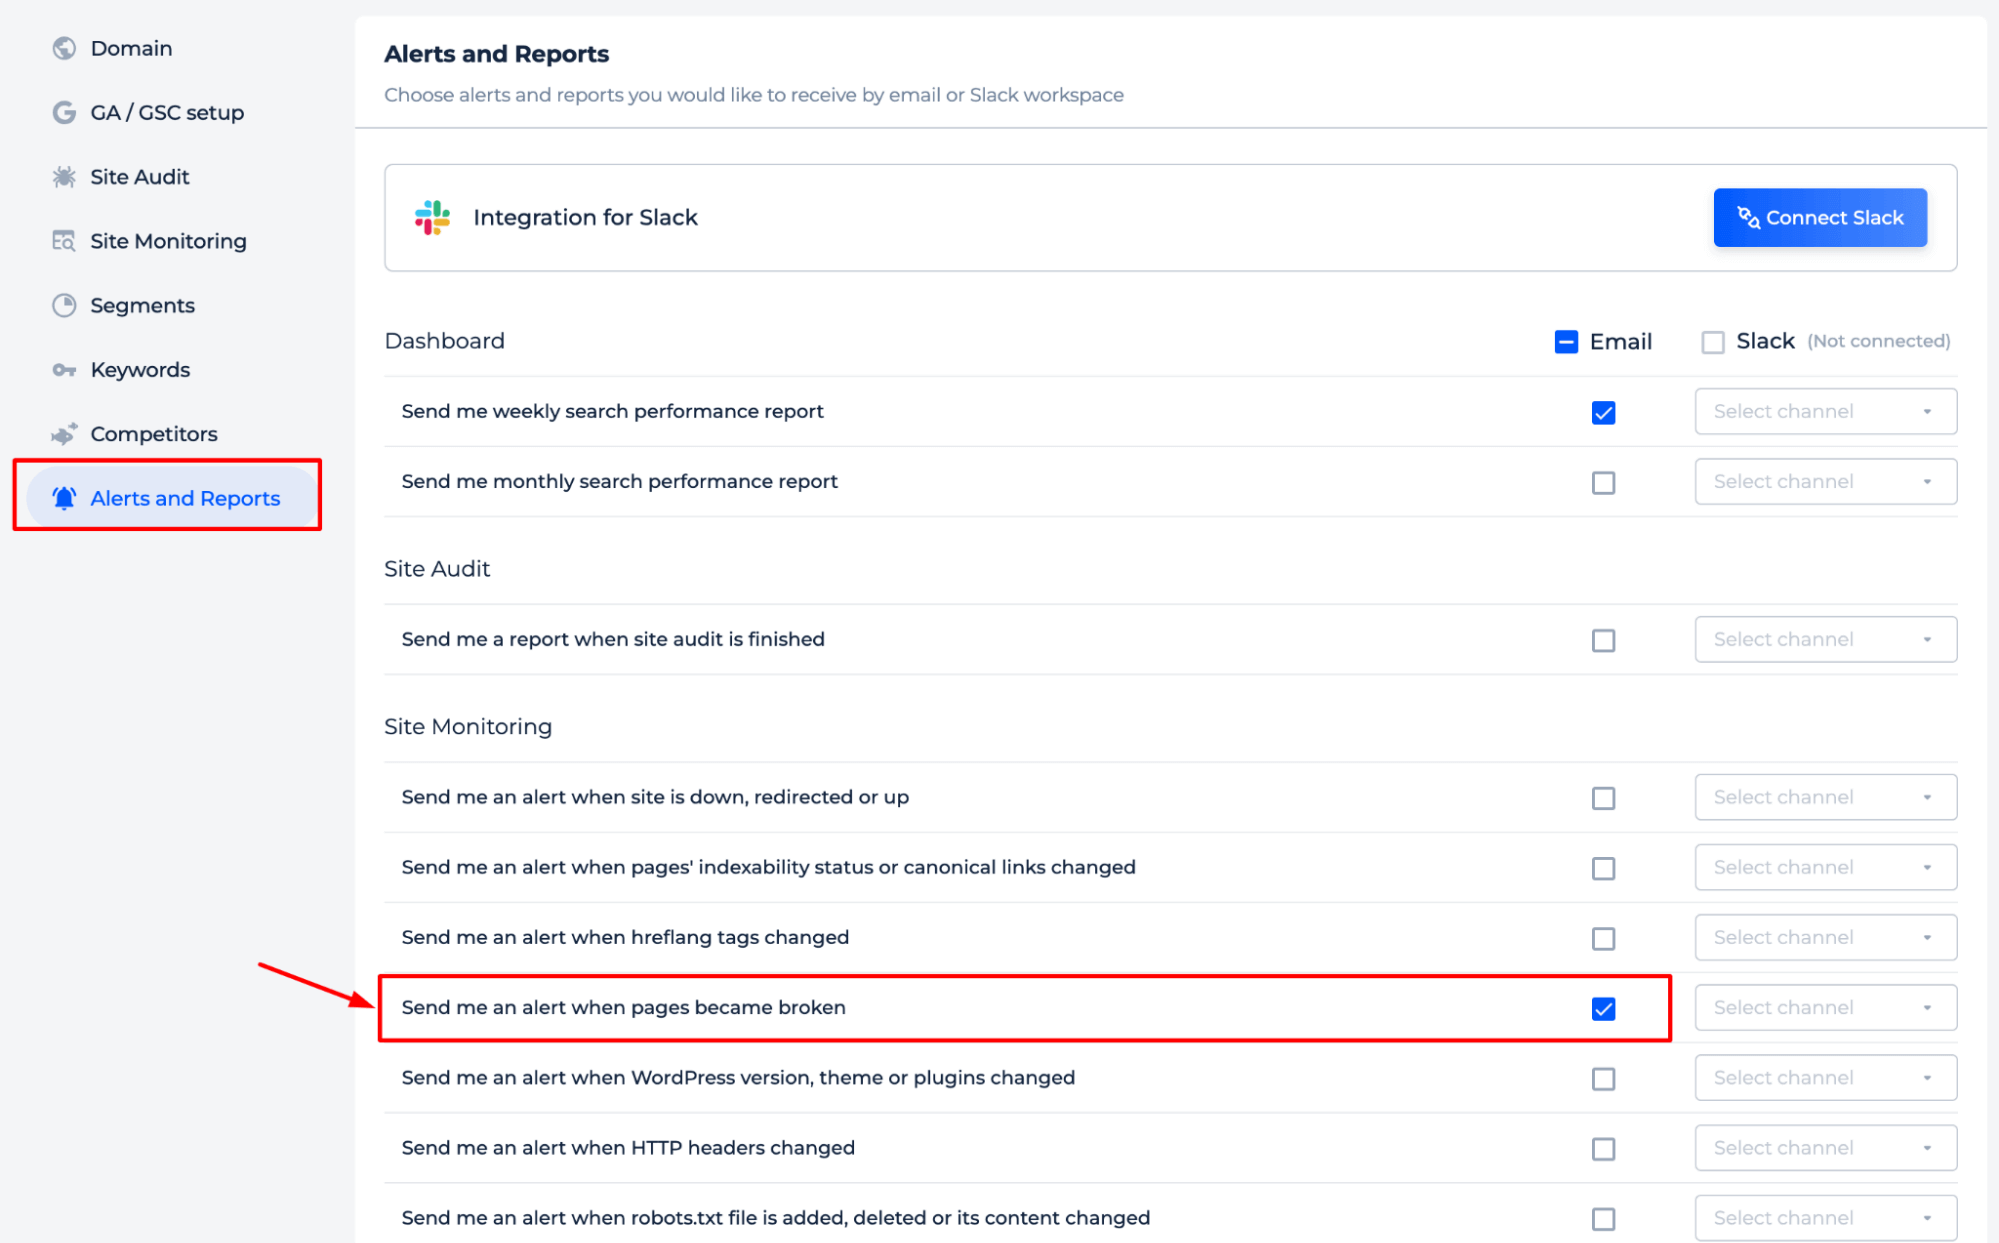
Stay informed of newly detected 4xx issues
You can also monitor the appearance of new 4xx errors directly in Sitechecker to catch potential problems early. The tool’s “4xx client errors” indicate that something’s blocking access, possibly a 401 Unauthorized issue.
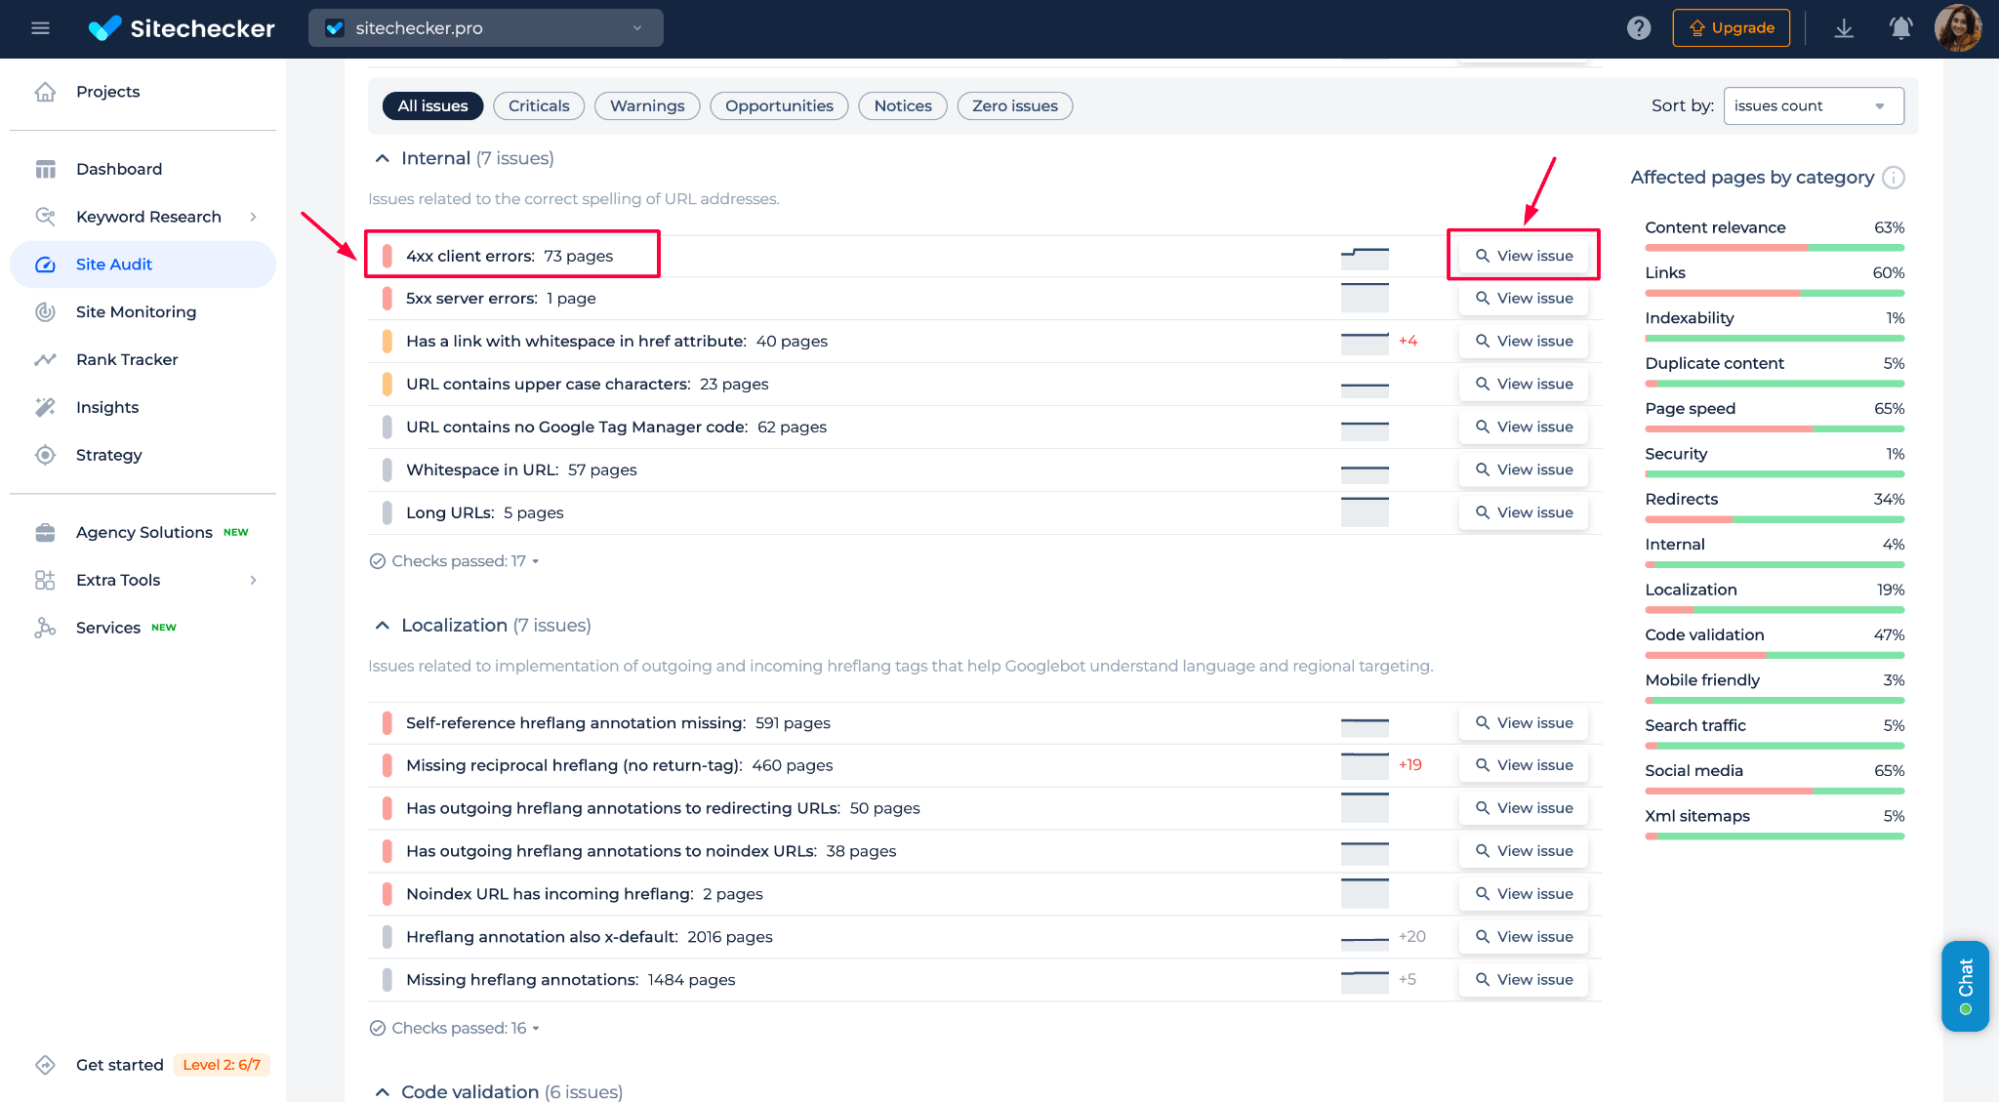
Just keep an eye on this section during regular audits. If the number of 4xx pages suddenly spikes, that’s your cue to investigate and resolve access issues before they impact crawling or indexing.
Conclusion
The “Blocked Due to Unauthorized Request (401)” error in GSC means Googlebot couldn’t access a page due to login requirements or security settings. This can happen because of password protection, firewalls, misconfigured server rules, or CMS defaults. If the content should be indexed, remove barriers or whitelist Googlebot.
Use Sitechecker to detect these errors, monitor 4xx issues, and ensure public pages remain accessible. For staging environments, avoid login walls and use robots.txt or meta noindex instead. Stay proactive to keep your site crawlable and search-friendly.