What is ‘Submitted URL marked noindex’?
When Google marks a “Submitted URL” as “Noindex,” it means that the URL has been flagged not to appear in search results. This happens when Google detects a “noindex” directive in the page’s code via meta tags, HTTP headers, or other factors that prevent the page from being indexed. As a result, your page won’t be included in search rankings, potentially affecting your site’s visibility.
There are several common reasons why a URL might be marked as “noindex”
❌ Meta Tags – “noindex” meta tag in the page’s HTML code tells Google not to index the page.
❌ Robots.txt – if your robots.txt file blocks Googlebot from crawling the page, it will not be indexed.
❌ Password Protection – pages behind a login or requiring a password will be excluded from indexing.
❌ Canonical Tags – a conflicting canonical URL may cause Google to ignore the page in favor of another.
❌ HTTP Headers – server-side “noindex” directives in HTTP headers can prevent indexing.
❌ Sitemap Issues – if “noindex” pages are included in your sitemap, Google may still attempt to crawl them but won’t index them.
Launch Sitechecker’s GSC Dashboard to boost your Search Console reporting!
Expand GSC Data Limits
Bypass Google’s 1,000-row cap and unlock up to 36 months of Search Console history in a single dashboard.
How to fix the “URL marked noindex” error
1. Locate affected pages in Google Search Console
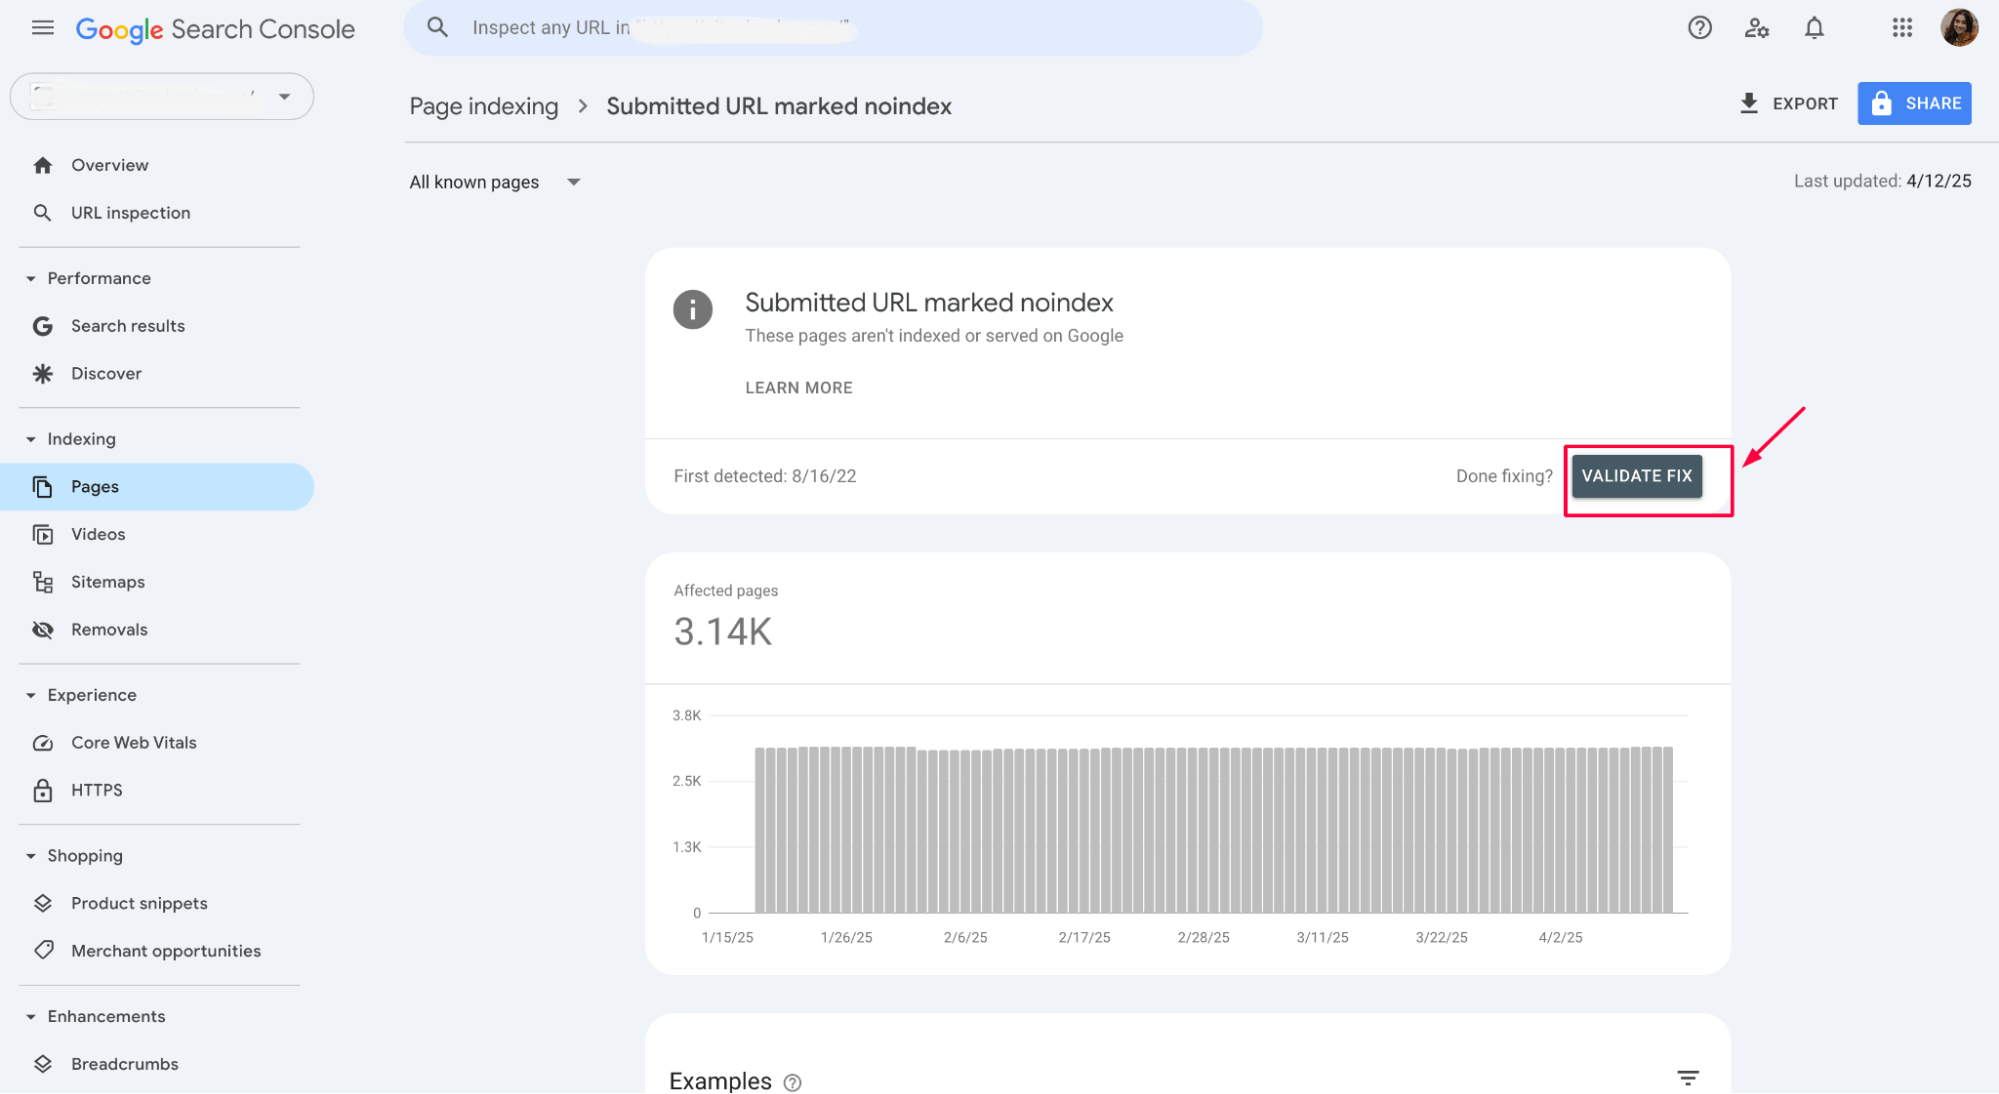
The first step is to locate the pages affected by the “Submitted URL marked noindex” error in GSC. Go to the Index section, then select Pages to identify any URLs that have the “noindex” directive applied.
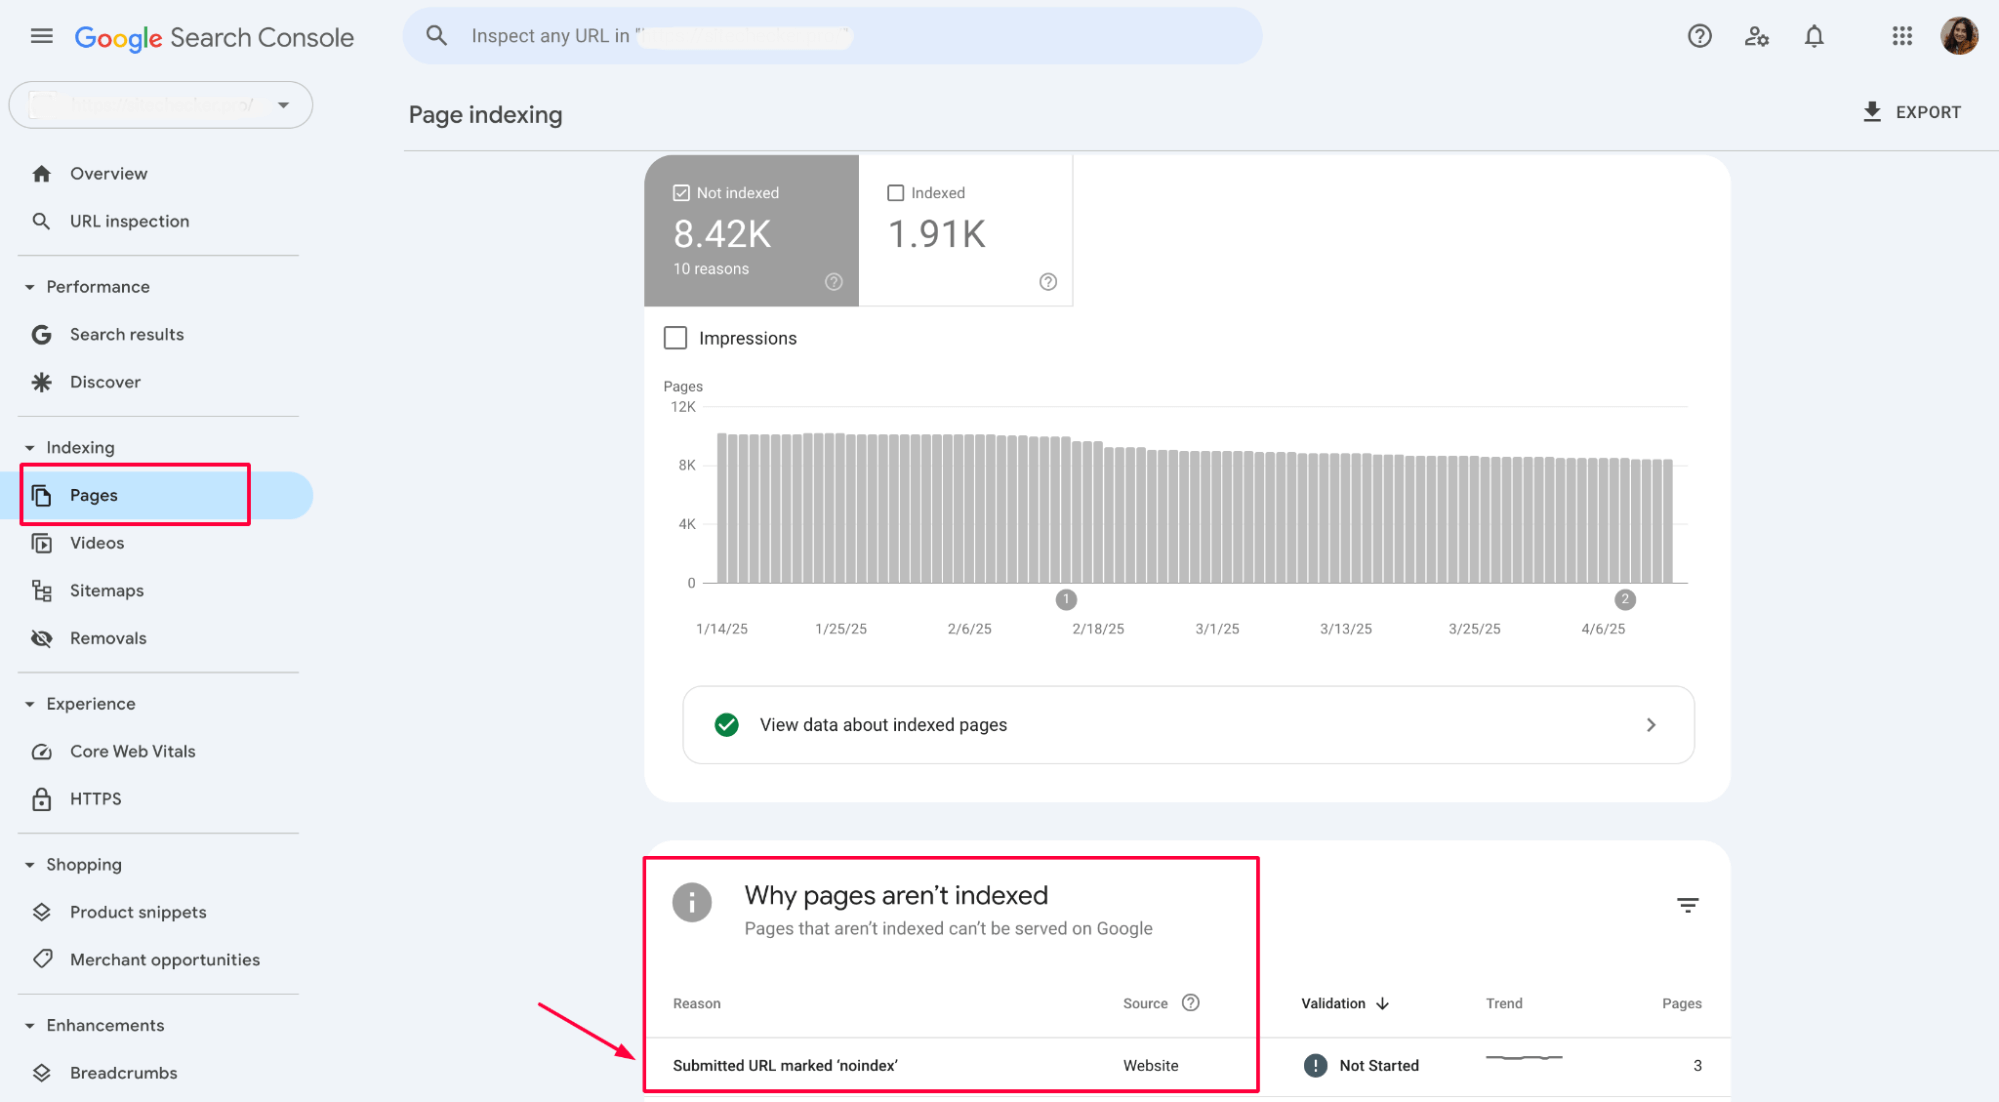
This error can also apply to individual pages when submitting them for indexing through the URL Inspection Tool in GSC.
Once you’ve found the affected pages, you can troubleshoot and fix the issue.
2. Remove meta tag or HTTP headers directives
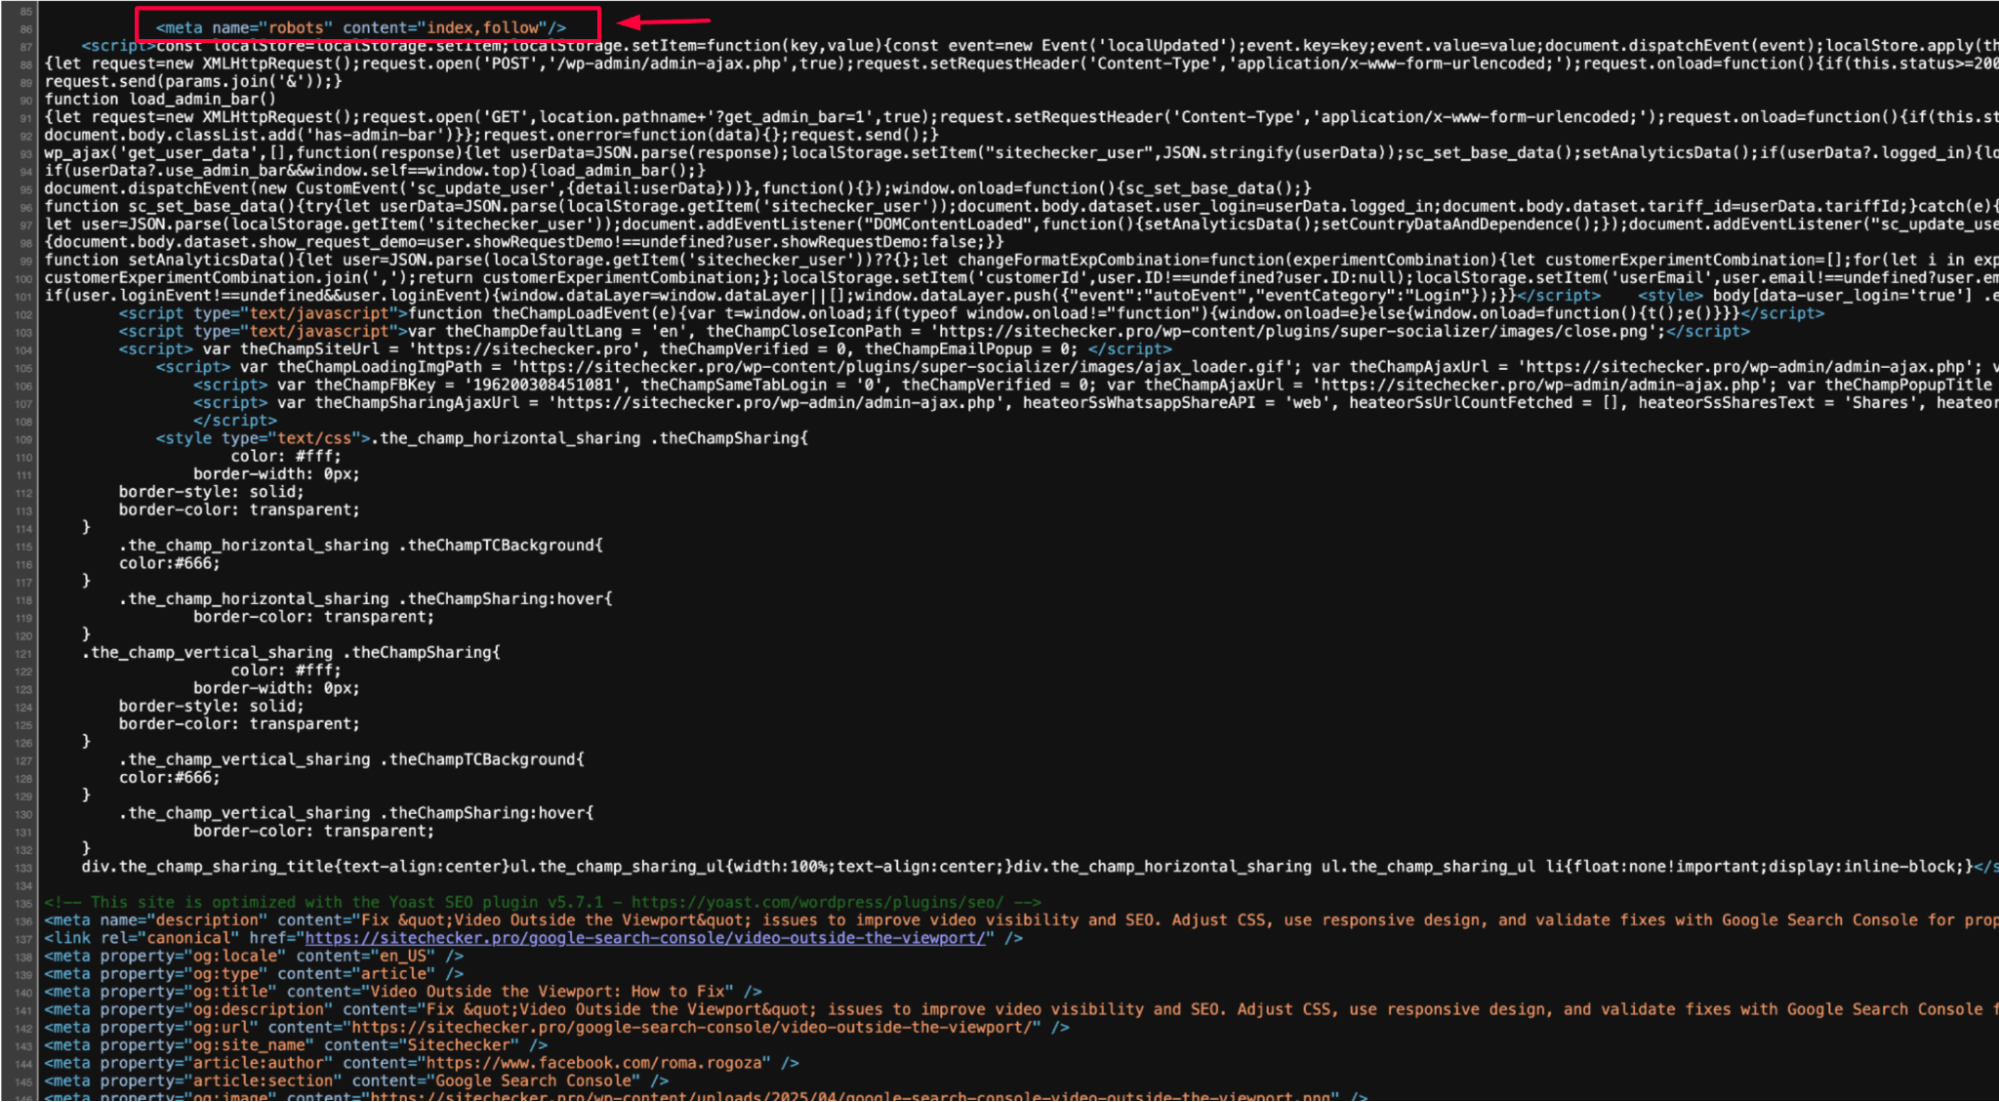
Check the meta tag in your page’s HTML:
If you find:
    <head>

        <meta name="robots" content="noindex">

    </head>
This is preventing Google from indexing the page. To resolve this, simply remove the disable:
    <head>

        <meta name="robots" content="index, follow">

    </head>
Additionally, check the HTTP headers for the X-Robots-Tag and ensure it’s not set to “noindex”:
Example of an HTTP response with X-Robots-Tag:
    HTTP/1.1 200 OK

    X-Robots-Tag: noindex
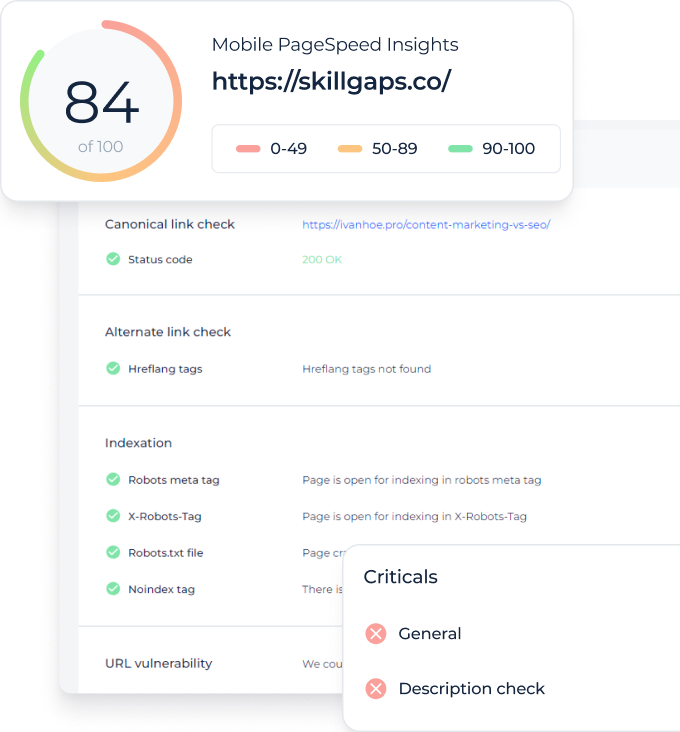
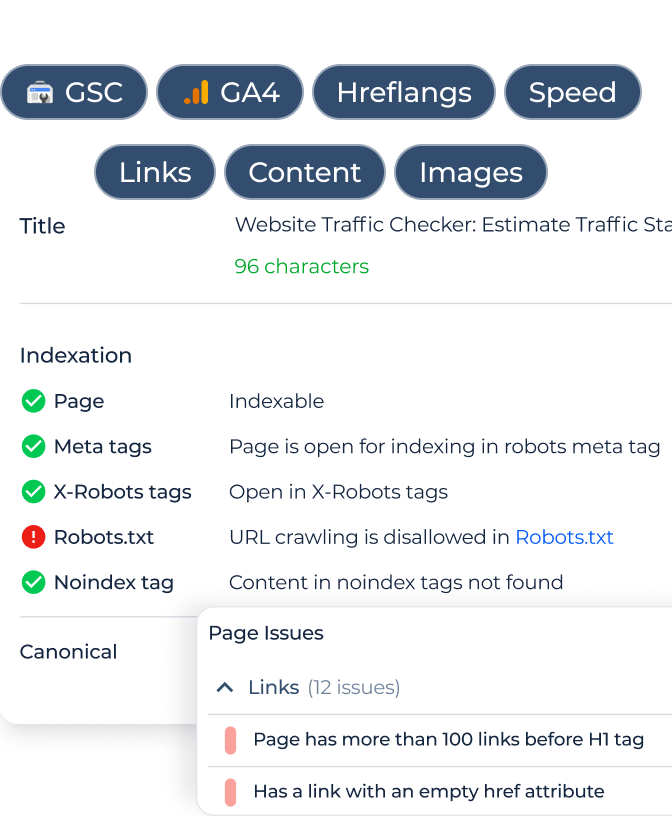
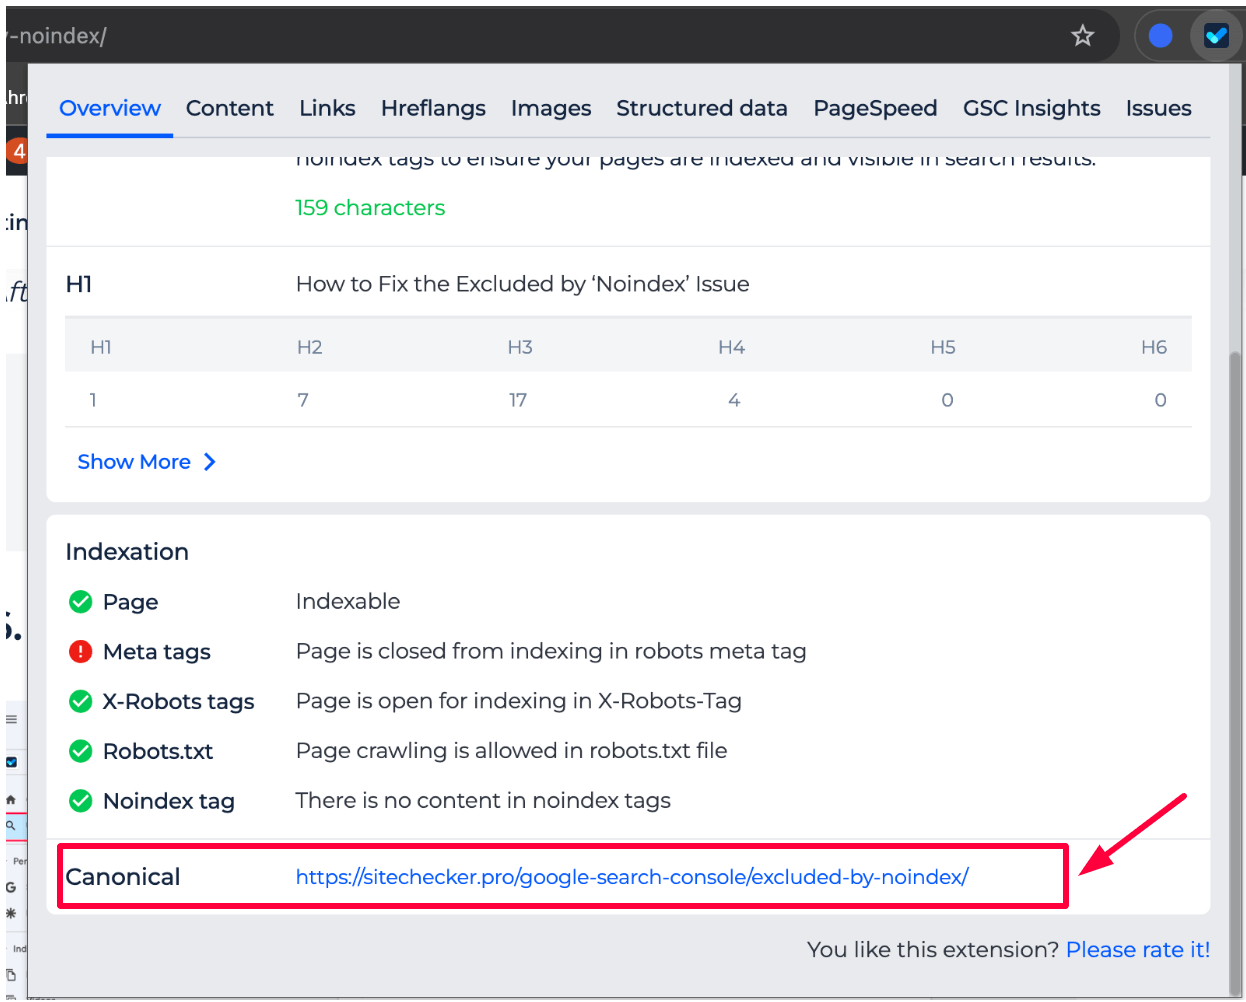
In the Indexation section of the SEO Chrome Extension, you can check all the imposed restrictions that may prevent a page from being indexed. It displays the status of:
- Meta tags: Whether the page is blocked from indexing through meta tags.
- X-Robots tags: Whether the page is open for indexing through the X-Robots-Tag header.
- Robots.txt: Is page crawling allowed in the robots.txt file?
- Noindex tag: Whether there is any content related to noindex tags that might be preventing indexing.
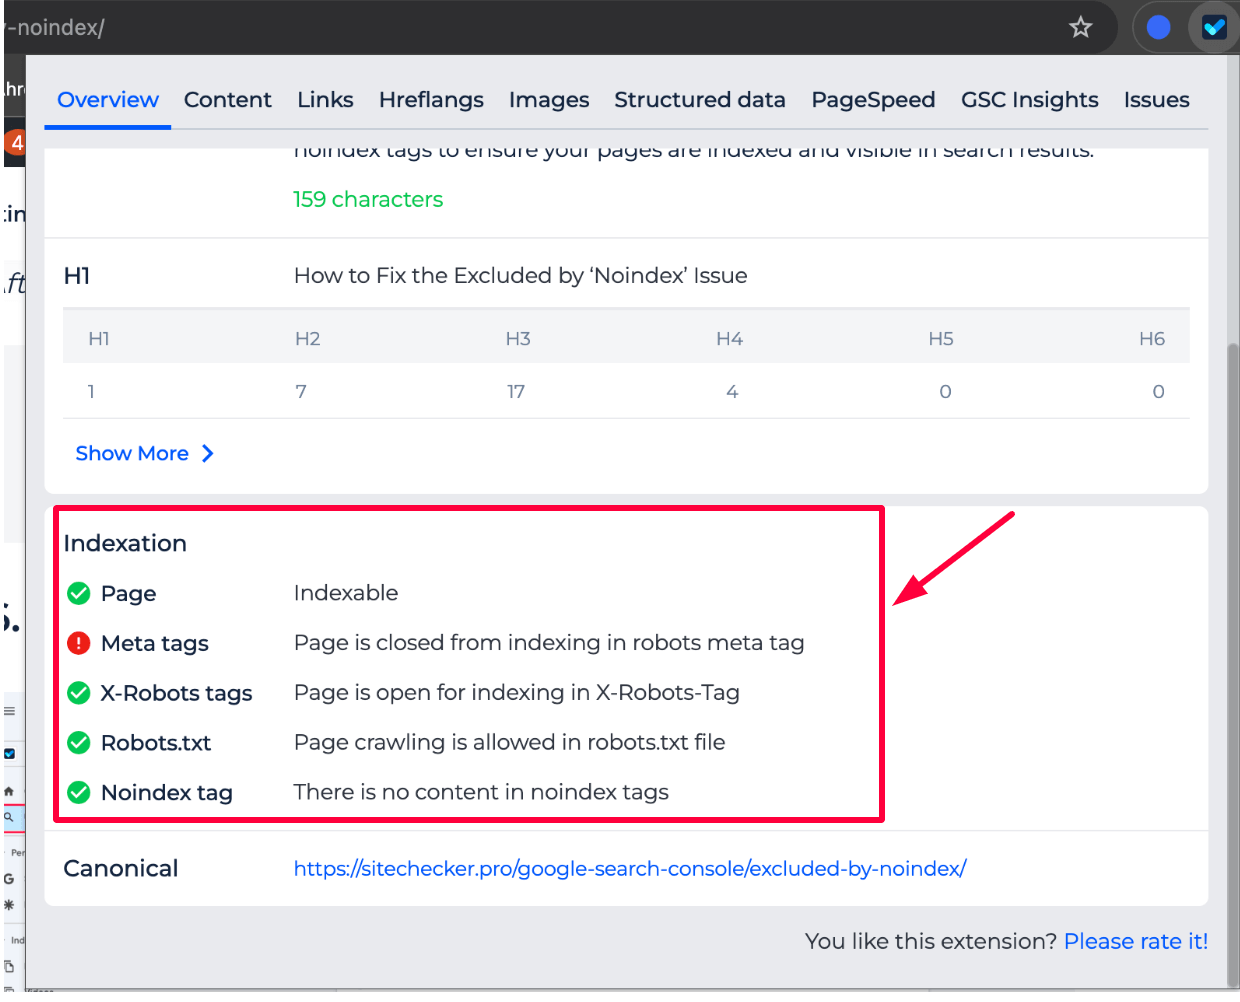
Reviewing these details helps you identify any factors blocking the page from being indexed and take corrective action.
Fix 'Submitted URL Marked Noindex' Now!
Check your site for 'noindex' issues and improve visibility.
3. Fix canonical tags
Canonical tags indicate the preferred version of a page when there are multiple versions with similar content. If a canonical tag points to a different page, Google may index the canonical version instead of the page in question.
Inspect the canonical tag (<link rel=”canonical” href=”URL”>) on the affected page and ensure it points to the correct URL that you want indexed. Remove any conflicting or incorrect canonical tags.
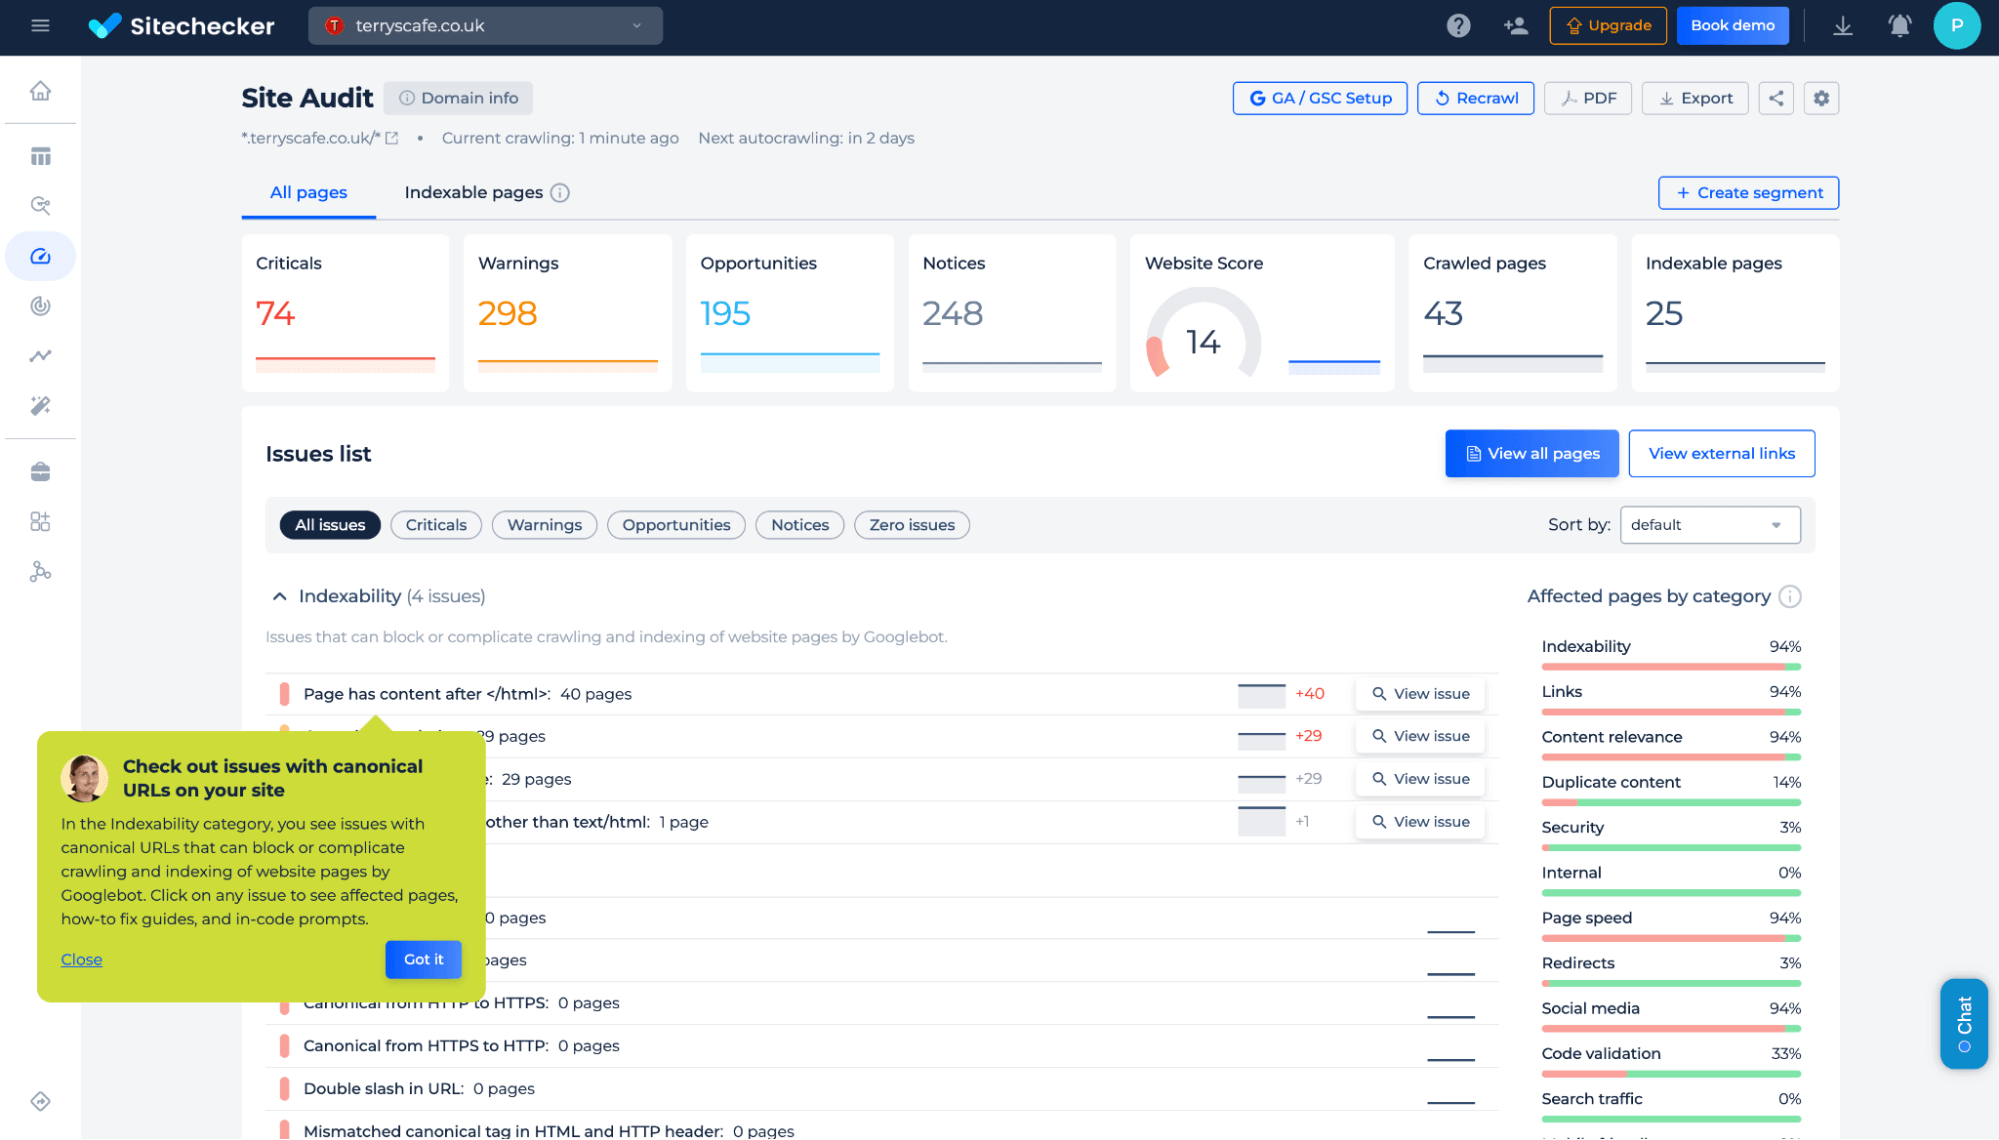
You can check for canonical issues that might impact indexability using Sitechecker’s Canonical URL Checker. The tool helps identify any conflicting or incorrect canonical tags that may prevent proper indexing.
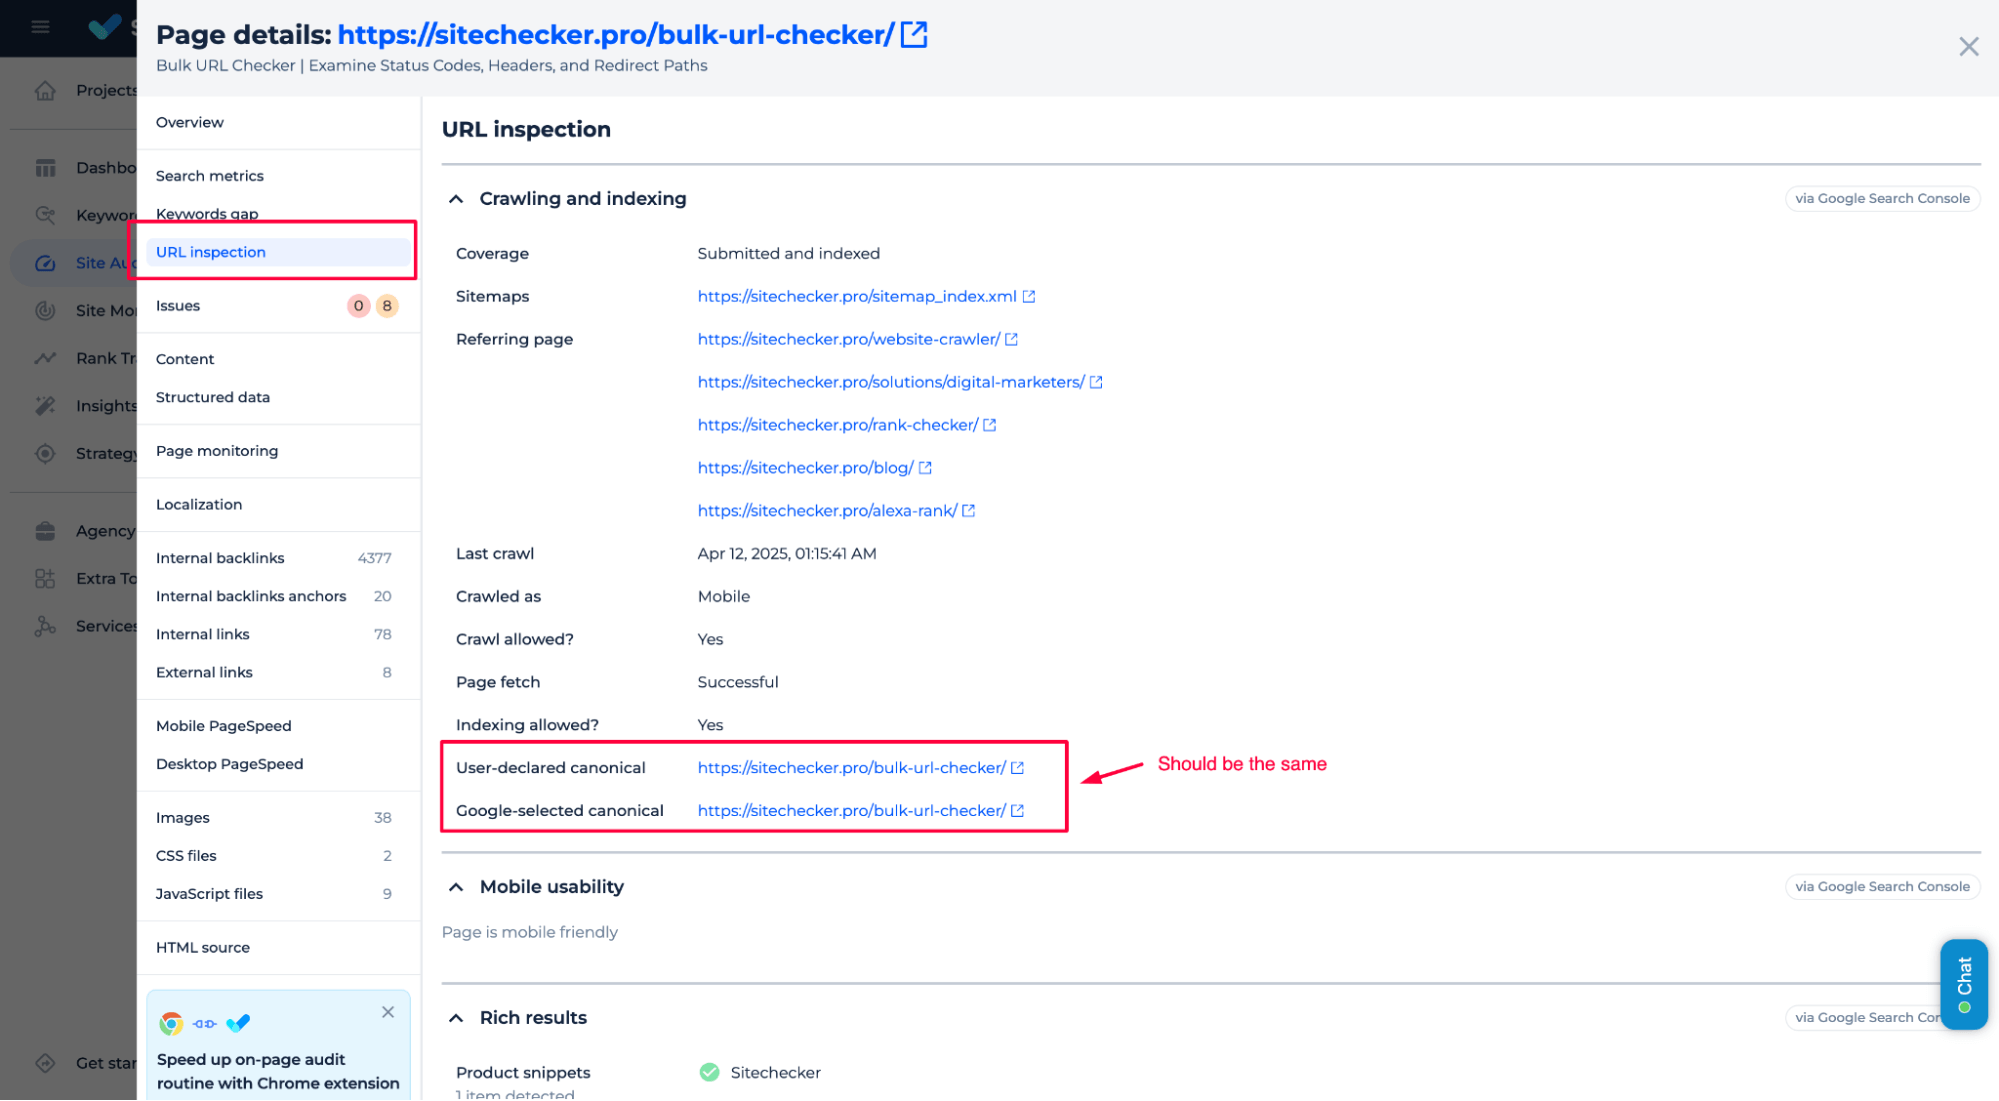
In Sitechecker, you can verify canonical tag issues using the URL Inspection tool, which will show you the “User-declared canonical” and the “Google-selected canonical.” Ensure these two match; otherwise, Google might index a different page version.
In the Sitechecker Chrome Extension, you can quickly check the canonical tags by inspecting the page source directly. Look for the <link rel=”canonical” href=”URL”> tag to confirm if it points to the correct version of the page you want indexed.
These methods help identify and resolve conflicting or incorrect canonical tags that might cause issues with indexation.
4. Update robots.txt
Next, verify your robots.txt file, which tells search engines which pages they can crawl. If there’s a Disallow rule for the page showing the “Noindex” error, Googlebot will not be able to access the content. Open your robots.txt file and look for any lines that block access to the page (e.g., Disallow: /your-page).
Example of a robots.txt file blocking a page:
    User-agent: *

    Disallow: /your-page
To resolve this, remove the Disallow line for the page that should be indexed:
Updated robots.txt allowing indexing:
    User-agent: *

    Allow: /your-page
Removing these lines ensures that Googlebot can crawl and index the URL.
5. Update sitemap
Ensure your sitemap reflects the correct URLs you want indexing. If the sitemap includes URLs marked as “noindex,” Google may crawl those pages but won’t index them.
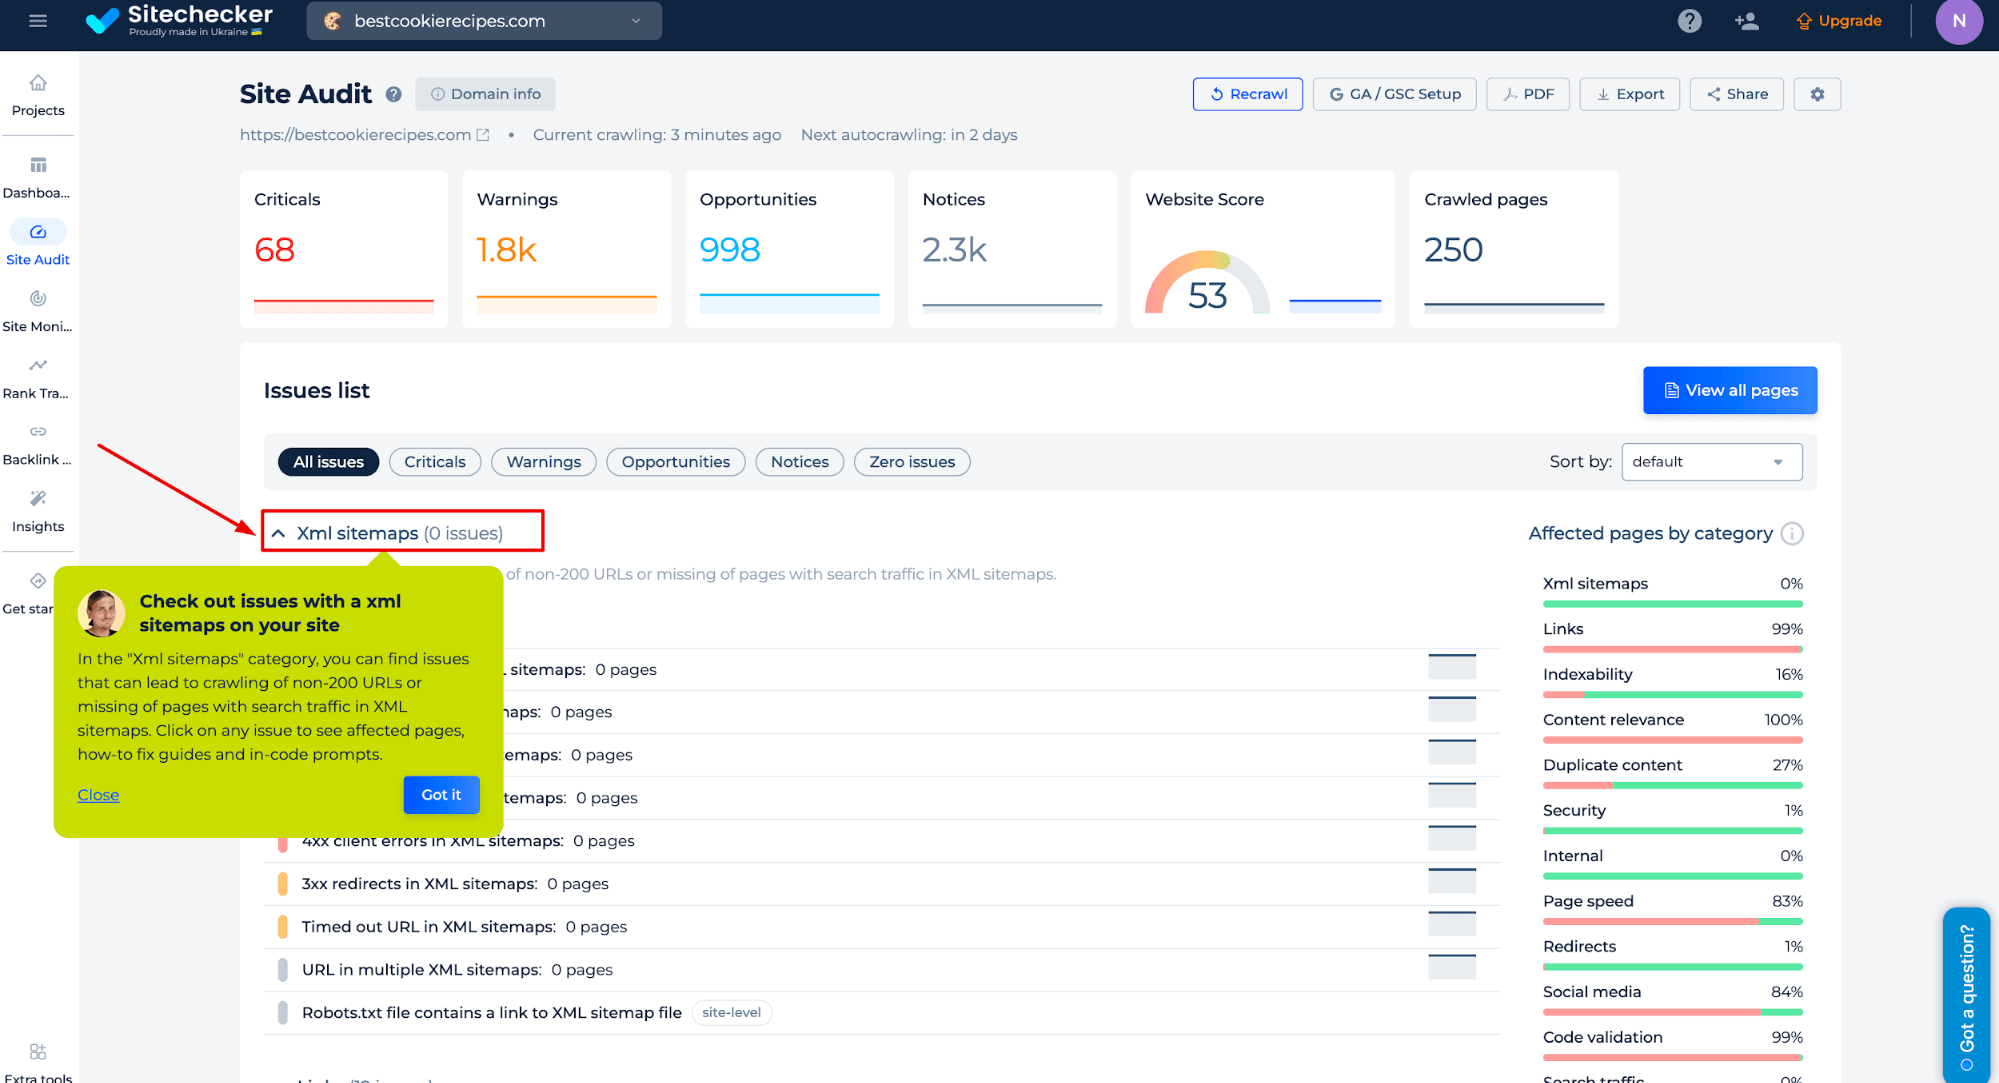
You can check for sitemap issues that affect indexability in XML Sitemap Checker, which helps identify any discrepancies or errors in your sitemap that could prevent pages from indexing properly.
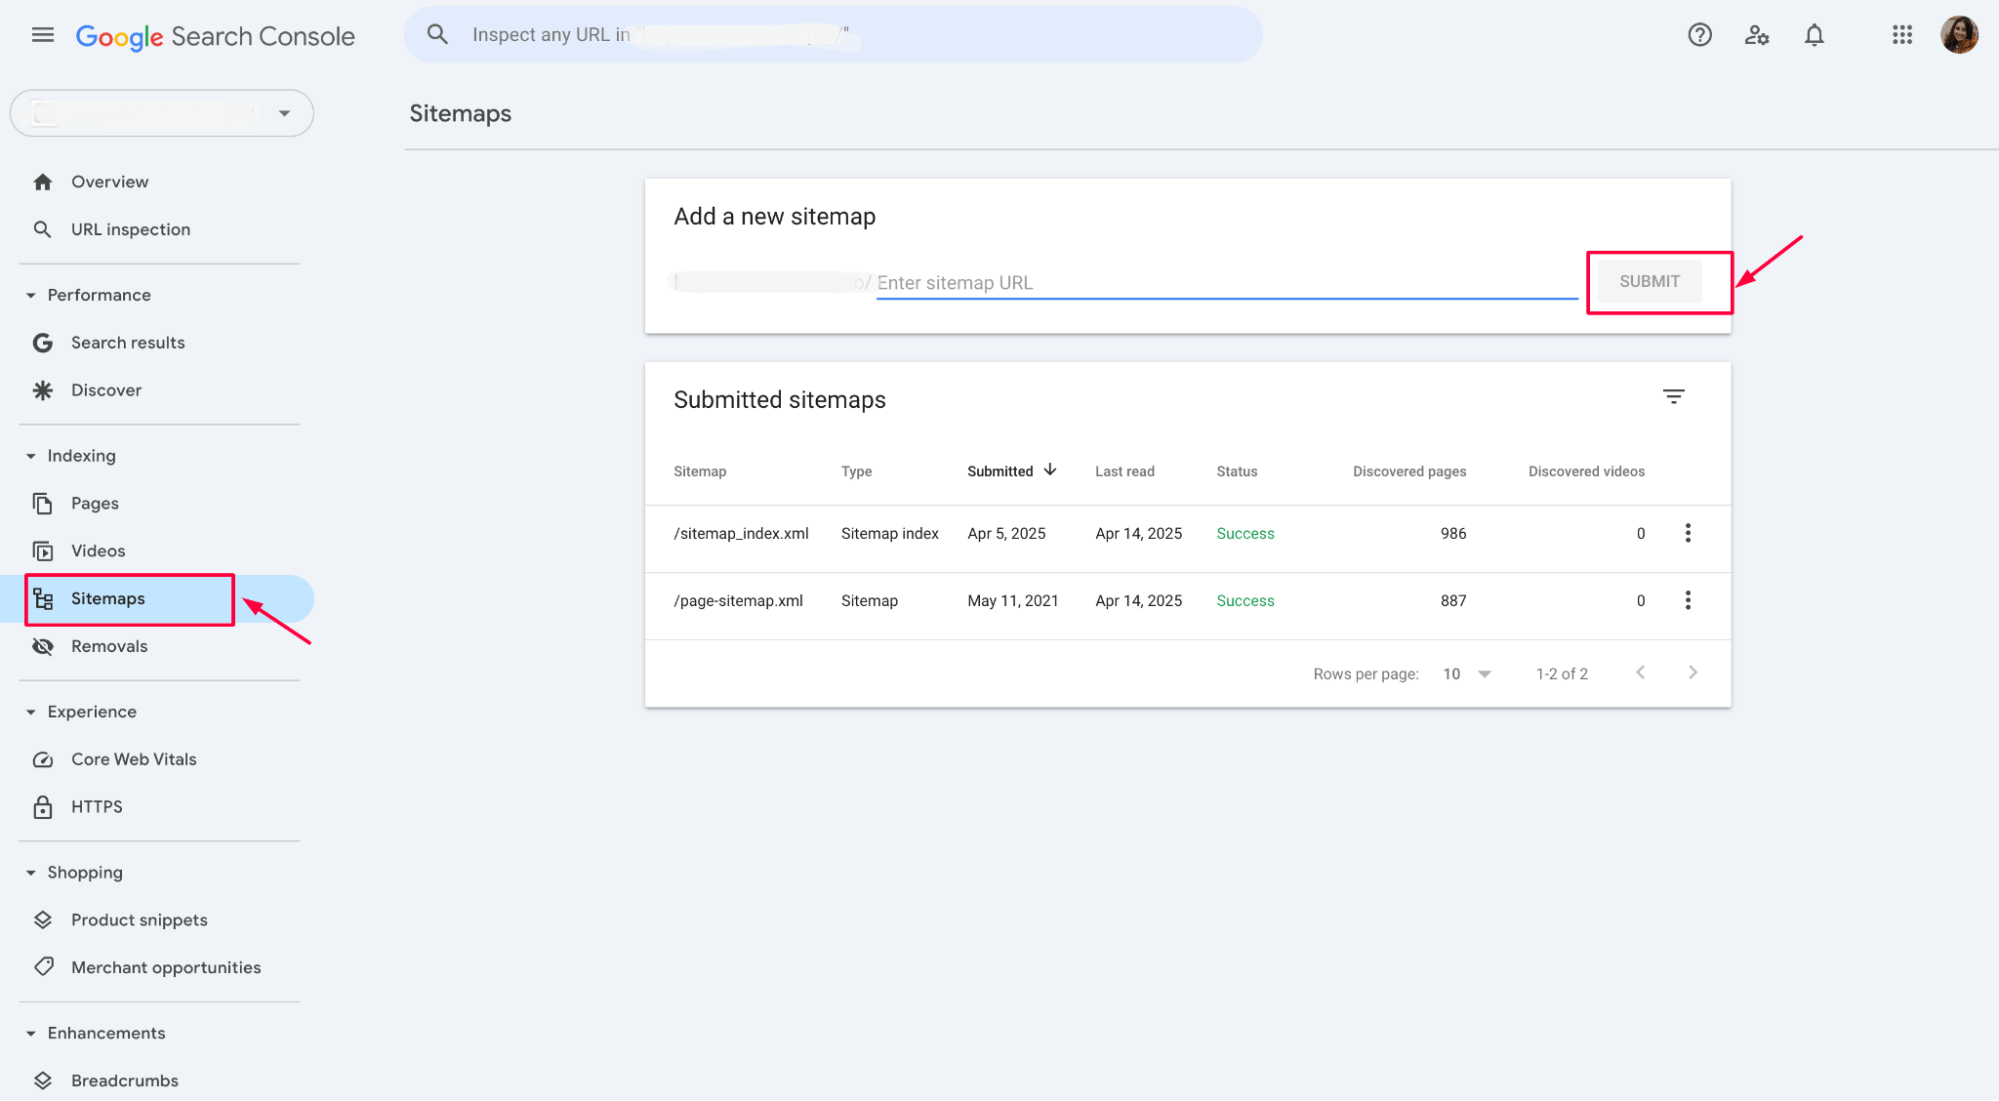
If necessary, you can upload a new sitemap file in GSC. To do so, go to the Sitemaps section, enter the URL of your sitemap, and click Submit. This will ensure that Google has the latest version of your sitemap for crawling and indexing your pages.
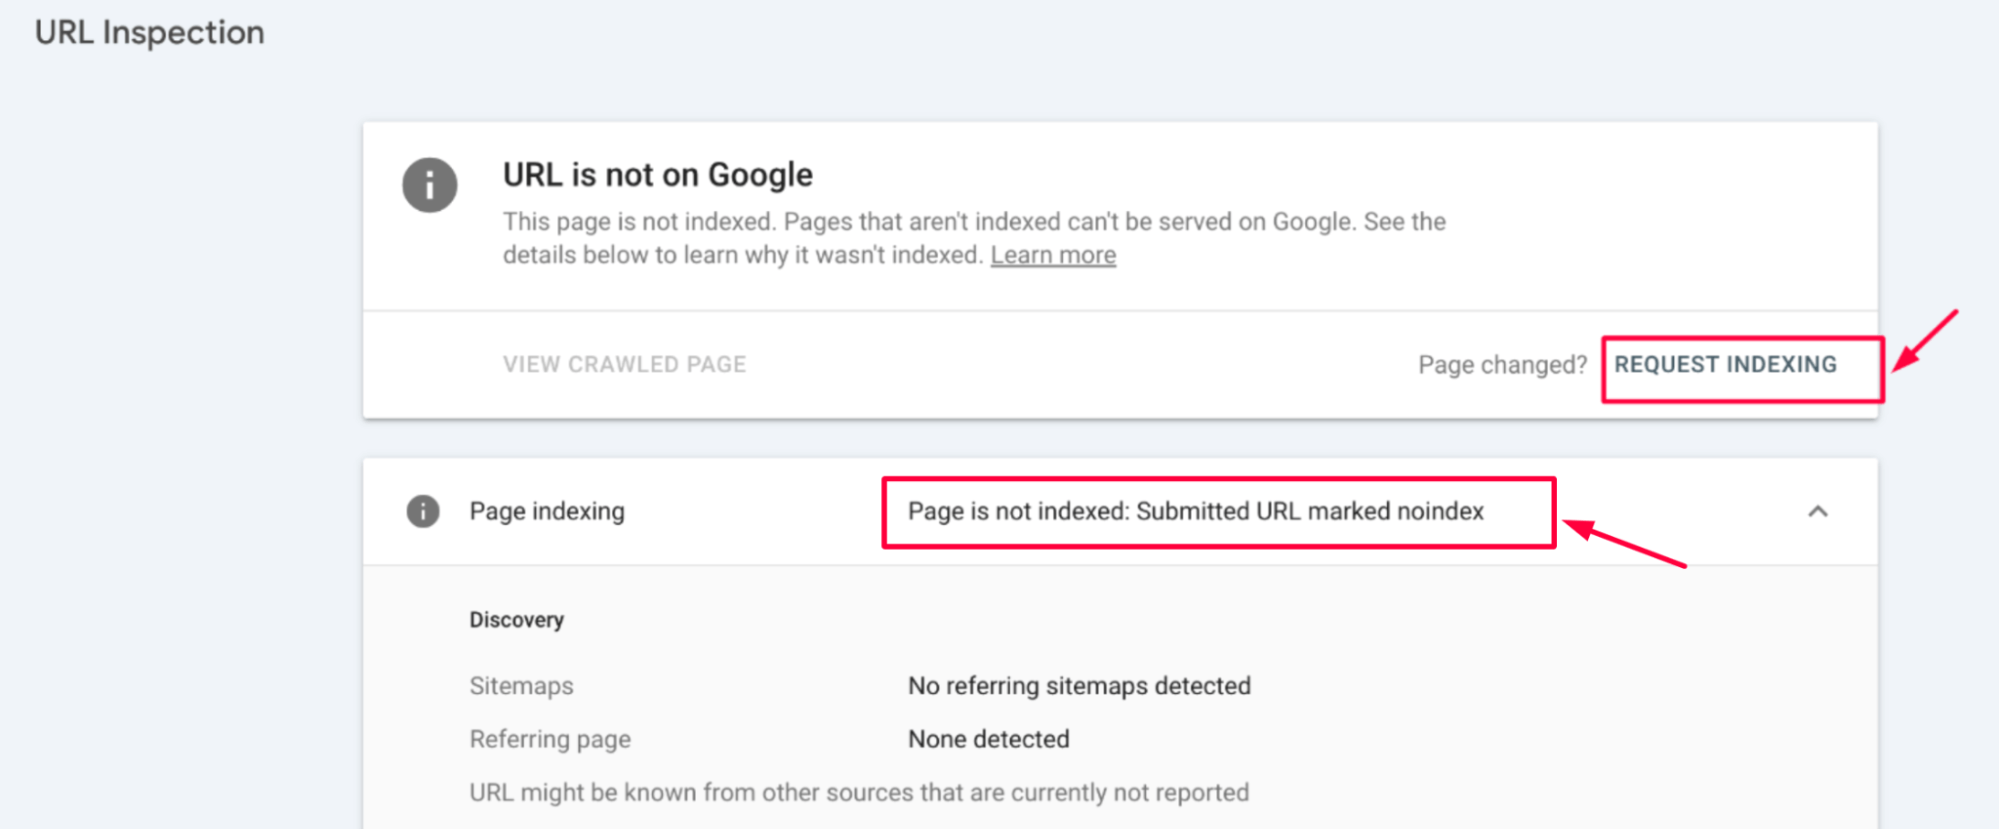
6. Request indexing
For each page that should be indexed and where the “noindex” issue has been resolved, you must use the Request Indexing option in Google Search Console. After fixing the problem (e.g., removing the noindex directive), go to the URL Inspection Tool, enter the URL, and click Request Indexing to prompt Google to crawl and index the page.
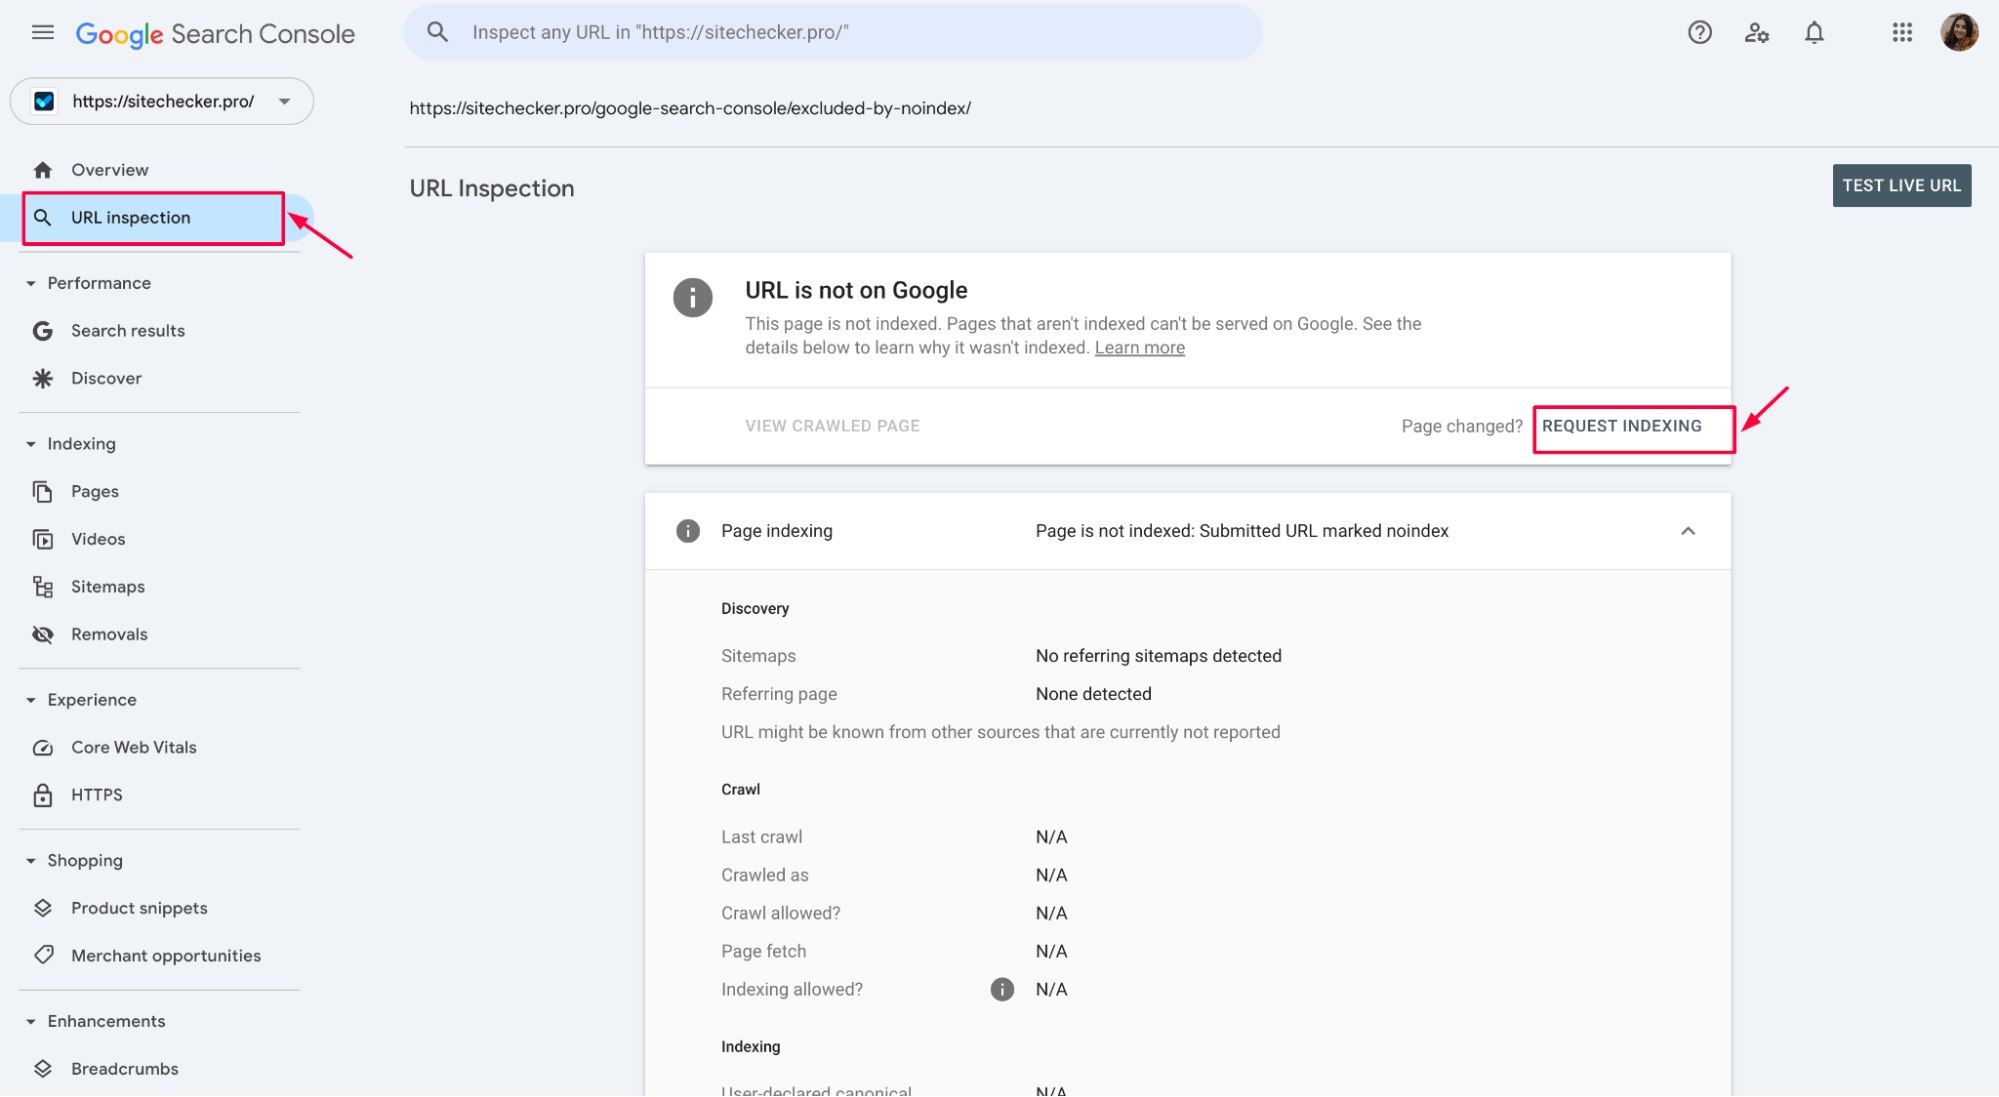
This ensures that the page is included in the search results after the necessary adjustments are made.
7. Preventing pages from being indexed
If the list of URLs affected by the “Submitted URL marked as noindex” error includes pages that should not be indexed, it must be appropriately blocked from indexing.
This can be achieved using the noindex directive in the meta tag or HTTP headers.
To prevent indexing, add the following <meta> tag in the page’s HTML:
    <head>

        <meta name="robots" content="noindex">

    </head>
Alternatively, use the X-Robots-Tag in HTTP headers:
X-Robots-Tag: noindex
b) Block crawling in Robots.txt
You can also block search engines from crawling the page by adding a Disallow rule in the robots.txt file:
    User-agent: *

    Disallow: /your-page
c) Handling accidentally indexed pages
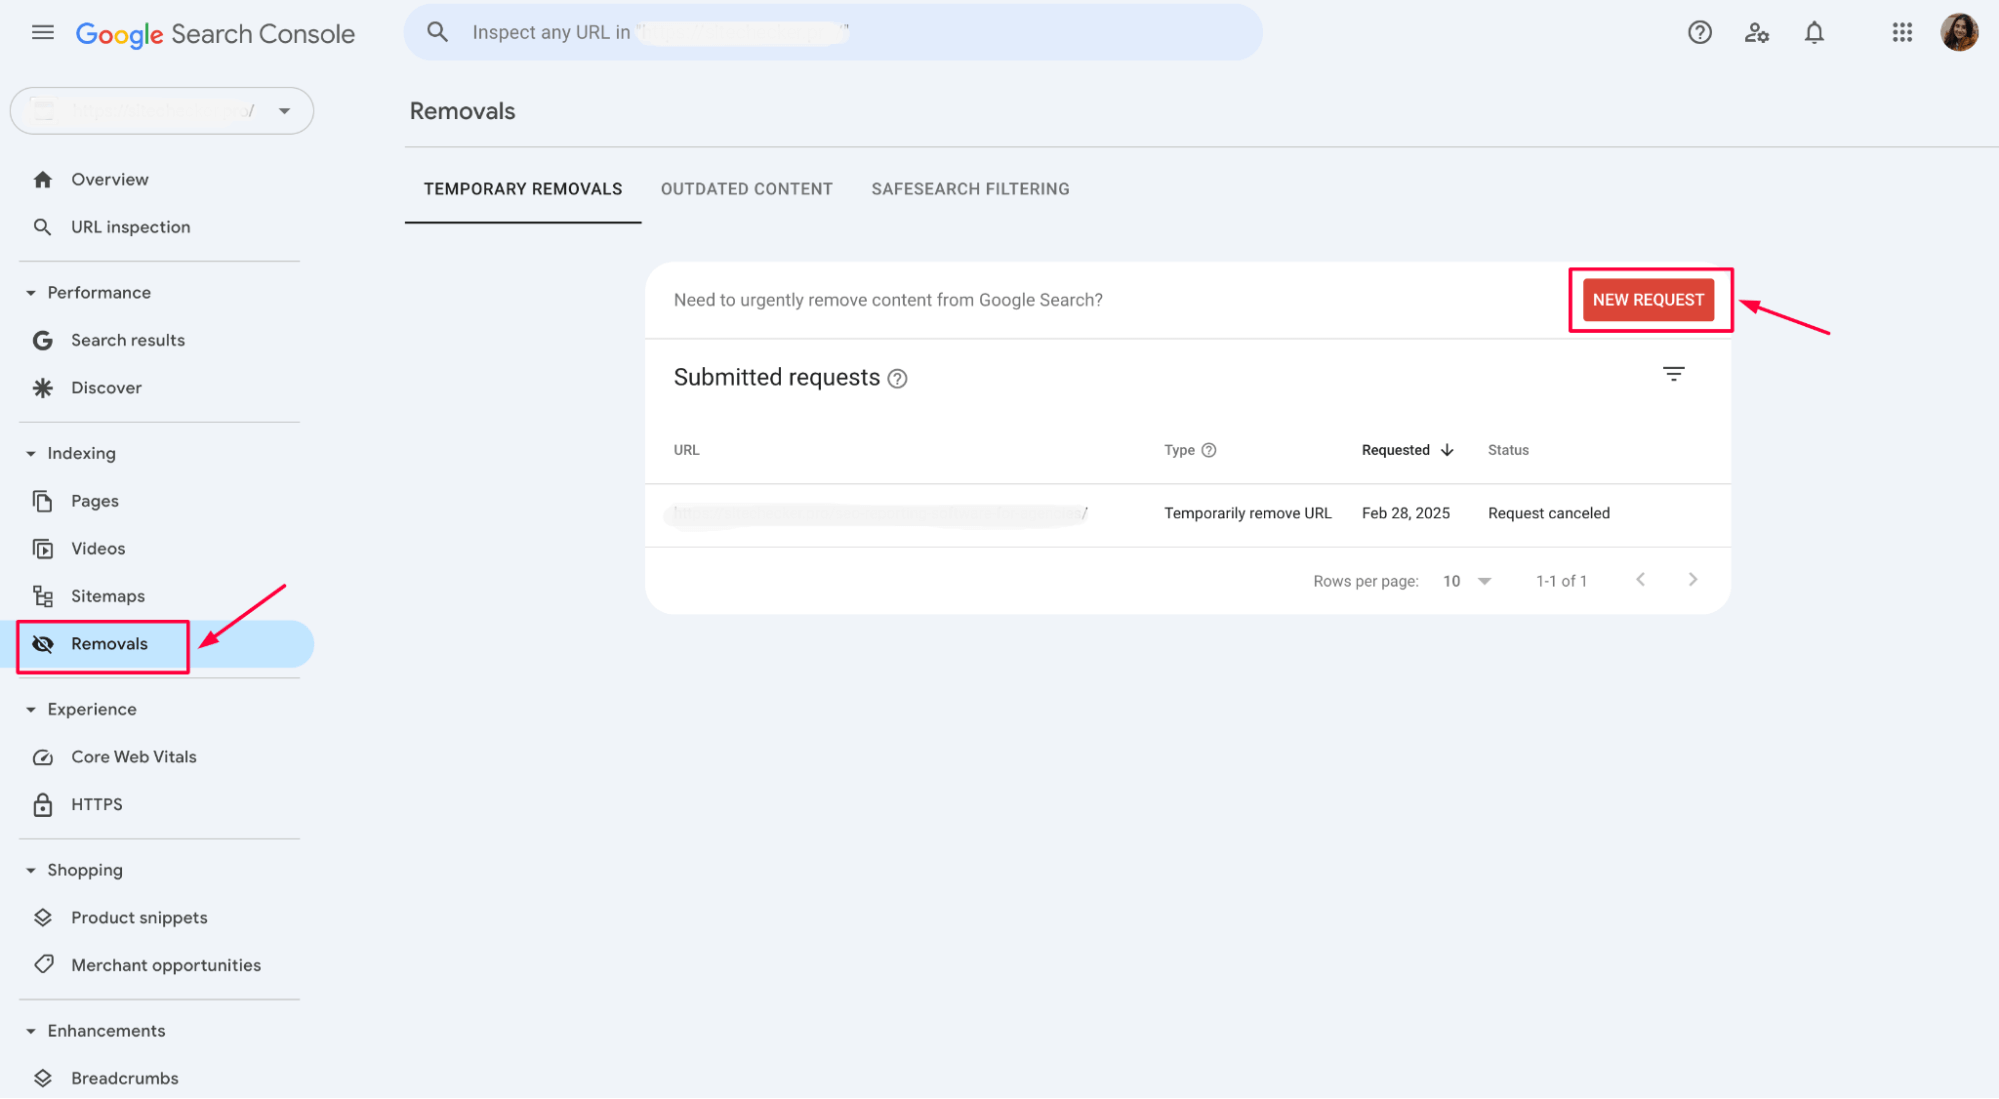
If pages are accidentally indexed, use the Removal Tool in GSC to remove them from the index.
8. Validate and fix
After making the necessary changes, click ‘Validate and Fix’ in GSC. This will allow Google to recheck the URLs and confirm that the “noindex” error has been resolved.
How to prevent future issues
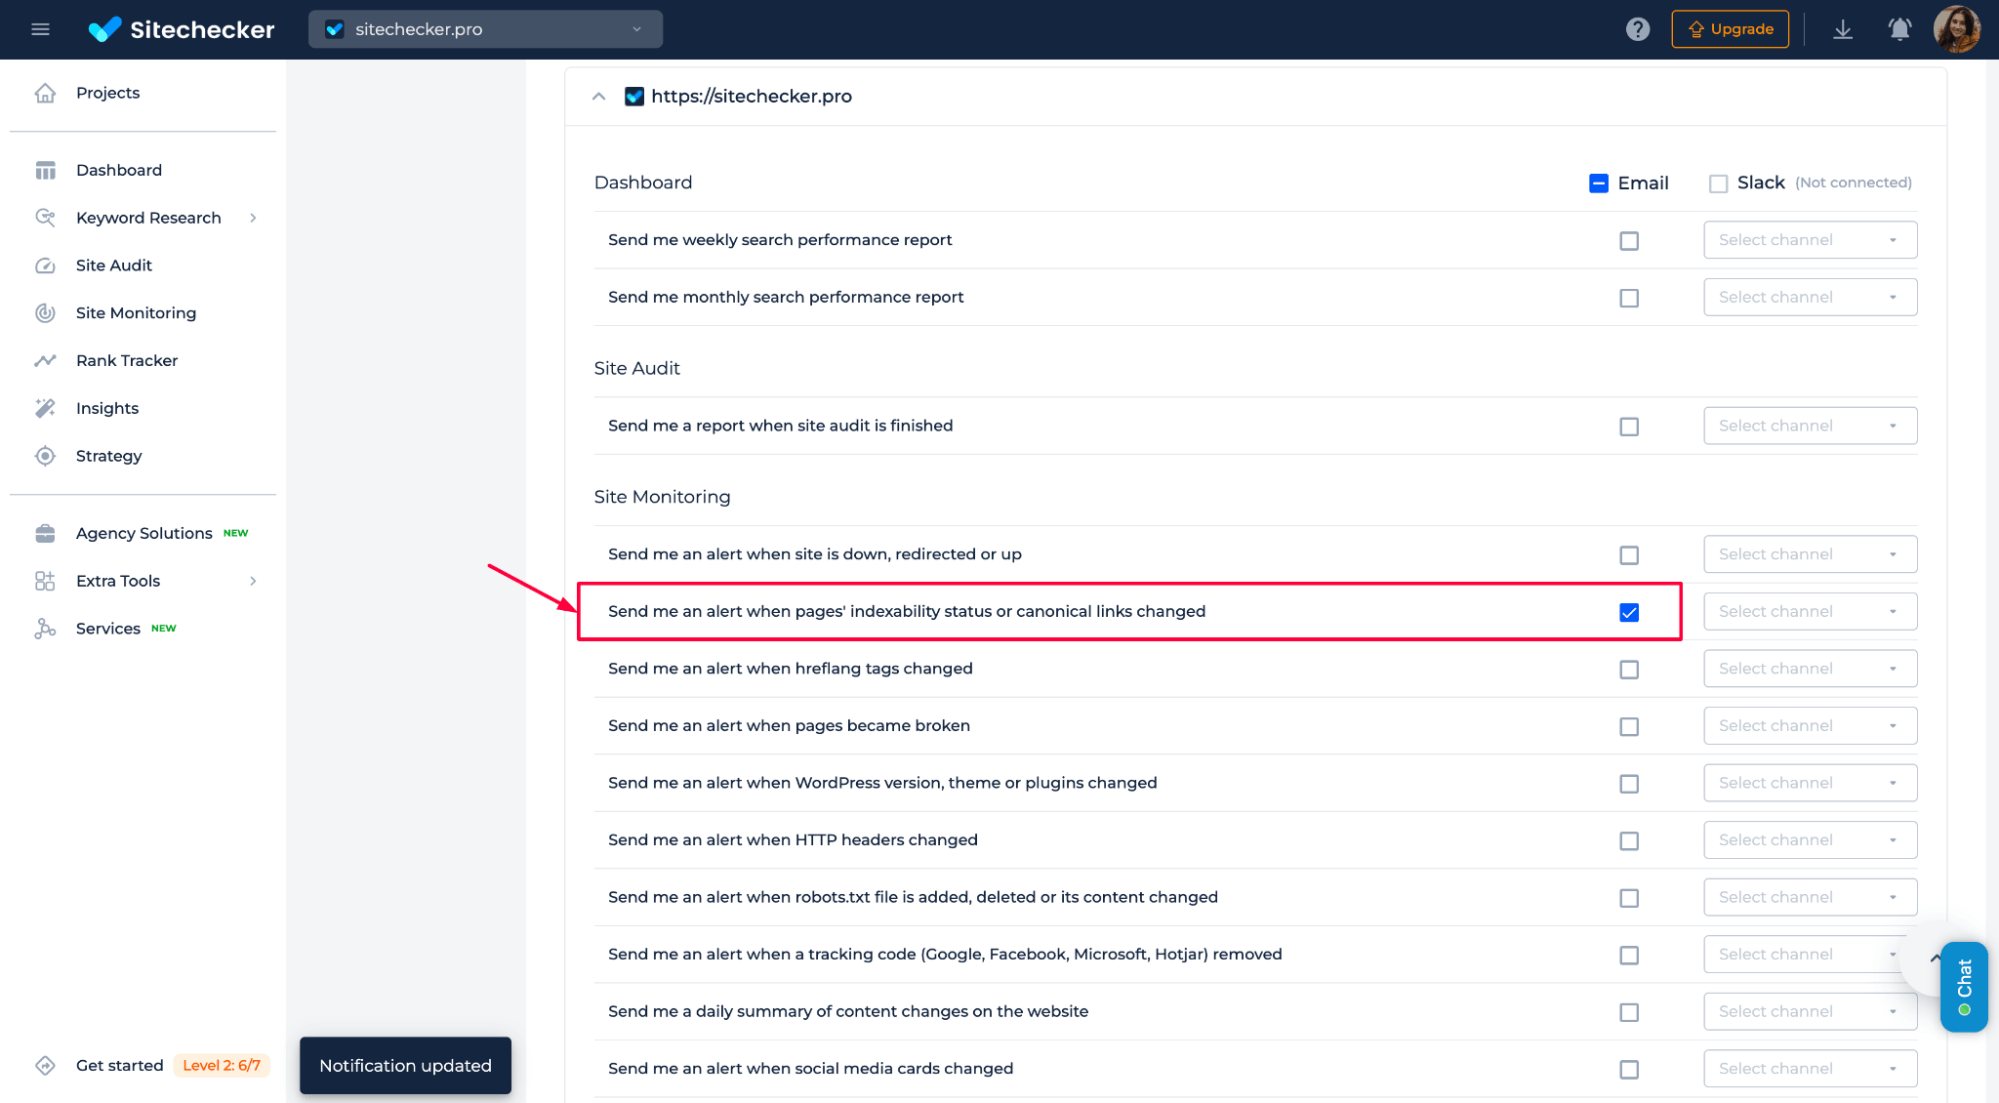
Set up HTTP Monitoring and SEO Alerts with Sitechecker to prevent future indexing issues. These tools will help you detect errors that could prevent URLs from being indexed, ensuring you can address them promptly.
HTTP Monitoring: Monitor your site for server issues or HTTP errors that might block indexing:
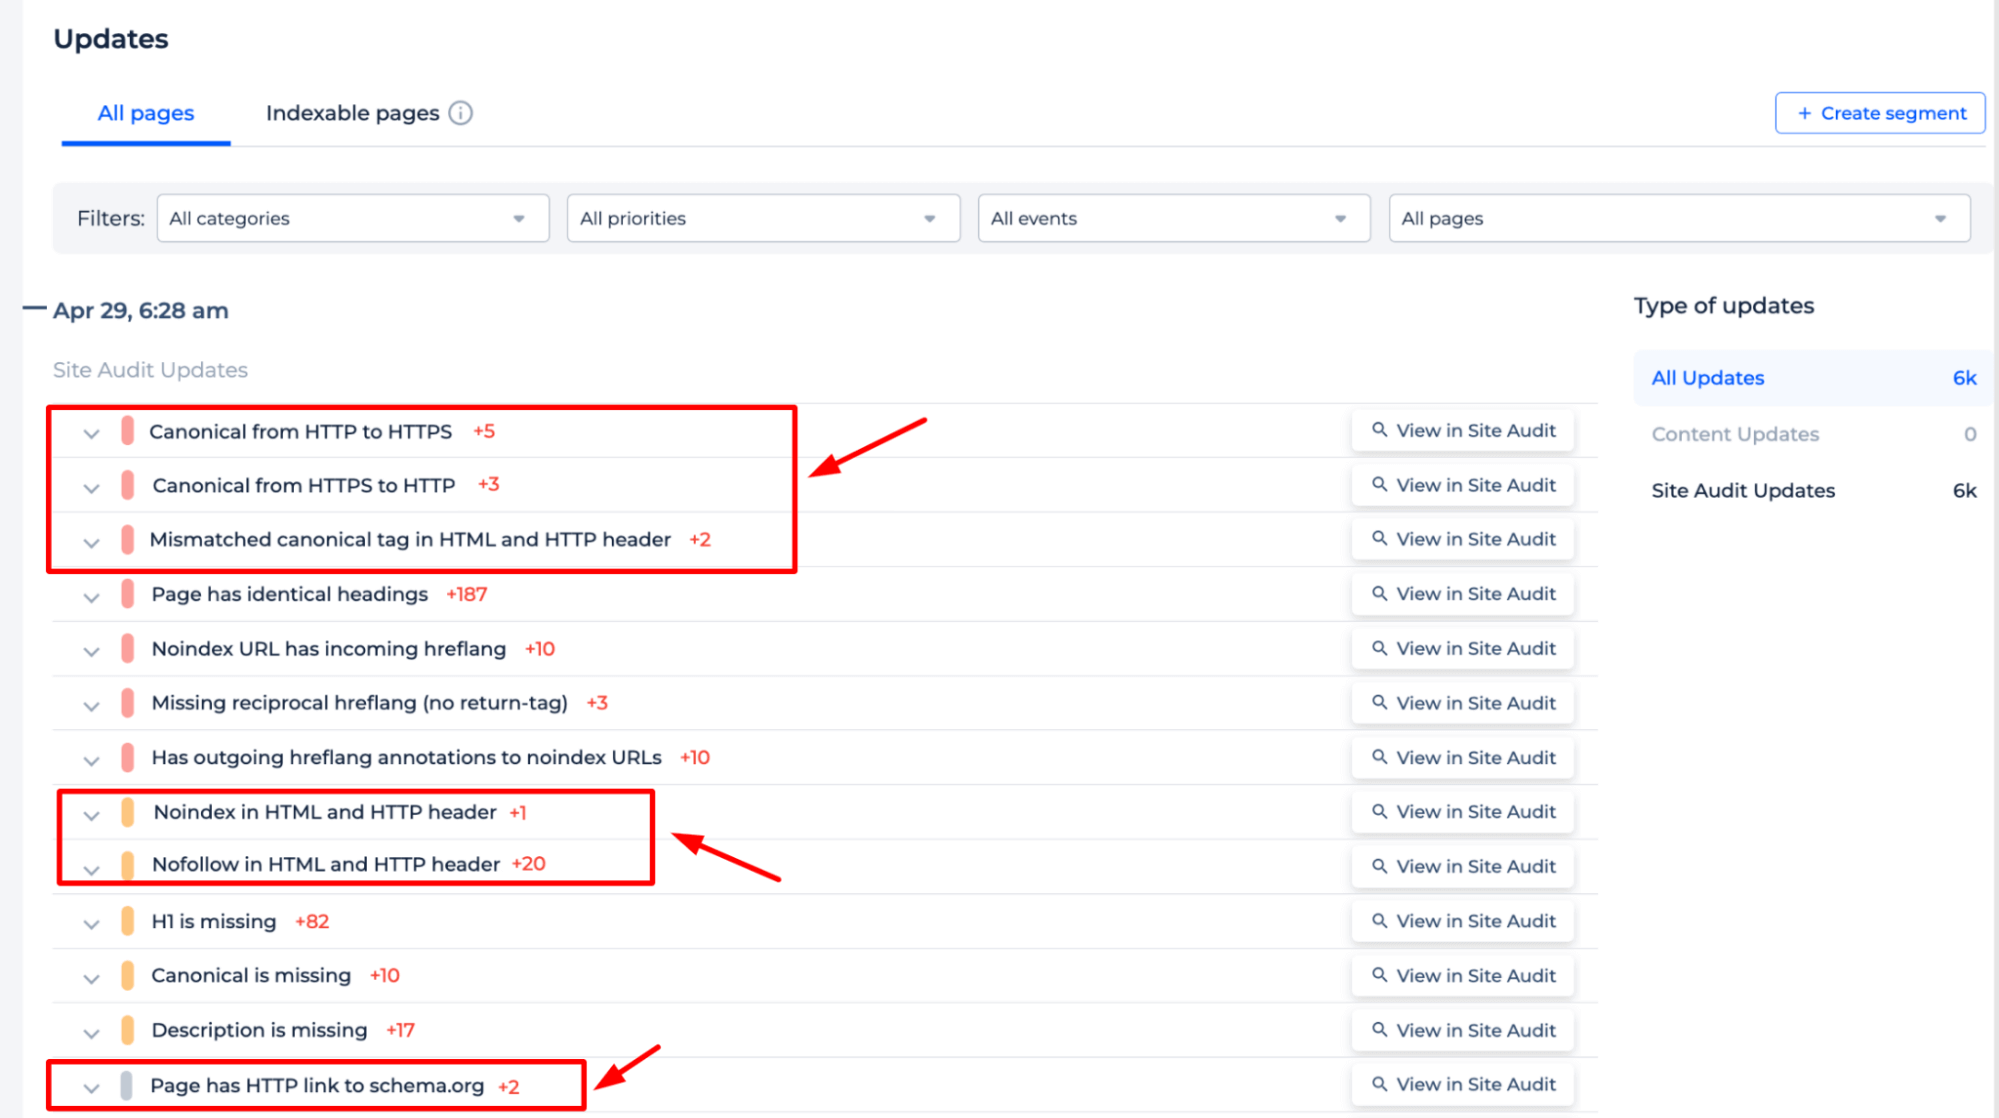
SEO Alerts: Receive notifications about any SEO-related changes or errors that could impact your site’s visibility and indexability.
Using these monitoring instruments, you can avoid potential indexability problems and optimize your site for search engines.
Conclusion
To fix the “Submitted URL marked noindex” issue, identify the affected URLs in GSC and check for factors like meta tags, HTTP headers, robots.txt, and canonical tags that may block indexing. After making the necessary changes, use the “Request Indexing” option in the URL Inspection Tool to prompt Google to crawl and index the updated pages. Block URLs that should not be indexed with the noindex directive, X-Robots-Tag, or robots.txt.
Regularly validate and fix any issues in Google Search Console to ensure proper indexing and improved site visibility.