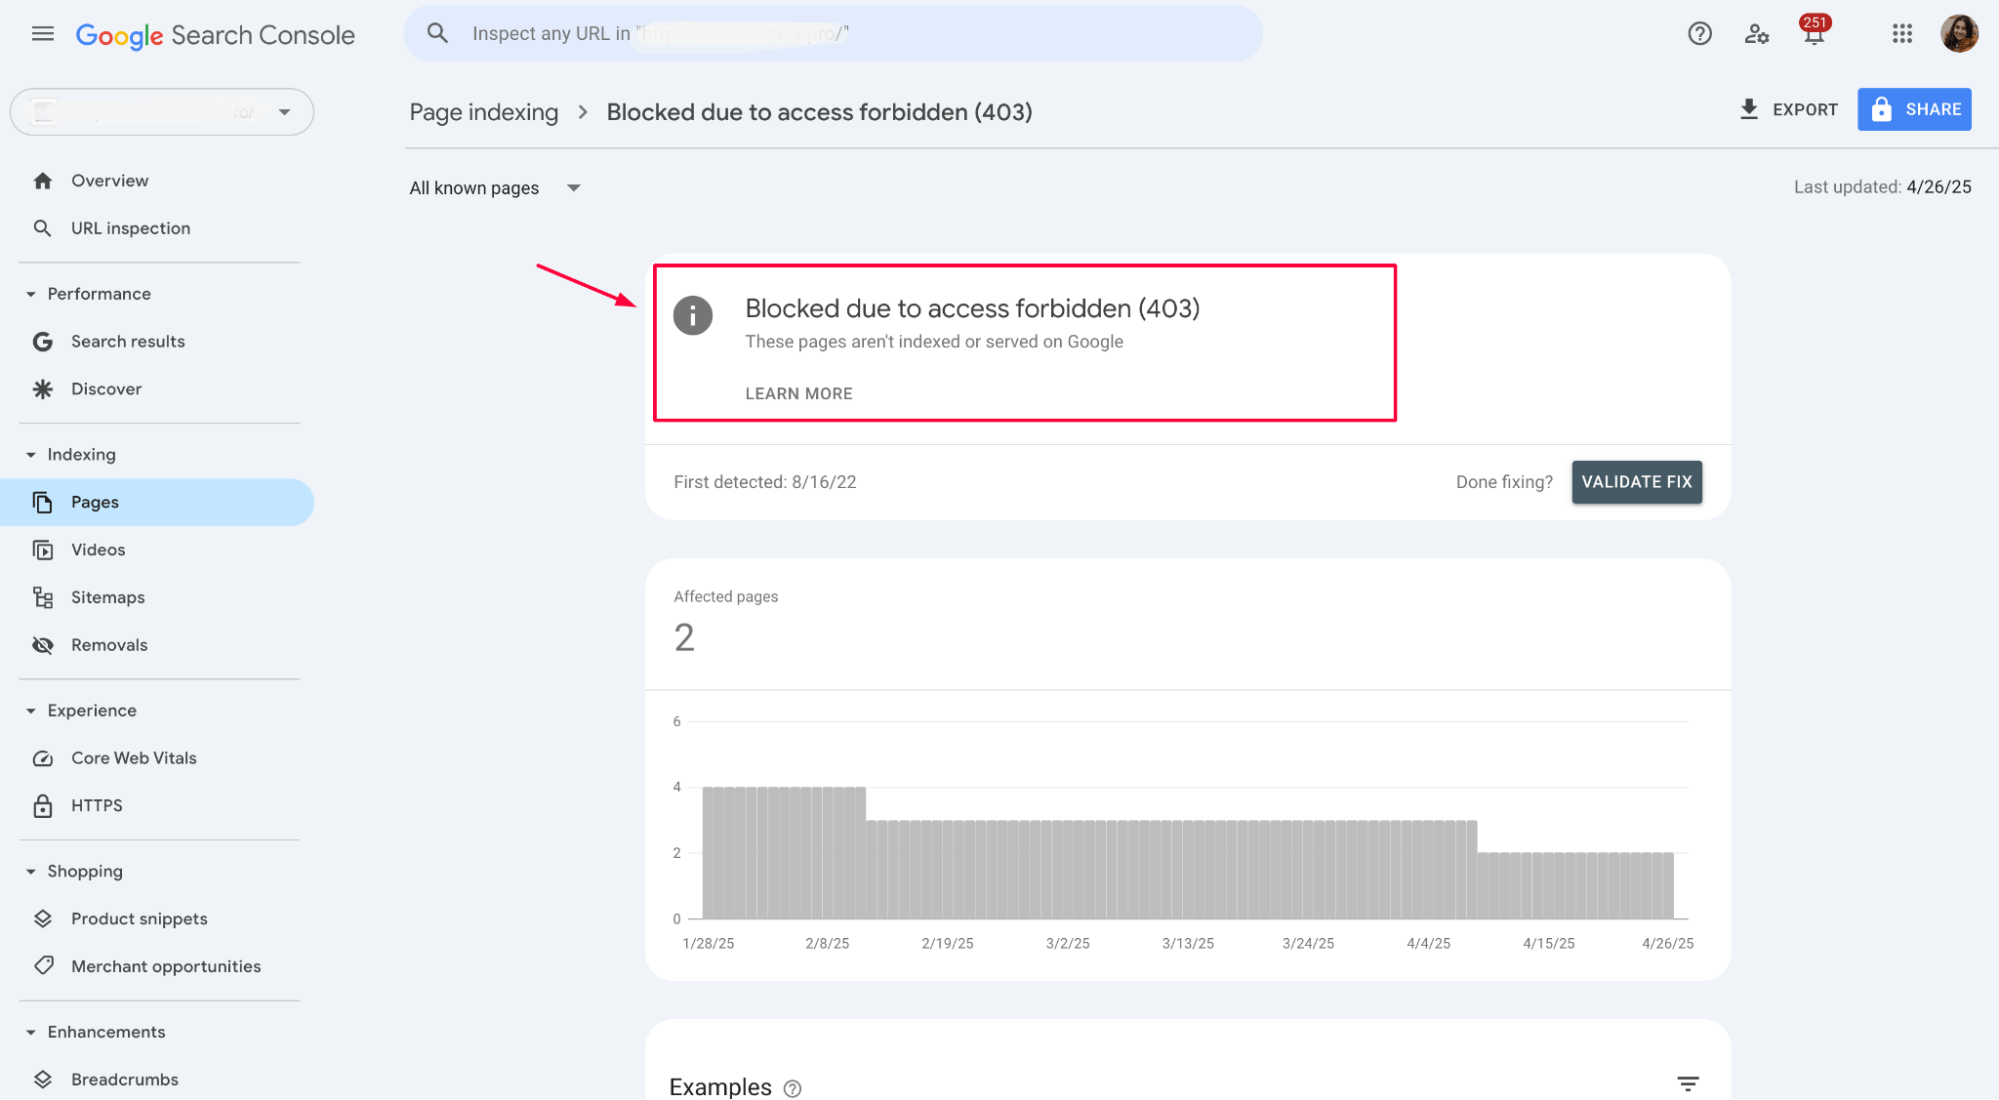
What does “Blocked due to access forbidden (403)” mean?
When you see “Blocked due to access forbidden (403)” in Google Search Console, it means Googlebot tried to crawl a page, but your server refused access. Instead of serving the content, the server returned a 403 status code, telling Google that the bot could not view the page.
Common causes of 403 errors in Google Search Console
- Firewall rules are blocking Googlebot requests by mistake.
- IP restrictions that accidentally deny Google’s crawling IPs.
- Cloudflare security settings, like Bot Fight Mode or strict WAF rules.
- Shopify apps or custom settings are interfering with crawler access.
- CMS plugins (especially security-focused) misidentify Googlebot as a threat.
- Incorrect file or directory permissions are preventing bots from viewing your pages.
Launch Sitechecker’s GSC Dashboard to boost your Search Console reporting!
Expand GSC Data Limits
Bypass Google’s 1,000-row cap and unlock up to 36 months of Search Console history in a single dashboard.
How to troubleshoot and fix 403 errors
Fixing a 403 error starts with understanding why your server is denying access. Follow these practical steps to identify the root cause and ensure Googlebot can crawl your site again.
1. Check server logs for 403 responses
Start with your server logs. Look for requests from Googlebot (usually user-agent Googlebot) that return a 403 status code. This helps you confirm whether Google was blocked and which pages triggered the error.
Where to find server logs
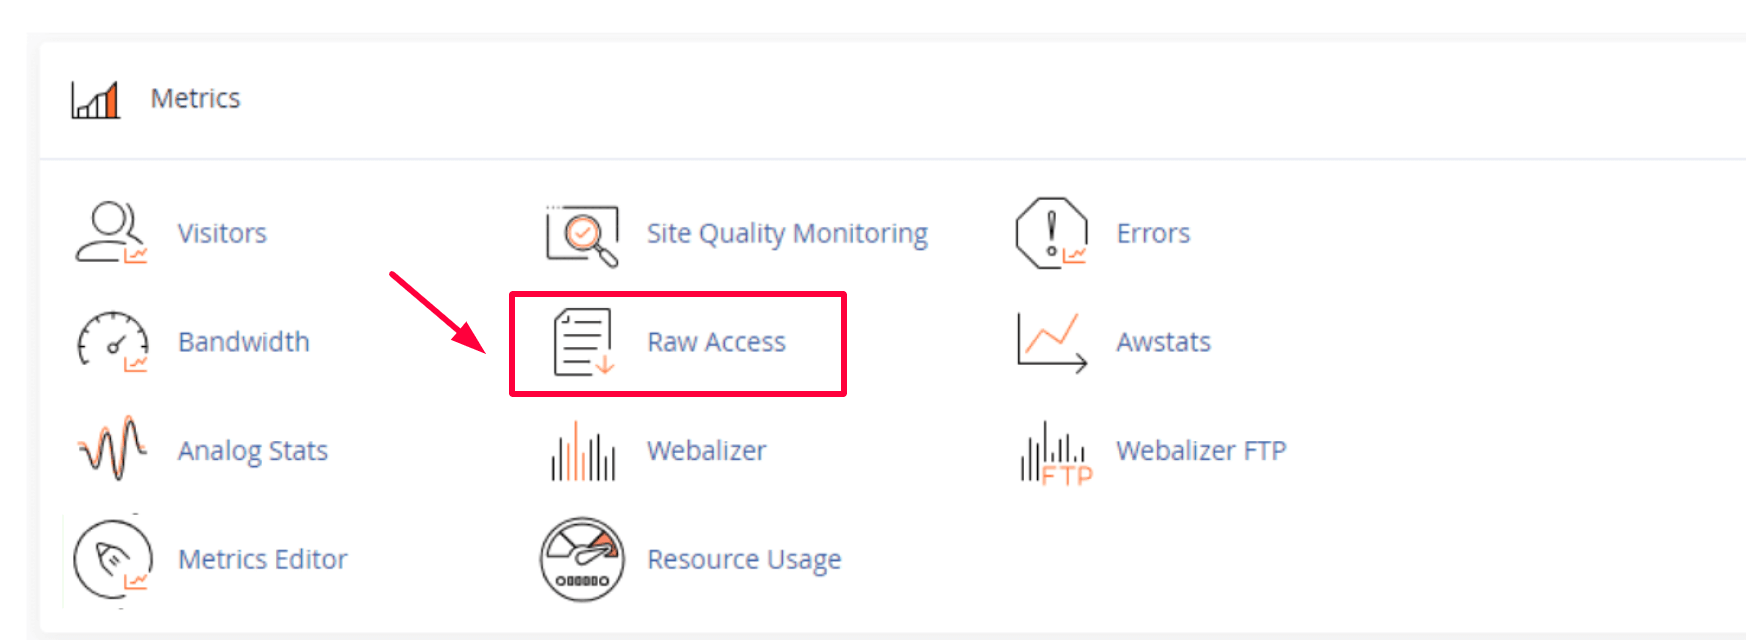
a) cPanel hosting (e.g, Hostinger, Bluehost, SiteGround)
Log in to your cPanel, go to Metrics → Raw Access or Errors, download the logs, and search for lines containing 403 and Googlebot.
b) Cloudflare
Cloudflare’s free plan doesn’t provide full access logs.
Use Logpush to export logs to services like AWS S3 or BigQuery on Enterprise plans.
Create a Logpush Job for AWS S3:
    curl -X POST "https://api.cloudflare.com/client/v4/zones/YOUR_ZONE_ID/logpush/jobs" \

  -H "X-Auth-Email: your-email@example.com" \

  -H "X-Auth-Key: YOUR_API_KEY" \

  -H "Content-Type: application/json" \

  --data '{

    "name": "logpush-to-s3",

    "destination_conf": "s3://your-bucket-name/path?region=us-east-1&access-key-id=YOUR_AWS_KEY&secret-access-key=YOUR_AWS_SECRET",

    "logpull_options": "fields=ClientIP,EdgeStartTimestamp,RequestHost,RequestURI×tamps=rfc3339",

    "dataset": "http_requests",

    "enabled": true

    }'
Logpush Job for Google BigQuery:
    curl -X POST "https://api.cloudflare.com/client/v4/zones/YOUR_ZONE_ID/logpush/jobs" \

    -H "X-Auth-Email: your-email@example.com" \

    -H "X-Auth-Key: YOUR_API_KEY" \

    -H "Content-Type: application/json" \

    --data '{

      "name": "logpush-to-bigquery",

      "destination_conf": "bigquery://project-id:dataset-id?table=your_table&credentials=BASE64_ENCODED_JSON_KEY",

      "logpull_options": "fields=ClientIP,EdgeStartTimestamp,RequestHost,RequestURI×tamps=rfc3339",

      "dataset": "http_requests",

      "enabled": true

    }'
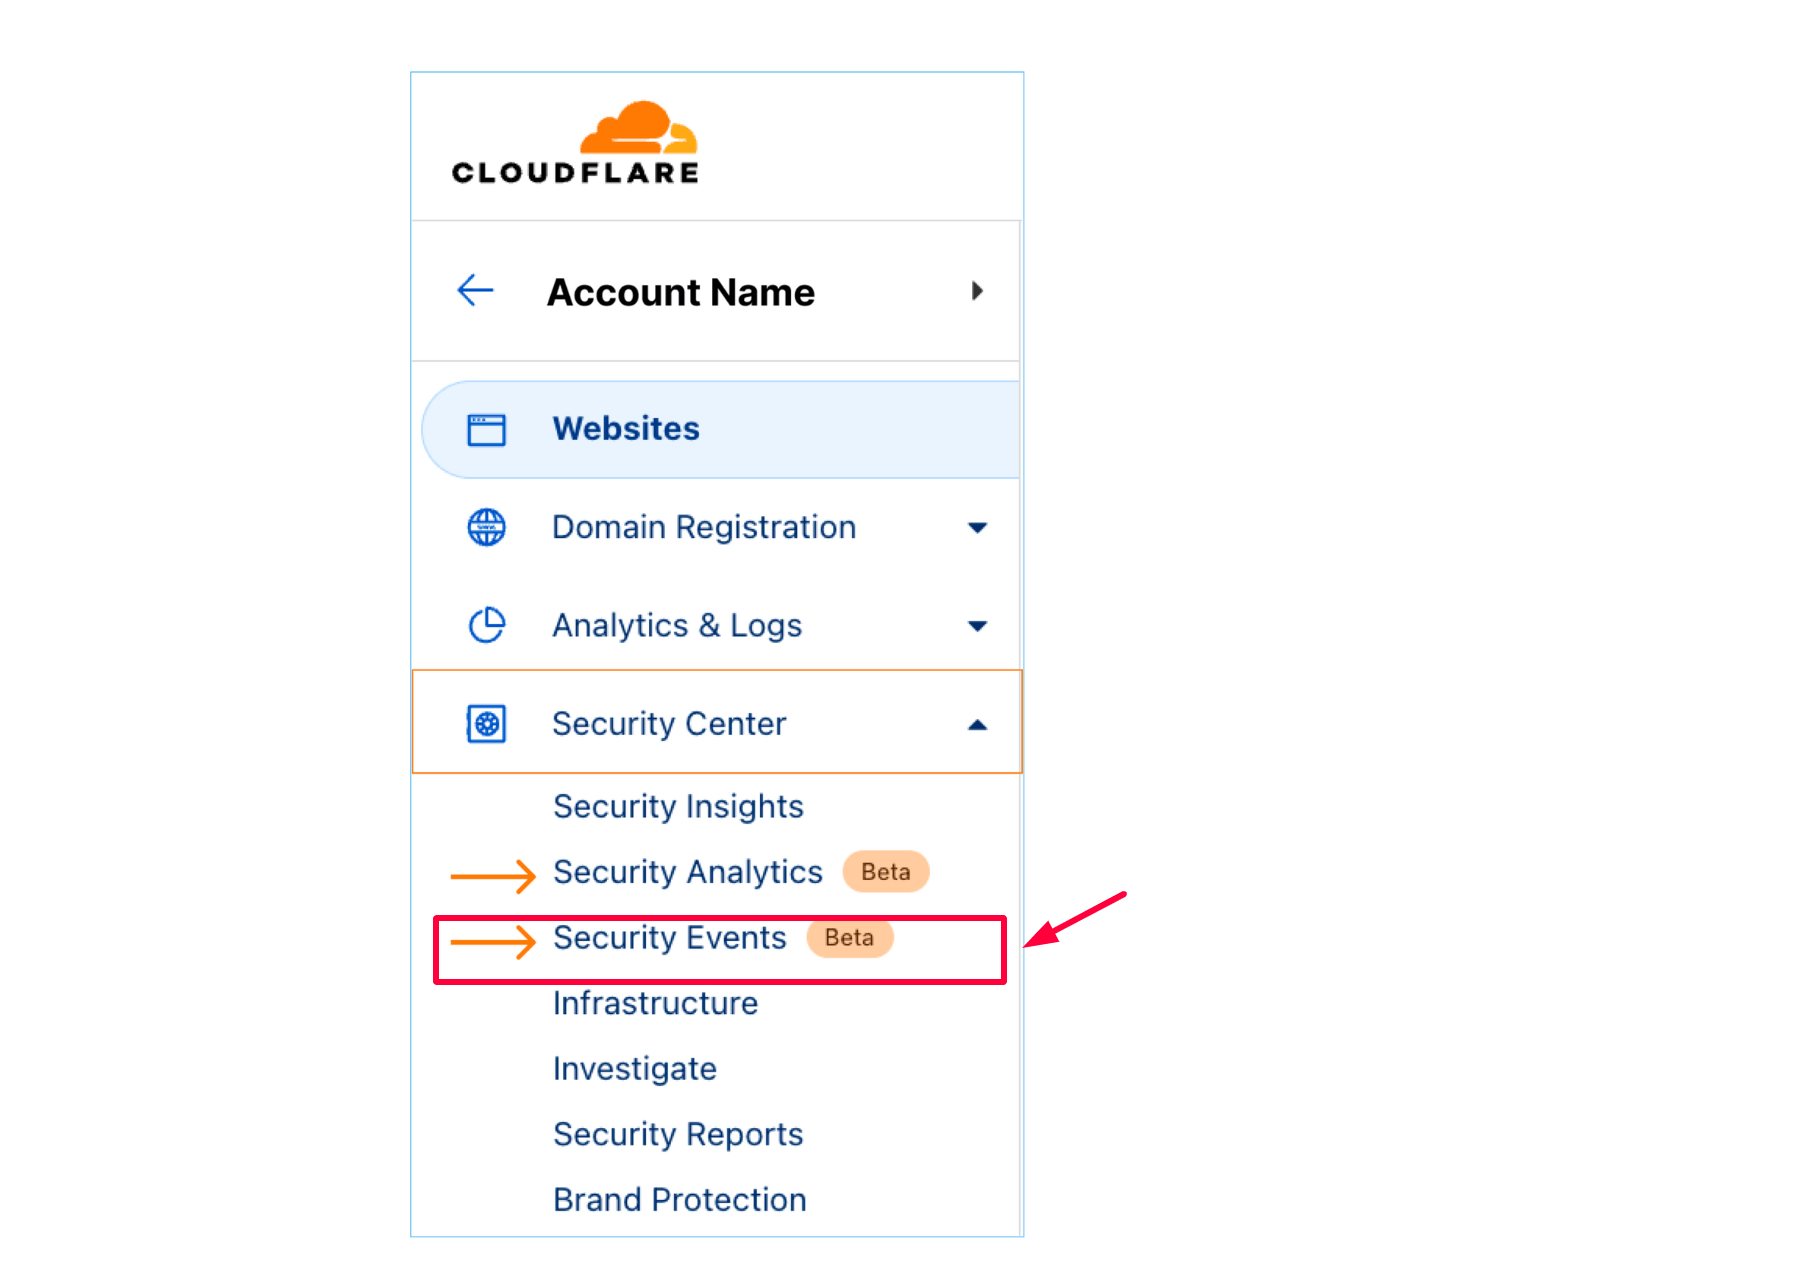
Otherwise, check the Security Events tab in your Cloudflare dashboard for blocked requests that may align with 403 errors.
c) Shopify
Shopify doesn’t provide direct access to server logs. If you see 403 errors in Google Search Console, check installed apps or custom themes that might restrict access to specific bots.
d) VPS or dedicated server
- Apache logs are usually at: /var/log/apache2/access.log
- Nginx logs are usually at: /var/log/nginx/access.log
Use command-line tools to filter logs:
grep "403" access.log | grep "Googlebot"
2. Test accessibility with google’s IP addresses
When setting up Cloudflare Logpush, it’s crucial to verify that Cloudflare can reach your target destination, such as an AWS S3 bucket or a Google BigQuery table. To do this, Cloudflare performs a test to ensure your destination is accessible from its servers hosted on Google Cloud Platform (GCP) infrastructure.
This is called a “destination accessibility test,” and it confirms that:
- The destination exists.
- The provided credentials are valid.
- Firewalls, bucket policies, or IAM permissions do not block Cloudflare.
Why is this important?
Before Logpush starts sending real-time log data, this test prevents misconfiguration issues such as:
- 403 Access Denied
- Could not connect to bucket
- Permission denied
- Or other silent failures where logs are never delivered.
It ensures your logging setup works as expected before live traffic starts flowing.
How to perform the test
✅ Step 1: Whitelist Google Cloud IP ranges
Since Cloudflare’s Logpush infrastructure runs on GCP, your firewall or access policy must allow incoming connections from GCP IP addresses.
You can find Google’s official IP ranges here: https://www.gstatic.com/ipranges/cloud.json
3. Review firewall and security tools (Cloudflare, hosting)
Security tools often mistake Googlebot for bad traffic. Review your firewall settings, Cloudflare rules, and any server security tools. Look for rules that block user agents, IP addresses, or entire countries. Make sure Googlebot is explicitly allowed through your firewall and security filters.
For example:
- Сheck if Bot Fight Mode or WAF rules are blocking automated crawlers in Cloudflare.
- In hosting panels like cPanel or Plesk, review ModSecurity logs for any blocks against Googlebot.
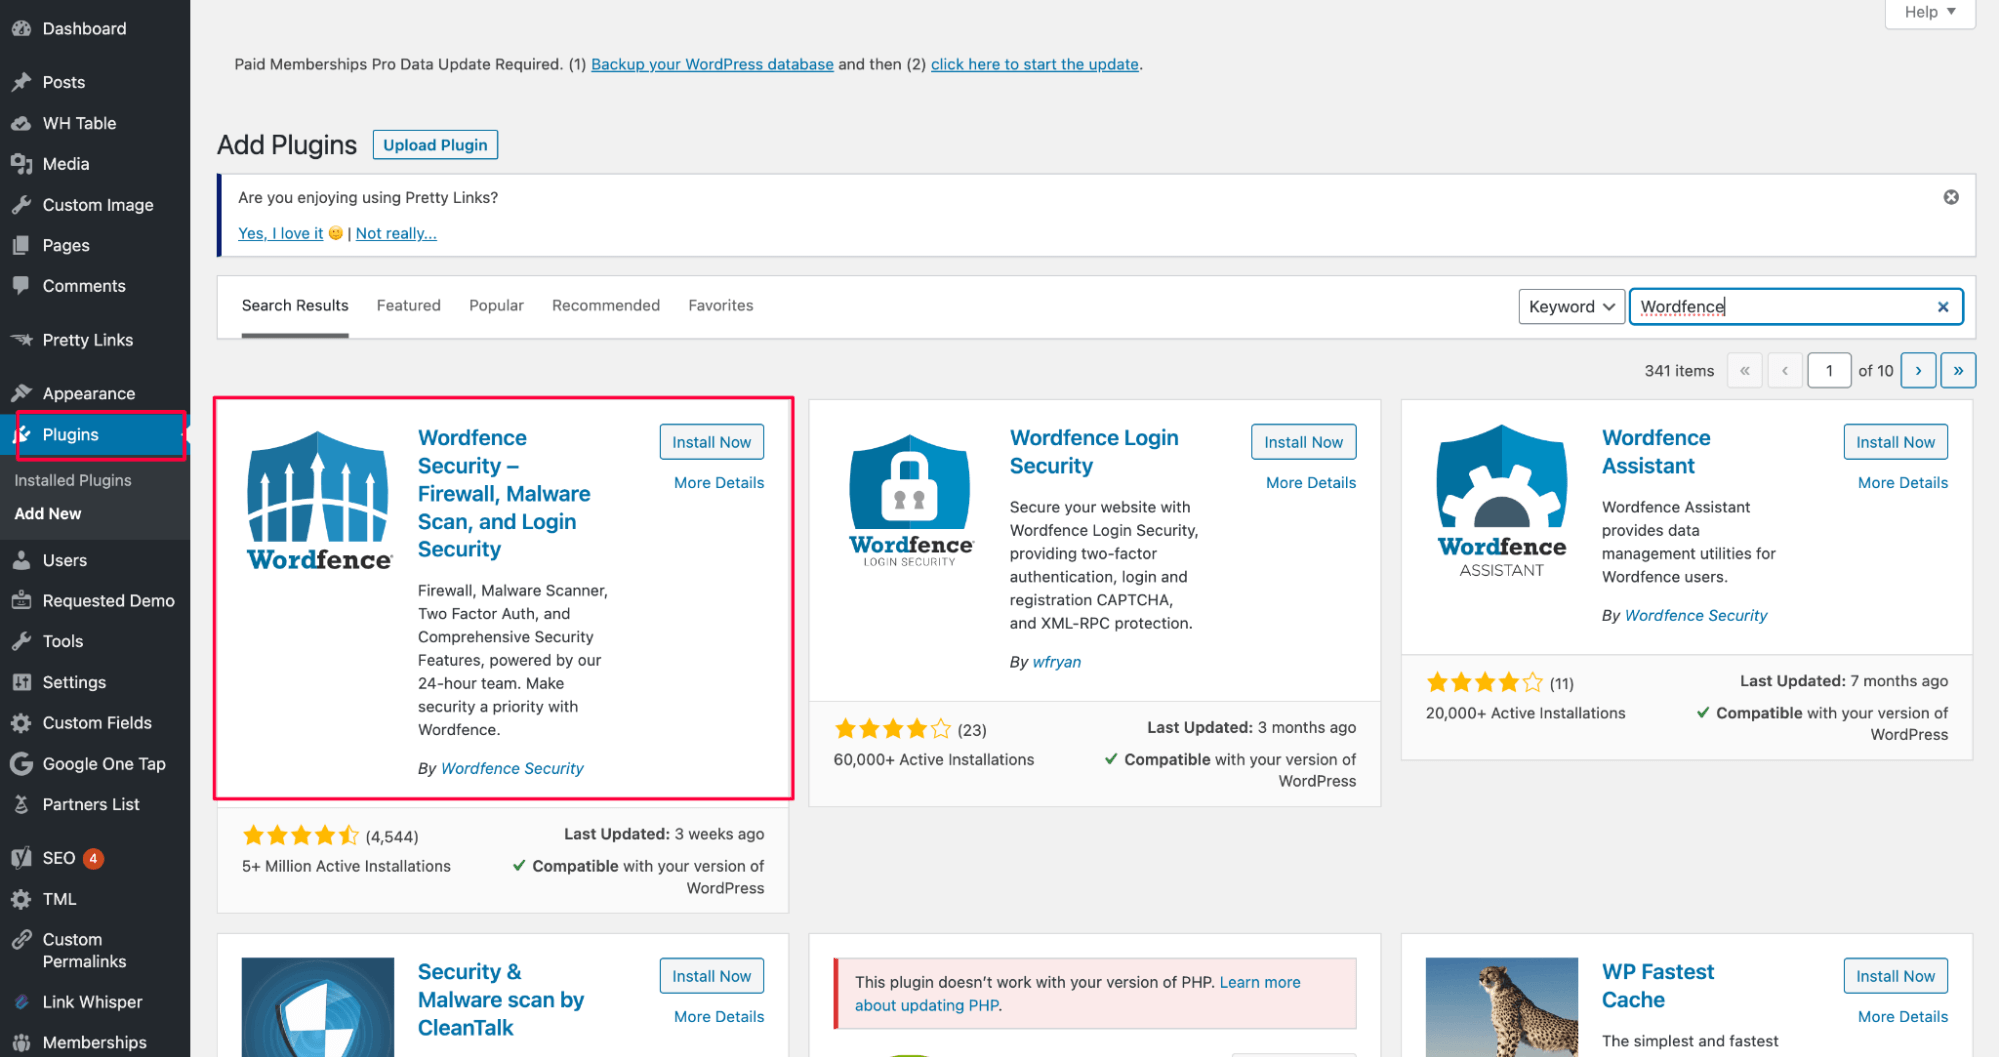
- Security plugins like Wordfence or iThemes Security might have strict bot-blocking settings on WordPress. Ensure Googlebot’s IPs and user agents are explicitly allowed through your firewall and bot protection layers.
4. Use robots.txt testing tool in GSC
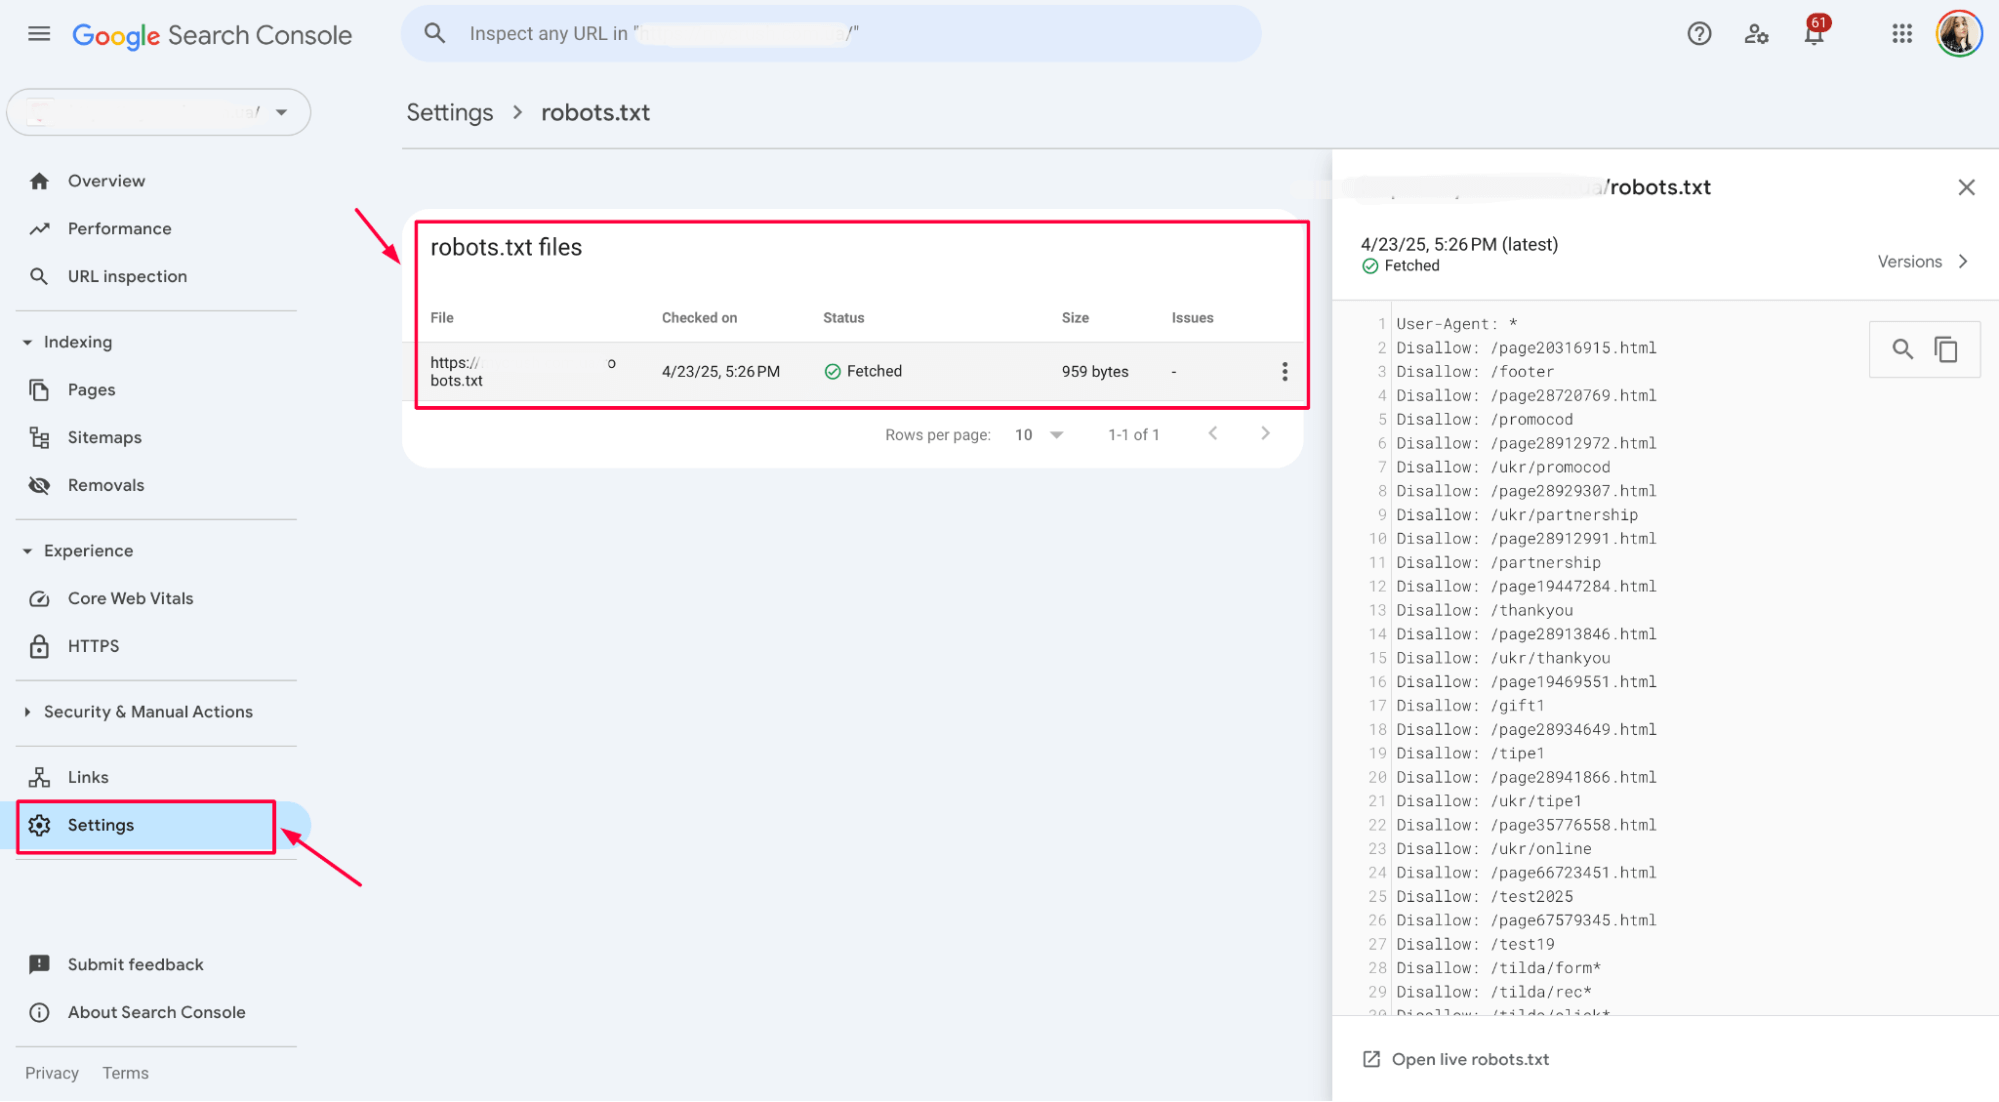
Open the robots.txt Tester inside Google Search Console. Check if your robots.txt file accidentally blocks important pages or entire folders.
For example:
- Look for lines like Disallow: / which block everything.
- Check if sensitive folders like /admin/ or /private/ are wrongly blocking crawler access to public content. Fix any mistakes by editing your robots.txt file and testing again before publishing the changes.
5. Temporarily disable security features for testing
If you can’t find the block, temporarily disable security features like Web Application Firewalls (WAF), bot protection, or plugins.
For example:
- In Cloudflare, disable Bot Fight Mode: Dashboard → Security → Bots → Turn off “Bot Fight Mode”.
- In Wordfence (WordPress plugin), switch to “Learning Mode”:
    <IfModule mod_security.c>

        SecFilterEngine Off

        SecFilterScanPOST Off

    </IfModule>
If using Apache ModSecurity, you can disable it for testing in .htaccess:
    # Comment out security rules

    # include /etc/nginx/modsecurity/modsecurity.conf;
6. Contact the hosting provider/service support if needed
If you’re stuck, contact your hosting provider or service support team. They can check server configurations, security layers, and access control settings that might block Googlebot.
When contacting support, provide:
- A link to the specific page showing the 403 error.
- A screenshot or export from Google Search Console.
- The exact user-agent (Googlebot) and IP address details, if possible.
A short description like:
Clear information helps the support team fix the problem faster.
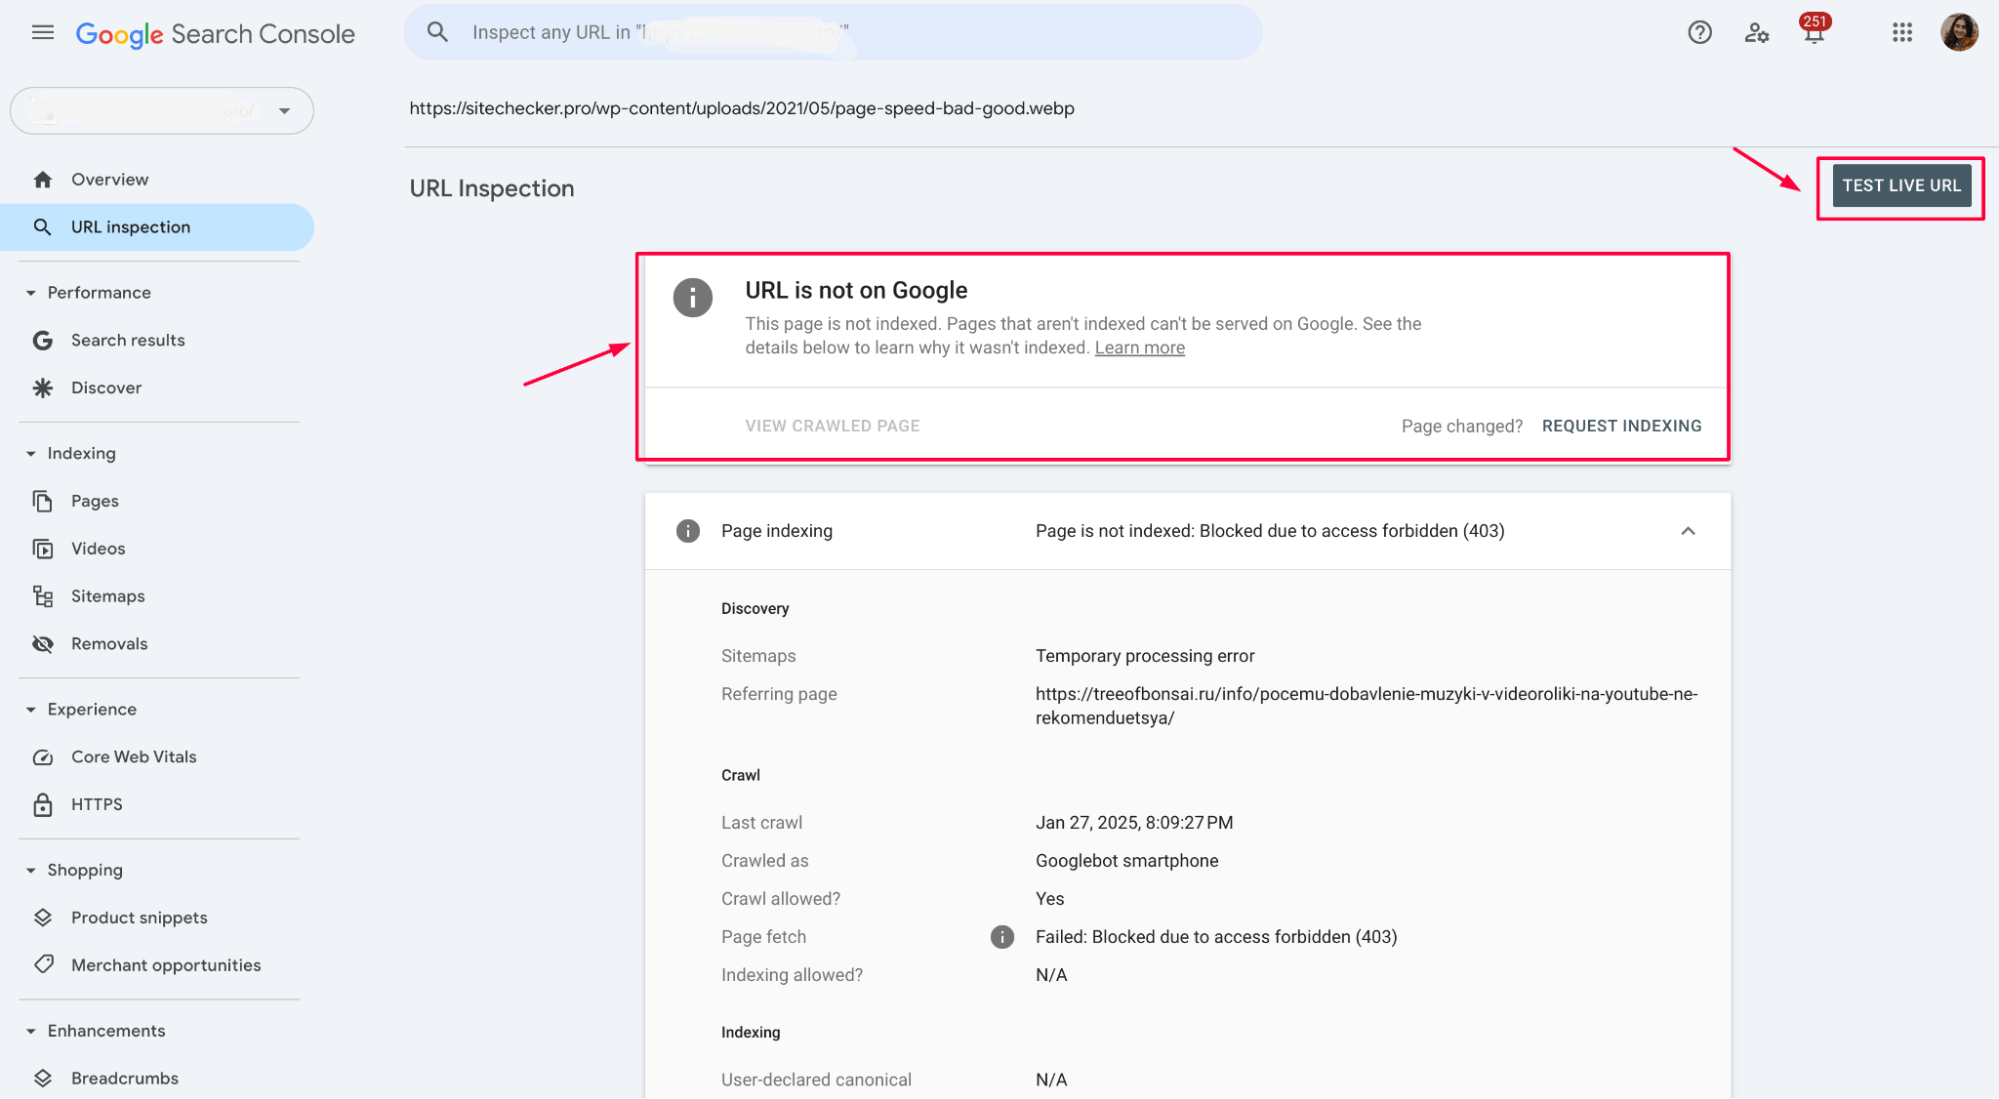
7. Use the fetch as Google tool to validate access
After making changes, use the URL Inspection Tool in Google Search Console (formerly called “Fetch as Google”).
Enter the affected URL and click “Test Live URL”:
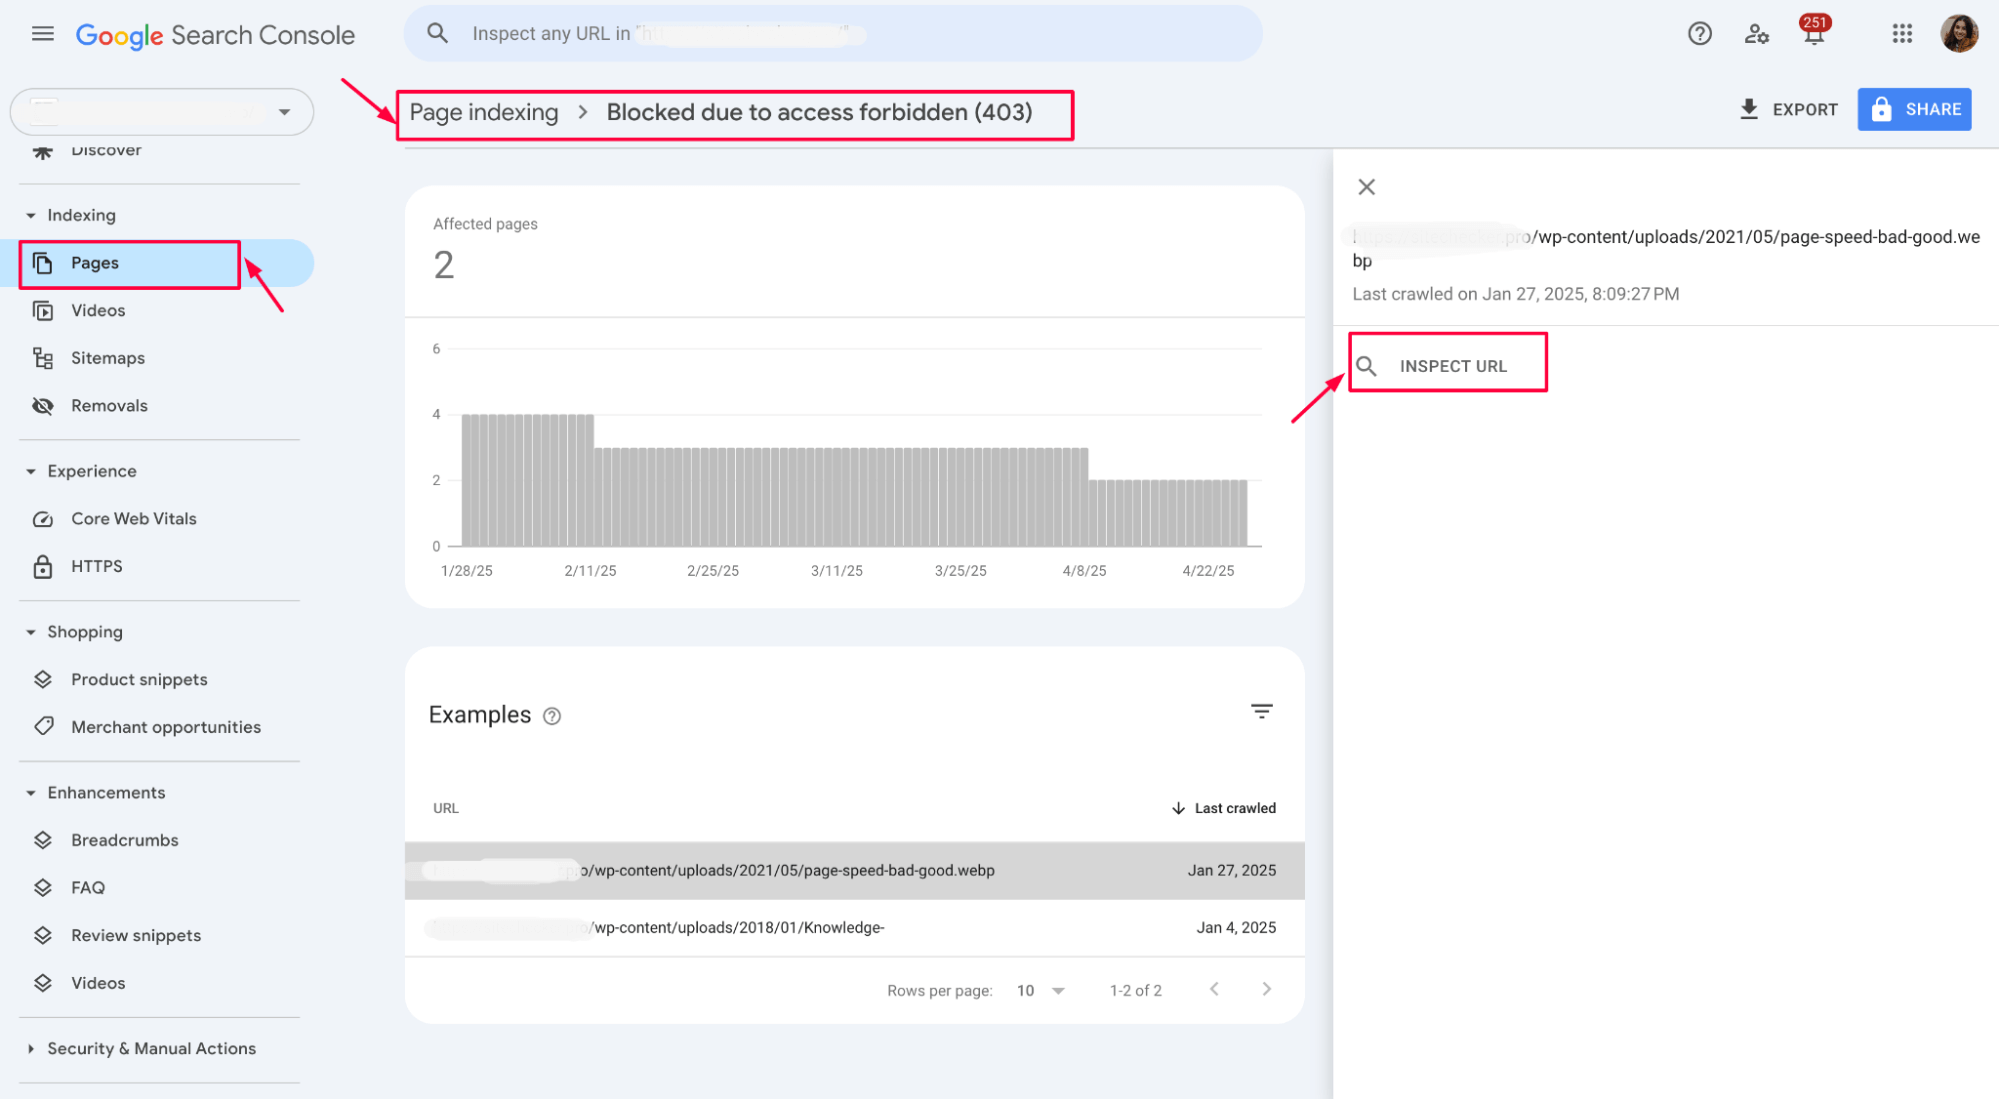
If the page is accessible and no 403 error appears, Googlebot can crawl it correctly.
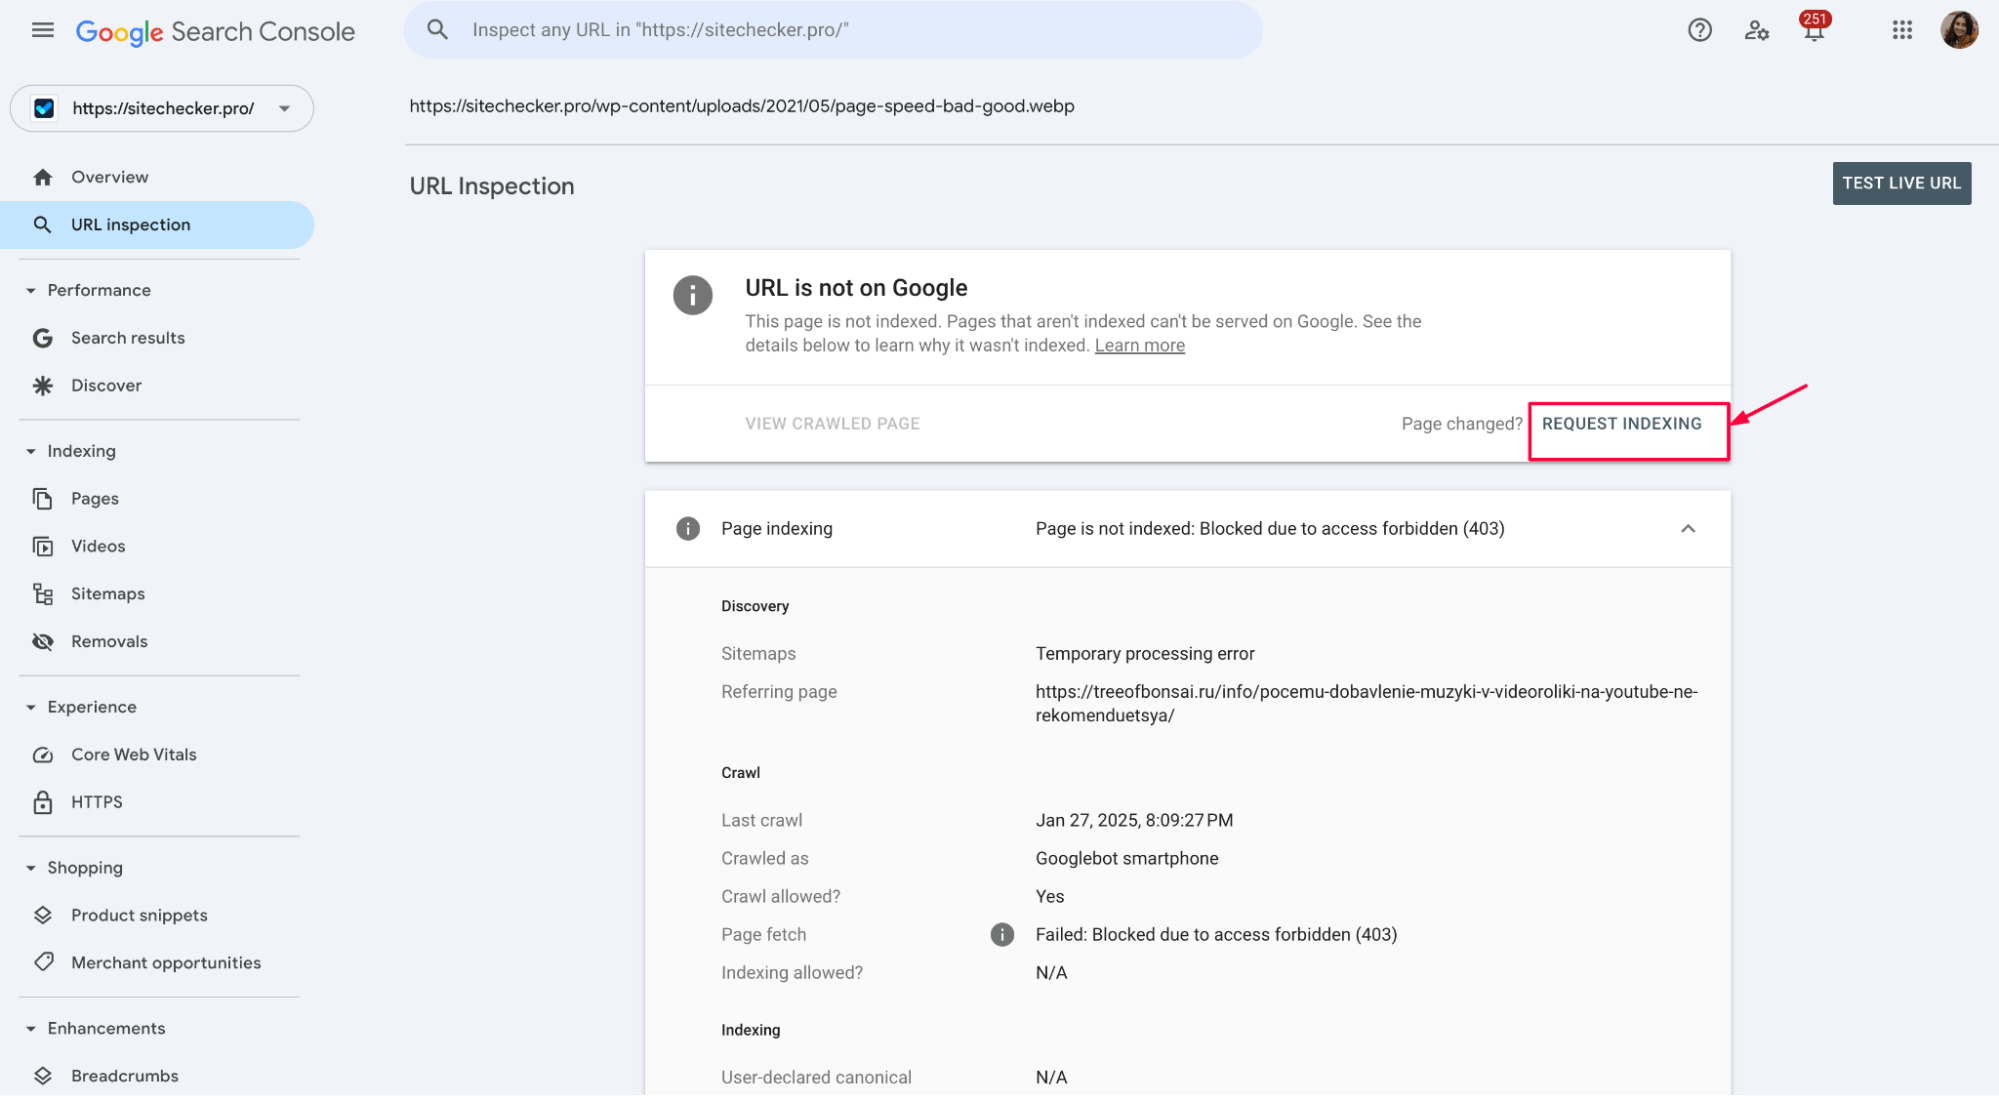
Click “Request Indexing” to ask Google to recrawl the page faster.
Track 403 errors automatically with Sitechecker
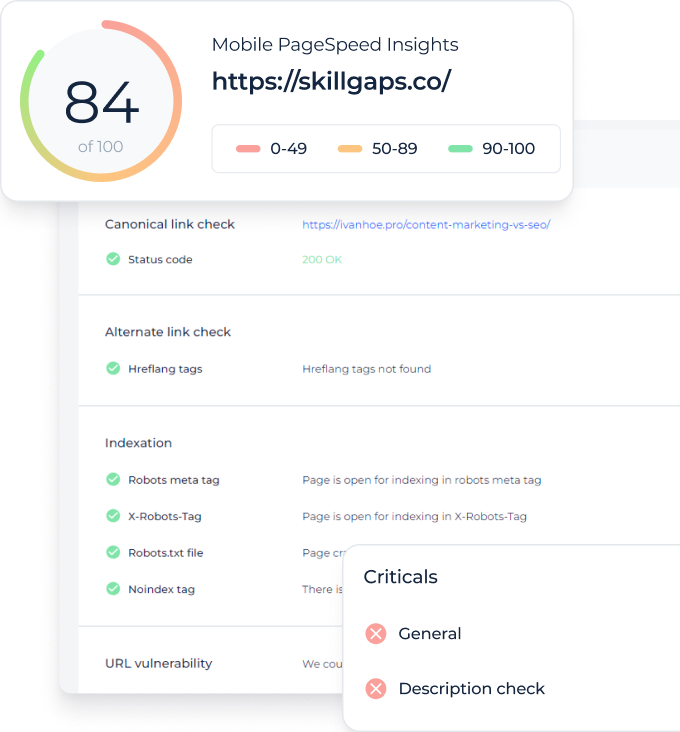
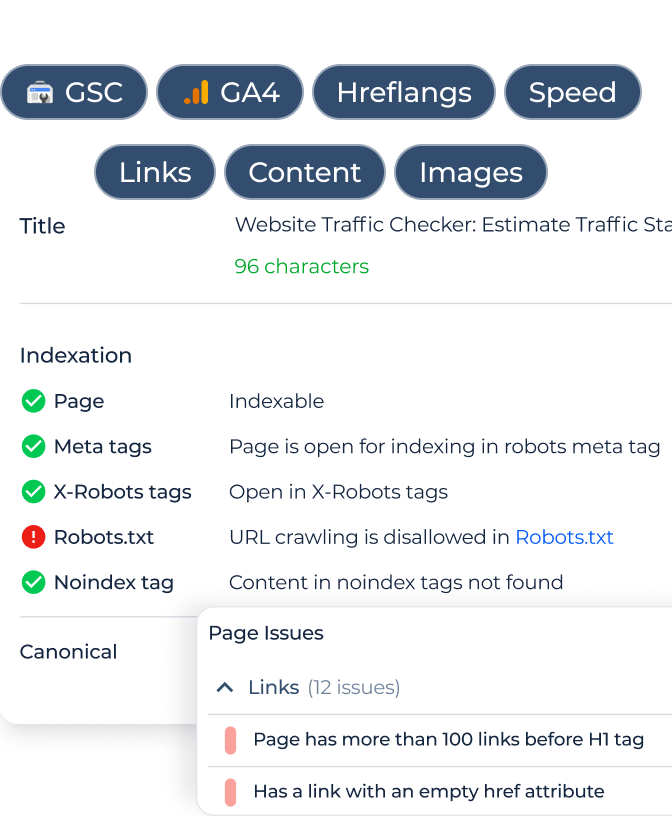
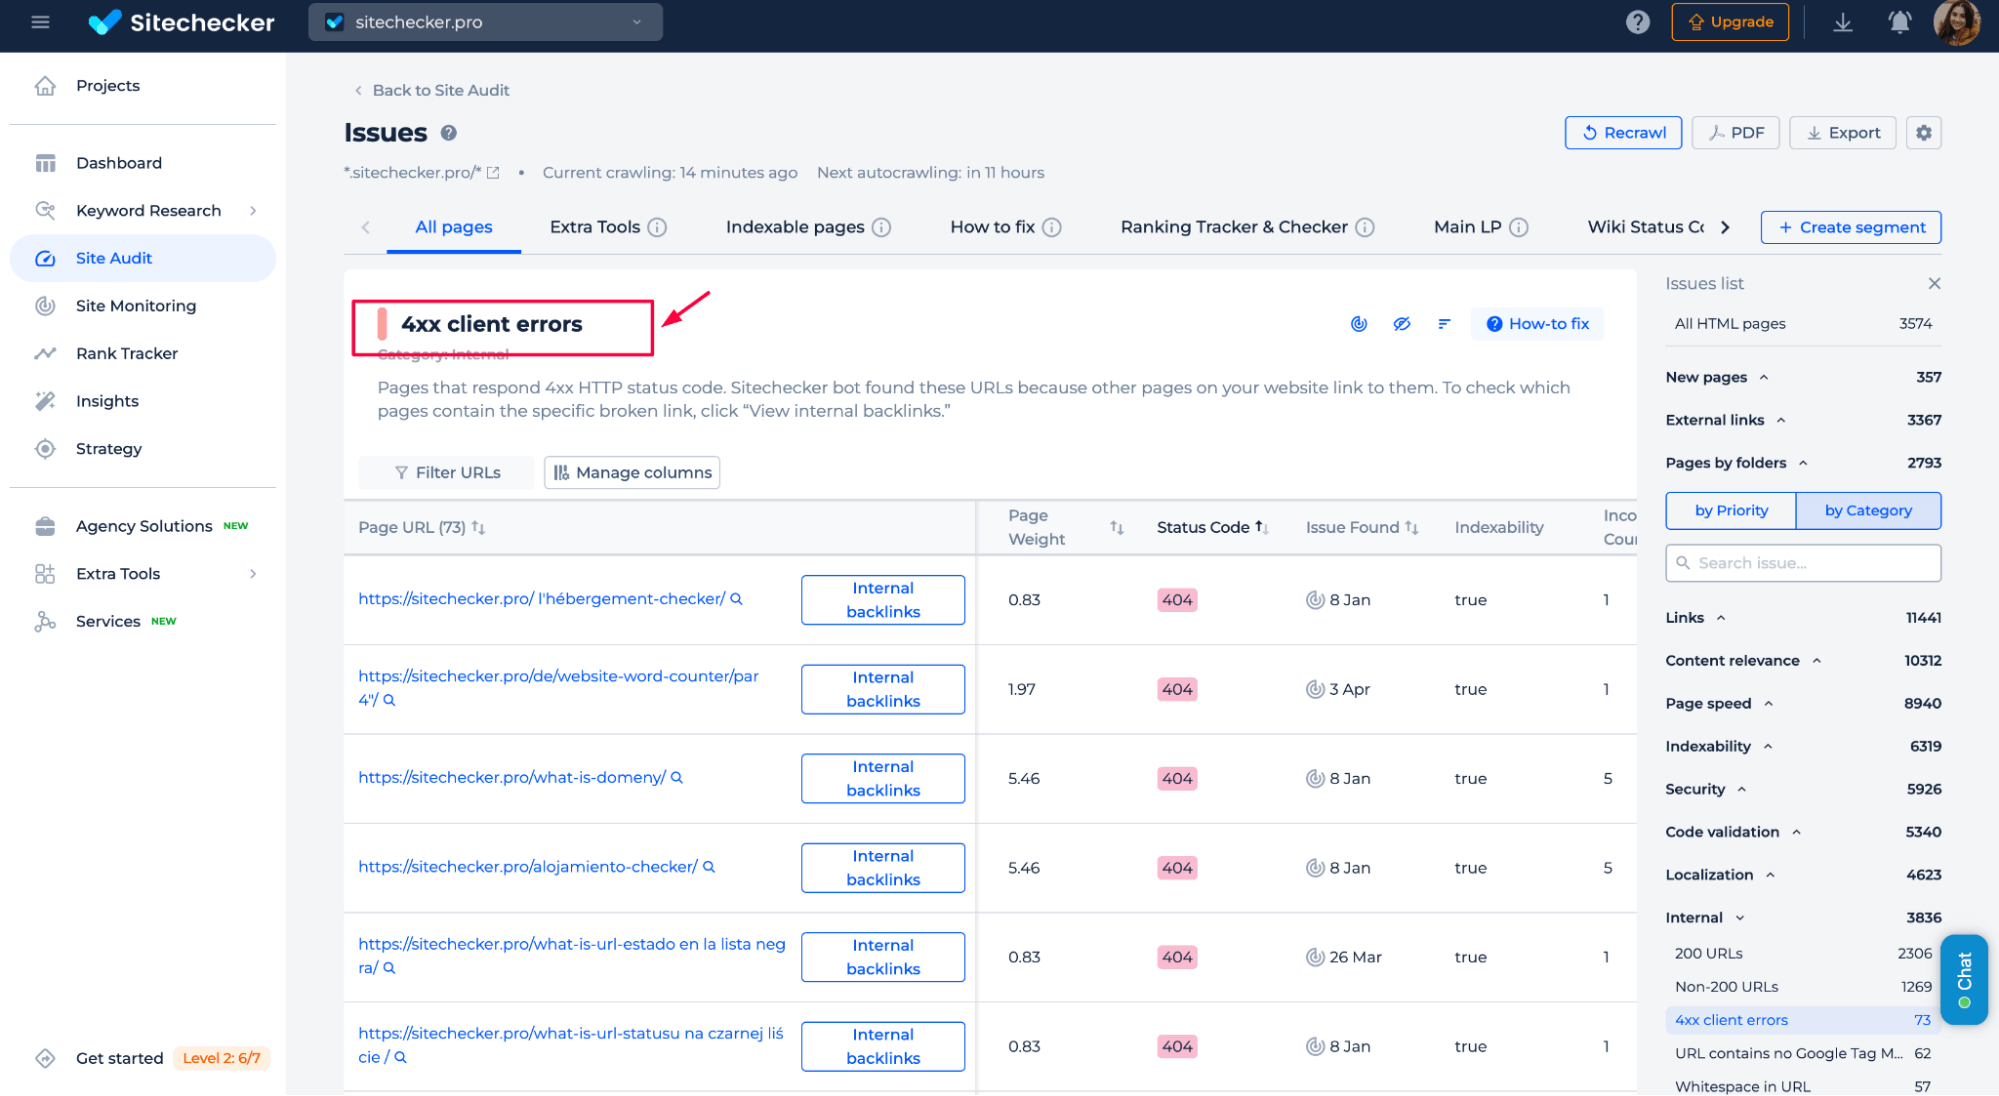
You can easily monitor and detect 403 errors using Sitechecker. In the audit report, look for 4xx Client Errors. This section shows you all blocked pages, including those with a 403 Forbidden error.
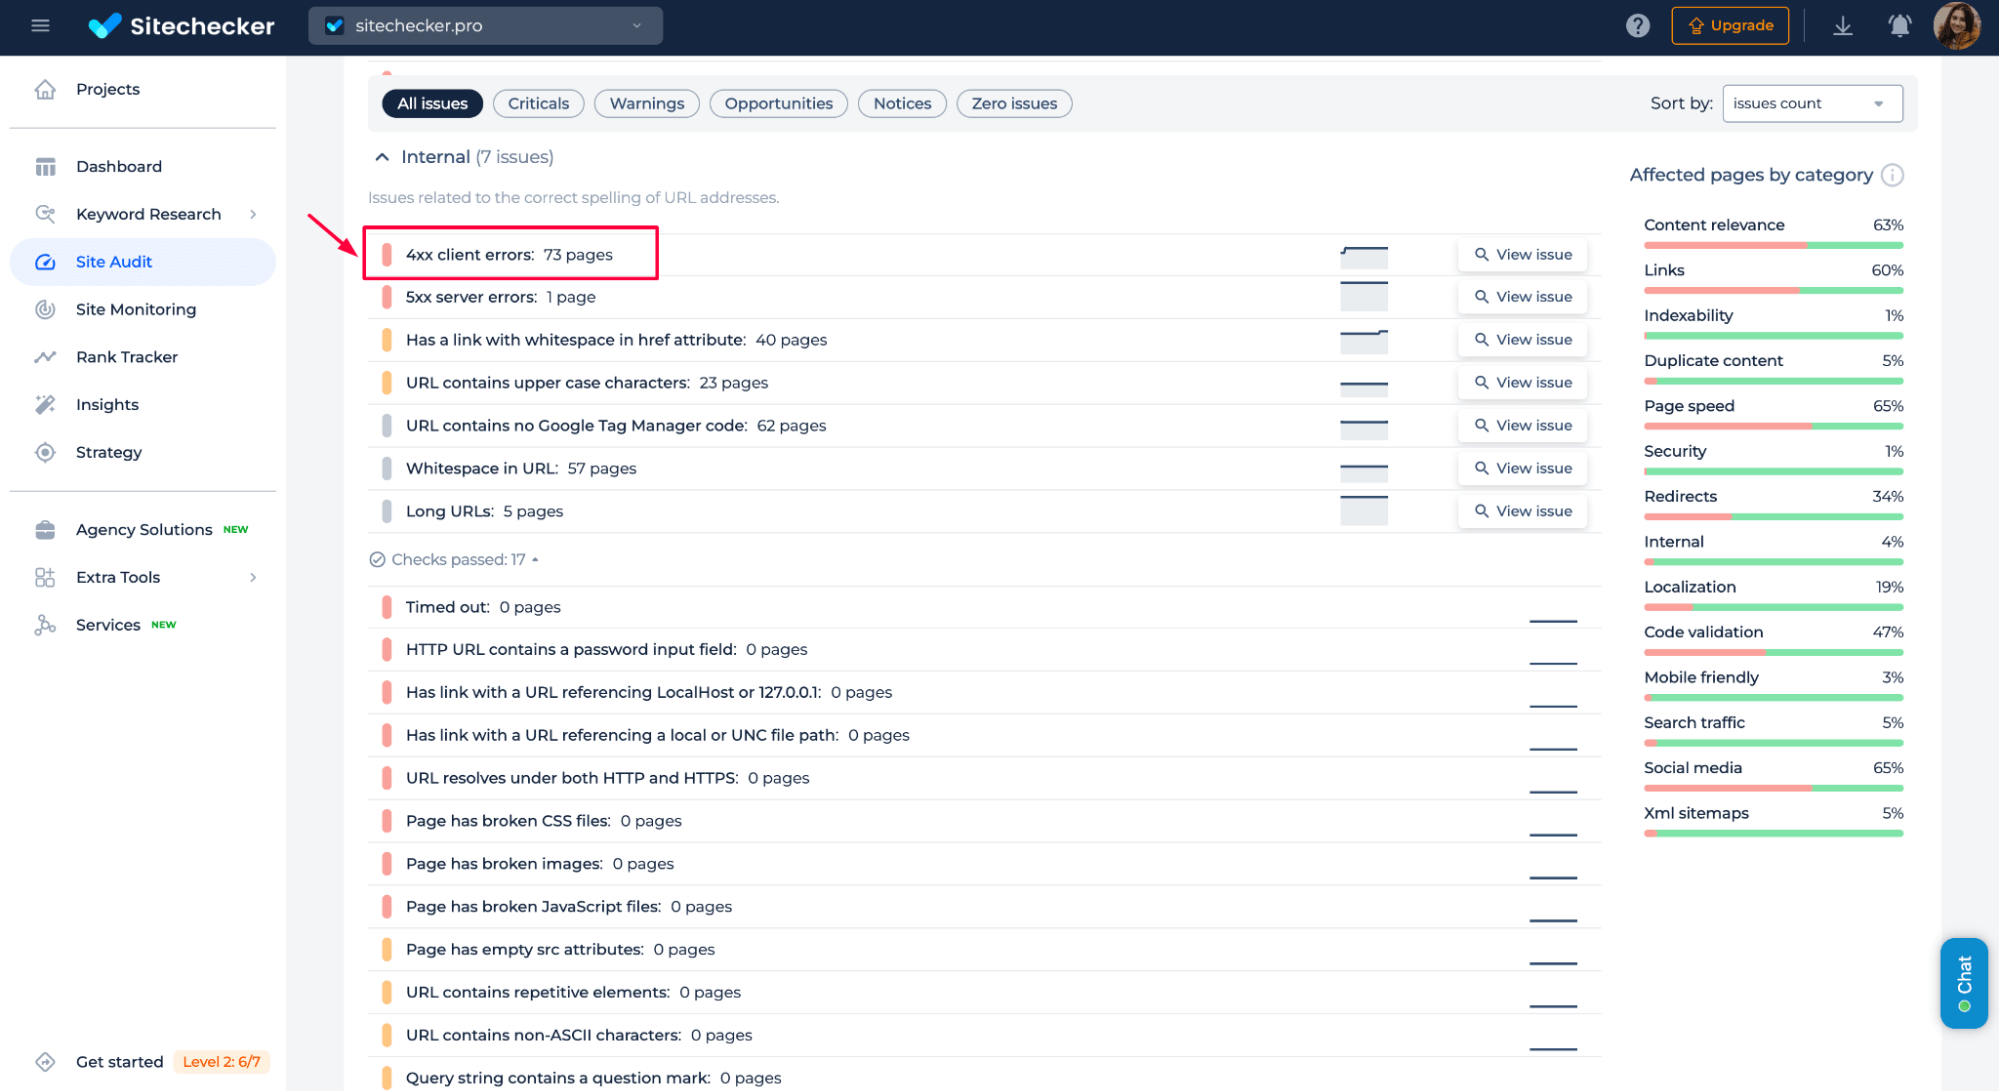
Click “View issue” next to the error to get a complete list of affected pages and detailed recommendations.
403 errors often appear after server updates, new plugin installations, or changes to firewall settings, and many site owners don’t notice them until their SEO is already hurt.
For ongoing protection, set up WordPress Updates Monitoring in Sitechecker. It automatically watches for new access issues after installing new apps, plugins, or server changes.
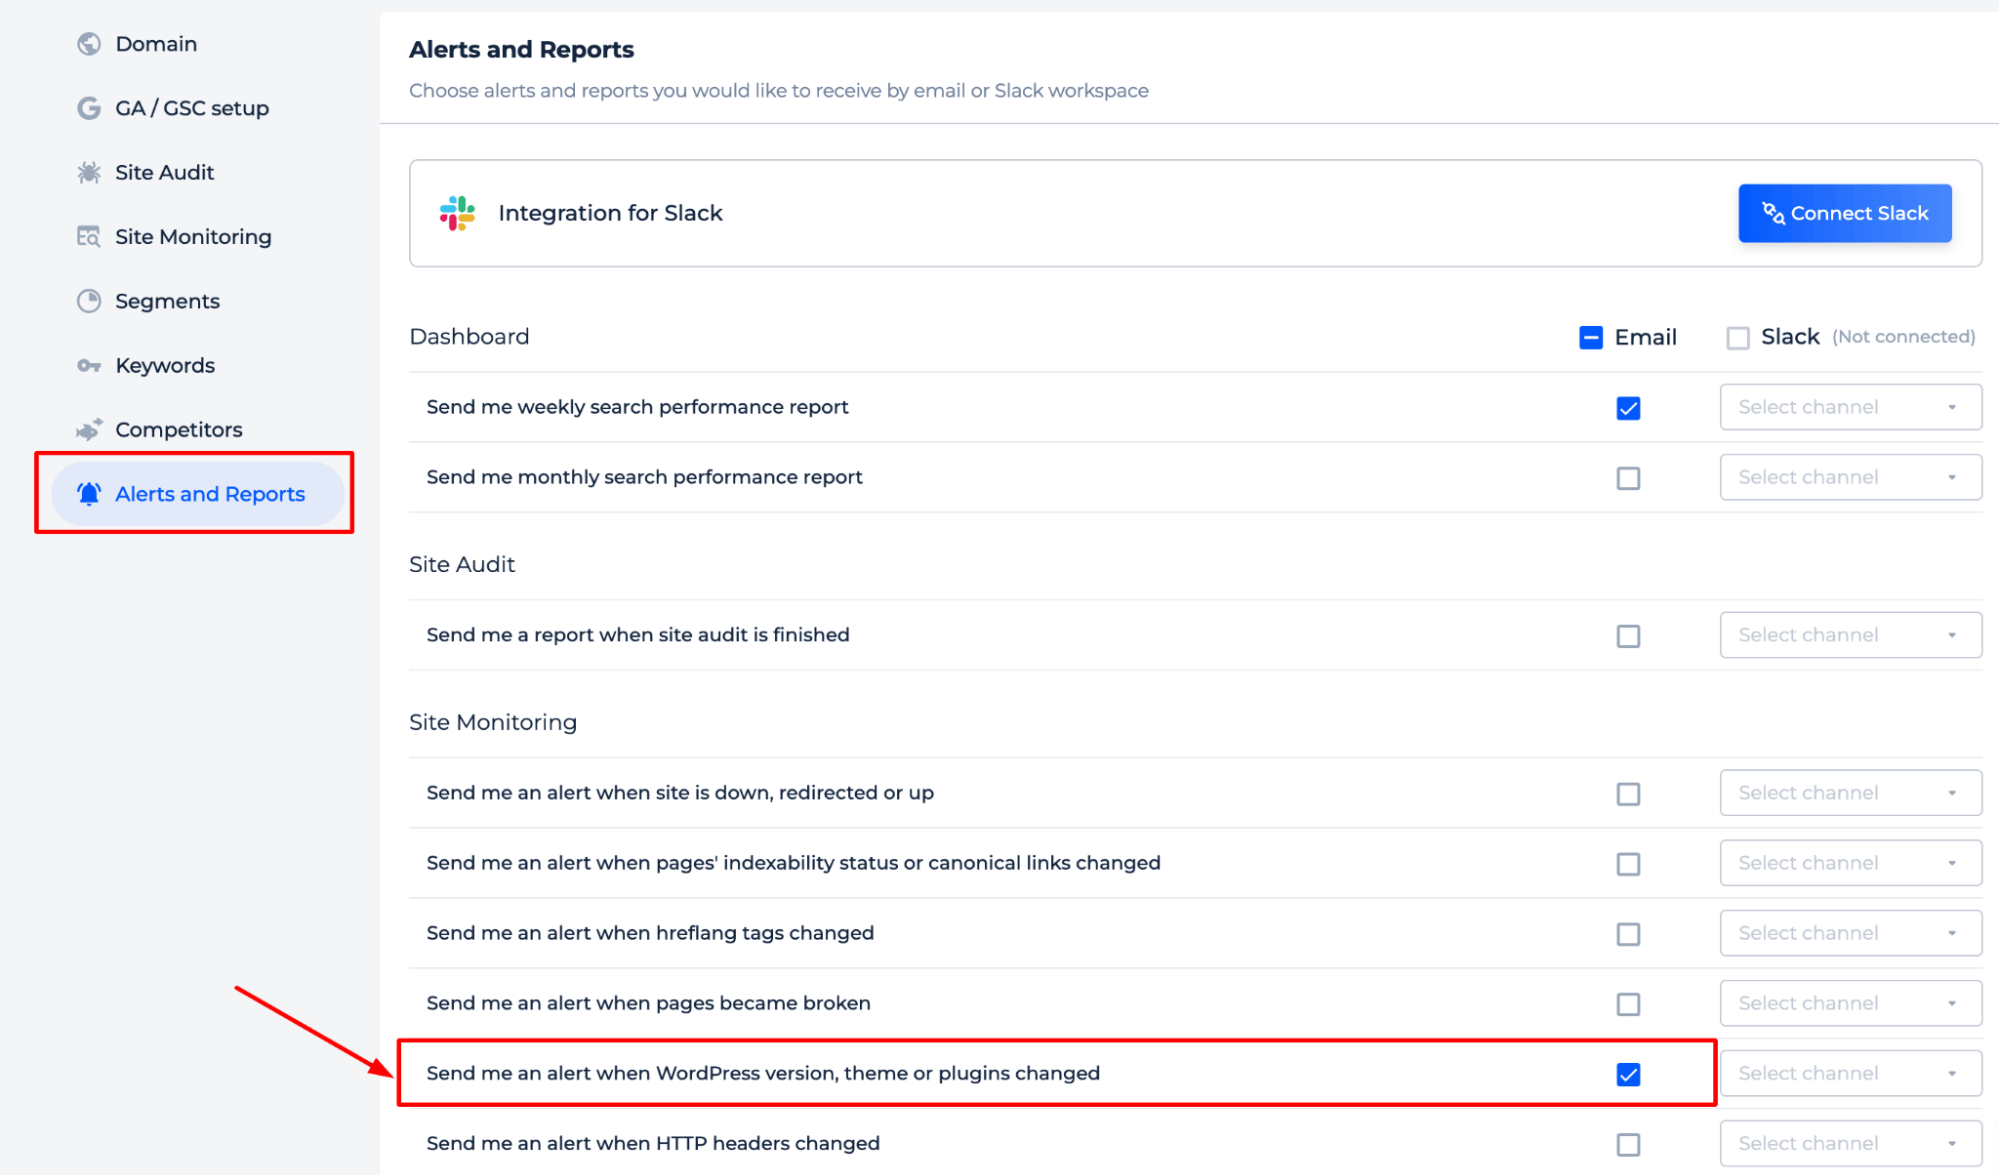
We keep track of changes in your WordPress version, theme, or plugins and alert you instantly via email or Slack when updates are detected.
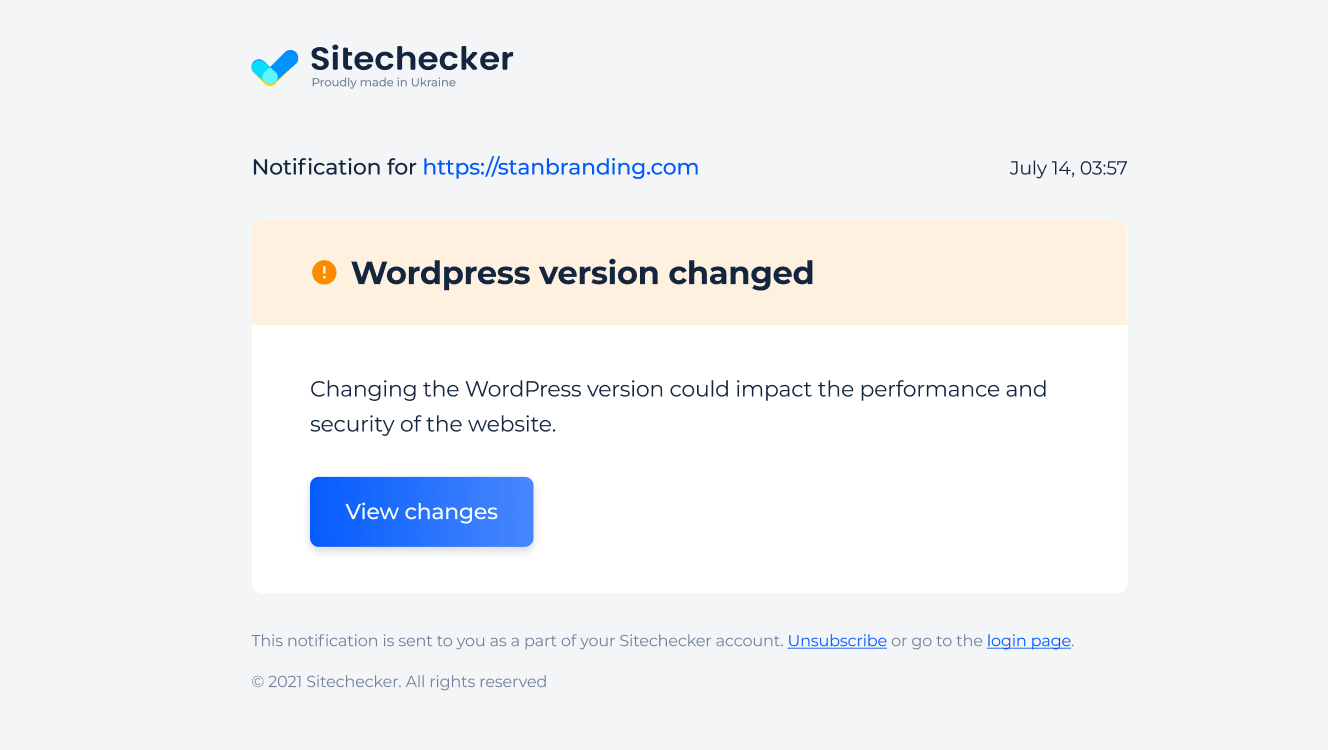
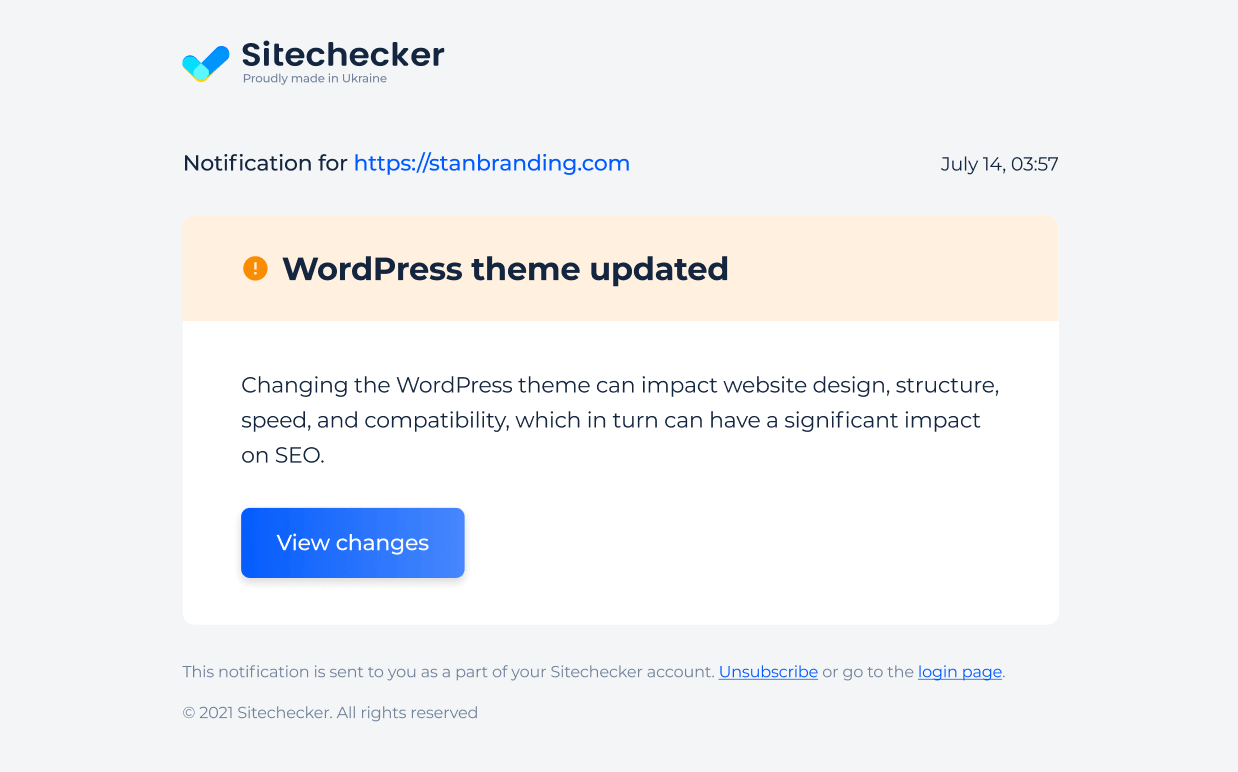
You’ll catch problems like 403 errors before they hurt your site’s SEO or block Googlebot.
How to verify that the 403 error is resolved
Once you’ve made changes, it’s time to double-check everything. Open the URL Inspection Tool in Google Search Console, enter the affected URL, and click “Test Live URL”.
If the test shows the page is accessible and no 403 error appears, the issue is fixed.
After that, click “Request Indexing” to speed up Google’s re-crawl and get the page back into the index faster.
After fixing the issue, you’ll often see a “Validate Fix” button next to the error in Google Search Console.
Click it to tell Google you’ve solved the problem.
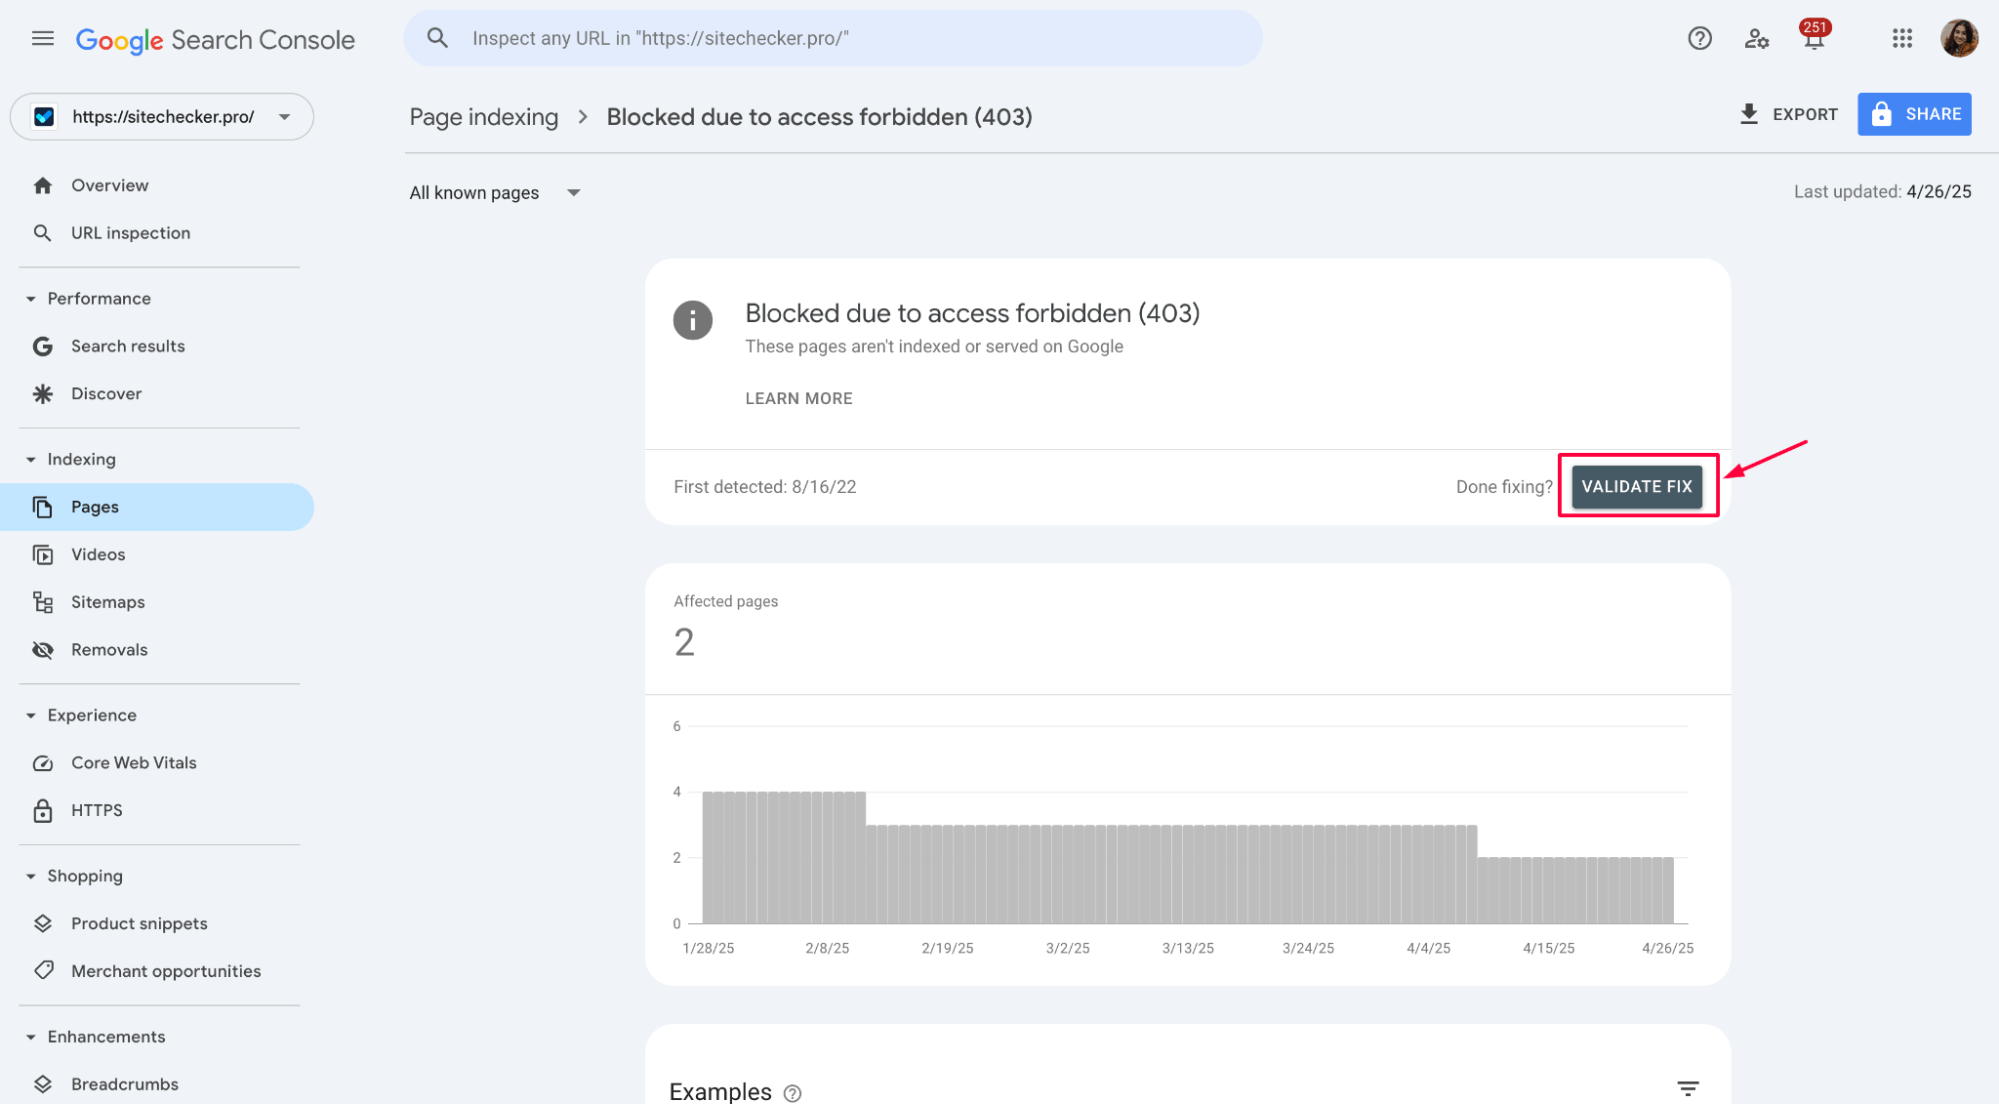
Google will start rechecking your pages, and if everything looks good, the 403 error will be cleared from your report within a few days.
Is Googlebot Blocked? Find Out Now
Detect and fix 403 errors before they harm your SEO – quick, free scan.
Conclusion
A 403 error in Google Search Console means Googlebot is blocked from accessing your site. To fix it, review server logs, firewall rules, robots.txt settings, and test accessibility. Sitechecker can automatically detect and monitor 403 errors and get real-time alerts via email or Slack. After fixing the issue, verify the fix in Google Search Console using the “Test Live URL” and “Validate Fix” options to ensure your pages are crawlable again and recover your SEO performance quickly.