Leverage Browser Caching? What do you Mean by That?
Leveraging browser caching refers to the method of instructing a user’s browser to temporarily store or “cache” certain types of website data locally. This ensures that on subsequent visits, the browser doesn’t need to re-fetch all the resources from the server, leading to faster page load times. Essentially, when leverages browser caching correctly it’s like giving your website visitors a “shortcut” to load your pages faster after their initial visit.
Browser caching works by specifying an expiration date for certain types of content. Once this date is reached, the browser fetches a fresh copy from the server. Until then, it uses the locally stored version, thus saving bandwidth and reducing server load.
To ensure optimal performance, combining this practice with WordPress Updates Monitoring is crucial. By keeping WordPress core, themes, and plugins up-to-date, you can prevent performance lags caused by outdated elements, ensuring that your site remains fast, secure, and user-friendly.
Significance and Implications of Not Leveraging Browser Caching
The digital age has ushered in a demand for instant gratification. Website visitors are no different; they expect fast-loading pages. If a page takes too long to load, you risk higher bounce rates, where users exit before interacting with your content.
By not leveraging browser caching:
User Experience is Hampered: Slow-loading pages can frustrate visitors, leading to a decreased likelihood of them returning or engaging with your site.
Increased Server Load: Every time a user visits your site, the server has to serve all resources anew. Over time, this can strain your server, especially during traffic spikes.
Higher Costs: More server requests can lead to increased hosting costs, especially if you’re on a plan that charges based on bandwidth or server resources used.
SEO Implications: Search engines like Google prioritize fast-loading sites. A slow site, partly due to not using browser caching, could negatively impact your search rankings.
In summary, leveraging browser caching is not just a technical best practice; it’s a pivotal part of ensuring your website’s success in terms of user experience, operational costs, and search visibility.
How Does Leverage Browser Caching in WordPress Work?
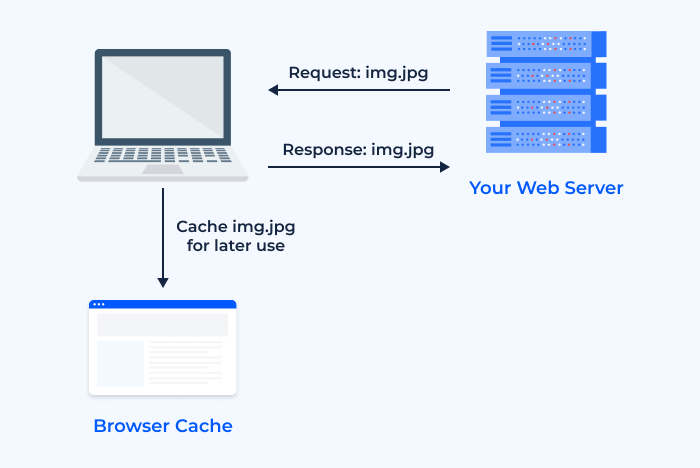
Leveraging browser caching in WordPress involves instructing the browser to store certain files locally for a specified period. This way, when a user revisits your site, the browser doesn’t have to retrieve all the files from the server again; it simply accesses the locally stored (or cached) versions of static files. This leads to faster page load times and a smoother user experience.
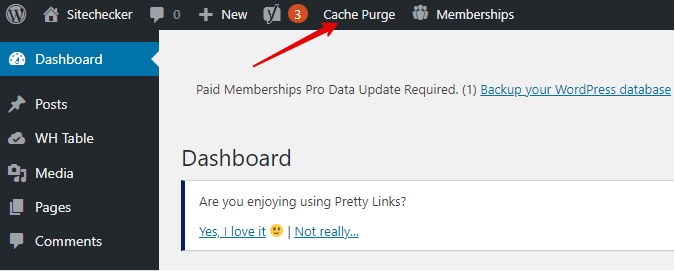
Here’s a breakdown of how it operates:
- Expiration Headers: When the server sends files (like images, CSS, or JS) to the browser, it can also send an ‘Expires’ header with a date indicating how long the file should be cached. After this date, the cache will be considered stale, and a fresh copy will be fetched from the server.
- Cache-Control Headers: This header defines caching policies in both requests and responses. It offers more flexibility than ‘Expires’ by specifying directives like max-age (the maximum time a resource is considered fresh) and no-cache (indicating a resource must be revalidated before use).
- ETags: ETags are a mechanism to validate cached resources. When a resource is fetched, the server sends an ETag value. On subsequent requests, if the resource hasn’t changed, the server returns a ‘304 Not Modified’ status, indicating the browser can use the cached version.
- WordPress Plugins: There are various WordPress plugins designed to simplify the process of setting and managing browser caching rules. These plugins can automatically set the appropriate headers and configurations without you having to manually edit server files.
By leveraging these mechanisms, WordPress site owners can effectively reduce server load, cut down on bandwidth usage, and deliver a speedier experience to their users.
Differences between server caching and browser caching
Both server caching and browser caching play critical roles in the performance optimization of a website. However, they function at different stages of the content delivery process and have distinct characteristics and purposes.
Let’s dive into the primary differences between the two:
-
Location:
Browser Caching: This type of caching happens on the user’s device, specifically within their web browser. Files like stylesheets, JavaScript, and images are stored locally after the first visit so that the browser can access them quickly without making repeated requests to the server.
Server Caching: This occurs on the web server where your website is hosted. Instead of generating content dynamically every time a user requests a page, the server saves a copy of the page after the first request and serves that static copy to subsequent visitors.
-
Content Type:
Browser Caching: Primarily deals with static assets like images, CSS files, and JavaScript files.
Server Caching: Can handle a wider variety of content, including full HTML pages, partial page elements, database queries, and more.
-
Control:
Browser Caching: Website owners can suggest how long browsers should cache specific files using headers. However, the end decision rests with the browser itself, and users can also manually clear their browser cache.Server Caching: Site administrators have more direct control over server caching, determining what gets cached, how, and for how long.
-
Purpose:
Browser Caching: Aims to reduce the number of files the browser needs to download on subsequent visits, speeding up page load times for returning visitors.Server Caching: Focuses on reducing server processing time by serving pre-generated content, which reduces the load on the server and speeds up page delivery to all visitors.
-
Duration:
Browser Caching: The cached files will remain on the user’s device until the cache expires, they are overwritten, or the user clears the cache.Server Caching: The duration is set by server configurations and cache policies. Cached content can be purged regularly or upon content updates.
-
Implementation:
Browser Caching: Implemented by setting HTTP headers like Cache-Control and Expires to instruct the browser.Server Caching: Achieved using server-side technologies, plugins, or server configurations. Examples include Object Caching, Page Caching, Opcode Caching, and Content Delivery Network (CDN) integrations.
In conclusion, while both browser and server caching aim to improve website speed and performance, they do so in different ways and at different stages of the content delivery process. A balanced combination of both is often ideal for optimum website performance.
Methods to Leverage Browser Caching in WordPress
Leveraging browser caching in WordPress involves a series of strategies and techniques to ensure that your website’s static assets are stored in a visitor’s browser for optimal load times during subsequent visits. Here are some of the most effective methods to leverage browser caching wordpress and implement this in WordPress:
- Modify .htaccess for Apache Servers: The .htaccess file is a configuration file used on web servers running the Apache Web Server software. You can insert code here to set caching parameters. Typically, you’d set Expires headers and Cache-Control headers to determine how long different resource types should be cached.
- Configuration for Nginx Servers: If your website is hosted on an Nginx server, you can configure browser caching by adding directives to your server block. This often involves setting the expires directive for various file types.
- Use WordPress Caching Plugins: There are several plugins designed to simplify the browser caching process for WordPress users. Here are some popular ones:
W3 Total Cache: Offers a comprehensive caching solution, including browser caching settings.
WP Super Cache: Generates static HTML files from your dynamic WordPress blog and serves those to reduce server processing.
WP Rocket: A premium plugin known for its user-friendly interface and efficient browser caching tools.
- Optimize for Third-party Resources: Sometimes, third-party scripts (like those from social media platforms or advertisement networks) can be a bottleneck. You might not have control over their cache settings, but you can optimize their delivery. Consider asynchronously loading these resources or hosting commonly used scripts locally.
- Use Content Delivery Network (CDN): CDNs can help leverage browser caching on a global scale. They distribute your website’s content across multiple servers worldwide, ensuring faster delivery and efficient caching. Most CDNs offer browser caching configurations that can be tailored to your needs.
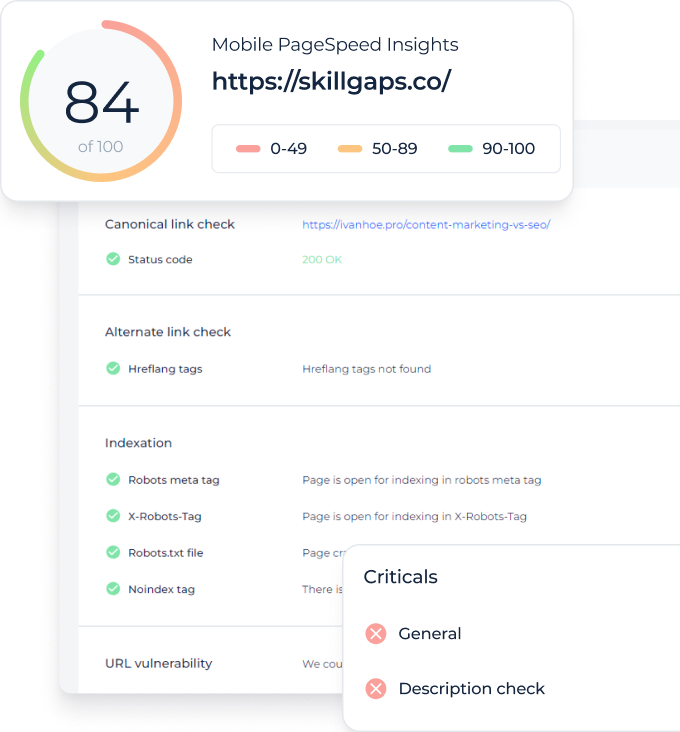
- Regularly Audit and Monitor: Tools like Google PageSpeed Insights or GTmetrix can provide insights into your caching efficiency. Regularly monitoring can help you identify if there are any files that aren’t being cached correctly or if any adjustments to your caching durations are needed.
<IfModule mod_expires.c> ExpiresActive On ExpiresByType image/jpg "access 1 year" ExpiresByType image/jpeg "access 1 year" ExpiresByType image/gif "access 1 year" ExpiresByType image/png "access 1 year" ExpiresByType text/css "access 1 month" ExpiresByType application/pdf "access 1 month" </IfModule>location ~* \.(jpg|jpeg|png|gif|ico|css|js)$ { expires 365d; }Incorporating these methods of browser caching plugin will ensure your WordPress site benefits from efficient browser caching, ultimately providing a better user experience and improved website performance.
Method 1: Access the website files
Before you can make any changes to web page, leverage browser caching or perform other optimizations, you’ll first need to access your website’s files. This process can vary based on your hosting environment, but here’s a general guide to help you navigate this step:
Via cPanel:
- Log in: Start by logging into your web hosting account and navigate to the cPanel dashboard.
- File Manager: Look for the ‘File Manager’ icon. Clicking on it will open a new window or tab showcasing the file structure of your website.
- Public_html: Usually, the primary files for a website are located within the ‘public_html’ folder. Open it to access your core WordPress files.
Using an FTP Client:
- Download and Install: If you don’t already have an FTP (File Transfer Protocol) client, download and install one. A popular choice is FileZilla.
- Connect to your Server: Launch the FTP client and connect to your server using the FTP credentials provided by your hosting provider. These typically include an FTP host (often your domain name), username, and password.
- Navigate to the Root Directory: Once connected, navigate to your website’s root directory, often named ‘public_html’ or ‘www’. Here, you’ll find all your website’s files.
Using SSH (Advanced):
- Access SSH: Some developers prefer to use SSH (Secure Shell) for a command-line interface to manage files. Ensure that your hosting provider supports SSH access.
- Connect: Use an SSH client like PuTTY for Windows or the terminal in macOS and Linux. Connect using your SSH credentials.
- Commands: Familiarize yourself with basic commands like ls to list files, cd to change directories, and nano or vi to edit files.
WordPress Dashboard (Limited Access):
- Login: Enter your WordPress dashboard by appending /wp-admin to your website’s URL.
- Navigate: Go to ‘Appearance’ > ‘Theme Editor’. Here, you can access and modify certain theme files. However, this method doesn’t grant full access to all website files, but it’s handy for quick edits.
Caution: Before making any changes, it’s imperative to back up your website. This ensures that you can quickly restore your site to its previous state if anything goes wrong. Mistakes, especially when directly editing website files, can lead to site downtime or even data loss.
Method 1: Modify .htaccess for Apache Servers
Add the browser caching code in your .htaccess file
- Access your website’s root directory and locate the .htaccess file.
- Before making changes, always back up the existing file.
- Add the following code to enable browser caching:
<IfModule mod_expires.c> ExpiresActive On ExpiresByType image/jpg "access 1 year" ExpiresByType image/jpeg "access 1 year" ExpiresByType image/gif "access 1 year" ExpiresByType image/png "access 1 year" ExpiresByType text/css "access 1 month" ExpiresByType application/pdf "access 1 month" </IfModule>- Save and upload the .htaccess file back to your server.
Add cache-control headers via Apache
- Still in the .htaccess file, you can define cache-control headers. These headers determine caching behavior:
<filesMatch ".(ico|pdf|flv|jpg|jpeg|png|gif|js|css|swf)$"> Header set Cache-Control "max-age=84600, public" </filesMatch>-
Save the changes and re-upload if necessary.
Turn Etags off
- ETags (Entity Tags) are identifiers assigned to specific versions of a resource. However, in some scenarios, they might cause caching issues. To disable them:
Header unset ETag FileETag None-
Remember to save and re-upload the file.
Method 2: Using NGINX Server
Detailed steps or differences in leveraging caching on NGINX
- Unlike Apache’s .htaccess, NGINX uses server blocks in its configuration file to control caching.
- Access the server block for your website, typically found in /etc/nginx/sites-available/your-domain-name.
- To enable browser caching, include the following:
location ~* \.(jpg|jpeg|png|gif|ico|css|js)$ { expires 365d; }-
Save changes and restart the NGINX server for them to take effect.
Method 3: Leverage Browsing in WordPress using plugins
W3 Total Cache – WordPress plugin
- Install and activate the plugin via your WordPress dashboard.
- Navigate to “Performance” > “Browser Cache” in the dashboard.
- Enable the necessary caching options and save settings. The plugin offers various caching methods, including page caching, minify, database caching, and more.
WP Fastest Cache
- After installing and activating, head to the WP Fastest Cache settings in your dashboard.
- Enable the ‘Browser Caching’ option and configure additional settings based on your requirements.
Cache Enabler – WordPress Cache
- Once installed, go to “Settings” > “Cache Enabler”.
- Adjust the desired cache settings, including the cache expiry time.
Use Yoast SEO to edit the .htaccess file
- Apart from its primary purpose as an SEO plugin, Yoast SEO provides direct access to edit the .htaccess file.
- In the dashboard, navigate to “SEO” > “Tools”.
- Select “File editor” and make necessary changes to the .htaccess file from within WordPress.
Minimizing Issues With Third-Party Scripts in Browser Caching
Third-party scripts, often from external sources like advertisement networks, social media platforms, and analytics services, can pose challenges when it comes to browser caching. While these scripts offer added functionality or monetization opportunities, they can also be a bottleneck in terms of performance. Here’s how to minimize potential issues:
Asynchronous Loading: Whenever possible, load third-party scripts asynchronously. This means that the script will not block the page’s rendering, allowing for a smoother user experience.
<script async src="path-to-external-script.js"></script>Defer Script Loading: Deferring a script tells the browser to continue parsing the document and execute the script afterward, ensuring it doesn’t interfere with page loading.
<script defer src="path-to-external-script.js"></script>Host Scripts Locally: Consider hosting regularly used third-party scripts on your server. This gives you control over caching parameters and reduces DNS lookups. However, be cautious; some scripts, like analytics, require frequent updates and are best served from the source.
Limit the Number of Scripts: Each script introduces an additional HTTP request. Evaluate the necessity of each third-party service and eliminate any that don’t significantly benefit your users or business goals.
Set Cache Headers for Proxies: While you can’t set browser cache settings for external resources, you can influence caching in intermediate proxies. Utilize the Cache-Control: s-maxage directive, which is respected by proxy caches but not by browsers.
Monitor with Performance Tools: Regularly audit your website with performance tools like Google PageSpeed Insights or GTmetrix. These tools can highlight third-party scripts that are particularly problematic.
Lazy Load Non-critical Scripts: For scripts that aren’t essential for the initial page view, consider implementing a lazy load strategy. This means the script only loads when it becomes relevant, like when a user scrolls to a particular section of the page.
Use Content Delivery Networks (CDNs): CDNs can help distribute third-party scripts more efficiently. If a third-party service doesn’t offer a CDN, consider using one like Cloudflare or Akamai to serve the script, especially if it’s hosted locally.
Stay Updated: Occasionally, third-party providers update their scripts to be more efficient or compatible with caching strategies. Regularly check for updates or improvements, and stay in communication with providers.
Feedback Loop: If a third-party script consistently poses caching or performance issues, provide feedback to the provider. Many companies are receptive to performance concerns and may offer solutions or optimizations.
By proactively managing third-party scripts and implementing strategies to optimize their delivery and execution, you can ensure that they don’t compromise your website’s performance or user experience.
Importance of Minimizing Your Use of Third-Party Scripts
Third-party scripts, while often essential for enhancing the functionality, interactivity, and profitability of a website, can come with some inherent challenges. Understanding the importance of minimizing the use of these scripts can make a significant difference to a website’s overall performance and user experience.
- Website Speed: Every script introduced to a site has the potential to increase its loading time. Some scripts are bulky, and even those that aren’t can introduce extra HTTP requests, causing latency.
- Reliability Concerns: Depending on external services means relying on their uptime. If a third-party service goes down or experiences issues, it can affect your website’s functionality or even render it inaccessible.
- Security Risks: Every external script is a potential security vulnerability. Even if the original script is secure, third-party services can be compromised, leading to potential security breaches on your website.
- Limited Control: When using external scripts, there’s limited control over their content, performance optimization, and updates. This can lead to unpredictable behavior or conflicts with other website elements.
- Negative Impact on SEO: Slow website speeds, due to bloated third-party scripts, can harm search engine rankings. Search engines prioritize user experience, and a slow site can negatively affect your position in search results.
Caching third-party resources
While it’s beneficial to minimize third-party scripts, some are indispensable. In such cases, it’s crucial to understand how to cache these resources effectively to mitigate their performance impact.
- Browser Caching: While you can’t directly control the browser cache settings of external resources, some third-party providers allow resources to be cached locally. This means frequent visitors to your site won’t need to redownload the script, speeding up load times.
- Proxy Caching: By using cache headers like Cache-Control: s-maxage, you can influence caching in intermediate proxies, even if you can’t dictate browser caching for third-party resources.
- Local Hosting: For scripts that rarely change, consider hosting them on your server. This gives you full control over caching parameters, ensuring optimized delivery. Do note that some scripts, especially those that need frequent updates (like analytics), are best served directly from their source.
- CDN Usage: Content Delivery Networks (CDNs) can cache and distribute third-party scripts from locations closer to the end-user, speeding up delivery. If a third-party service doesn’t have its CDN, and the terms allow, you can serve the cached script from your CDN.
- Regular Audits: Periodically review the cache behavior of third-party resources using tools like web.dev or GTmetrix. This helps ensure that they’re being cached efficiently and alerts you to potential problems.
- Lazy Loading: For non-essential third-party scripts, implement lazy loading. The script will only load when necessary, reducing the initial load time and potential render-blocking issues.
By effectively caching third-party resources, you can harness their functionality while minimizing their performance impact.
WordPress Plugin Detector to Discover Which WordPress Plugins Does Specific Site Use
The WordPress Plugin Detector by Sitechecker is an invaluable asset for website enthusiasts and developers curious about the plugins powering a specific WordPress site. With a simple interface, users only need to enter a website’s URL to get instant insights into the plugins that site employs. This tool demystifies the backend functionalities, providing clarity on what enhances the site’s capabilities.
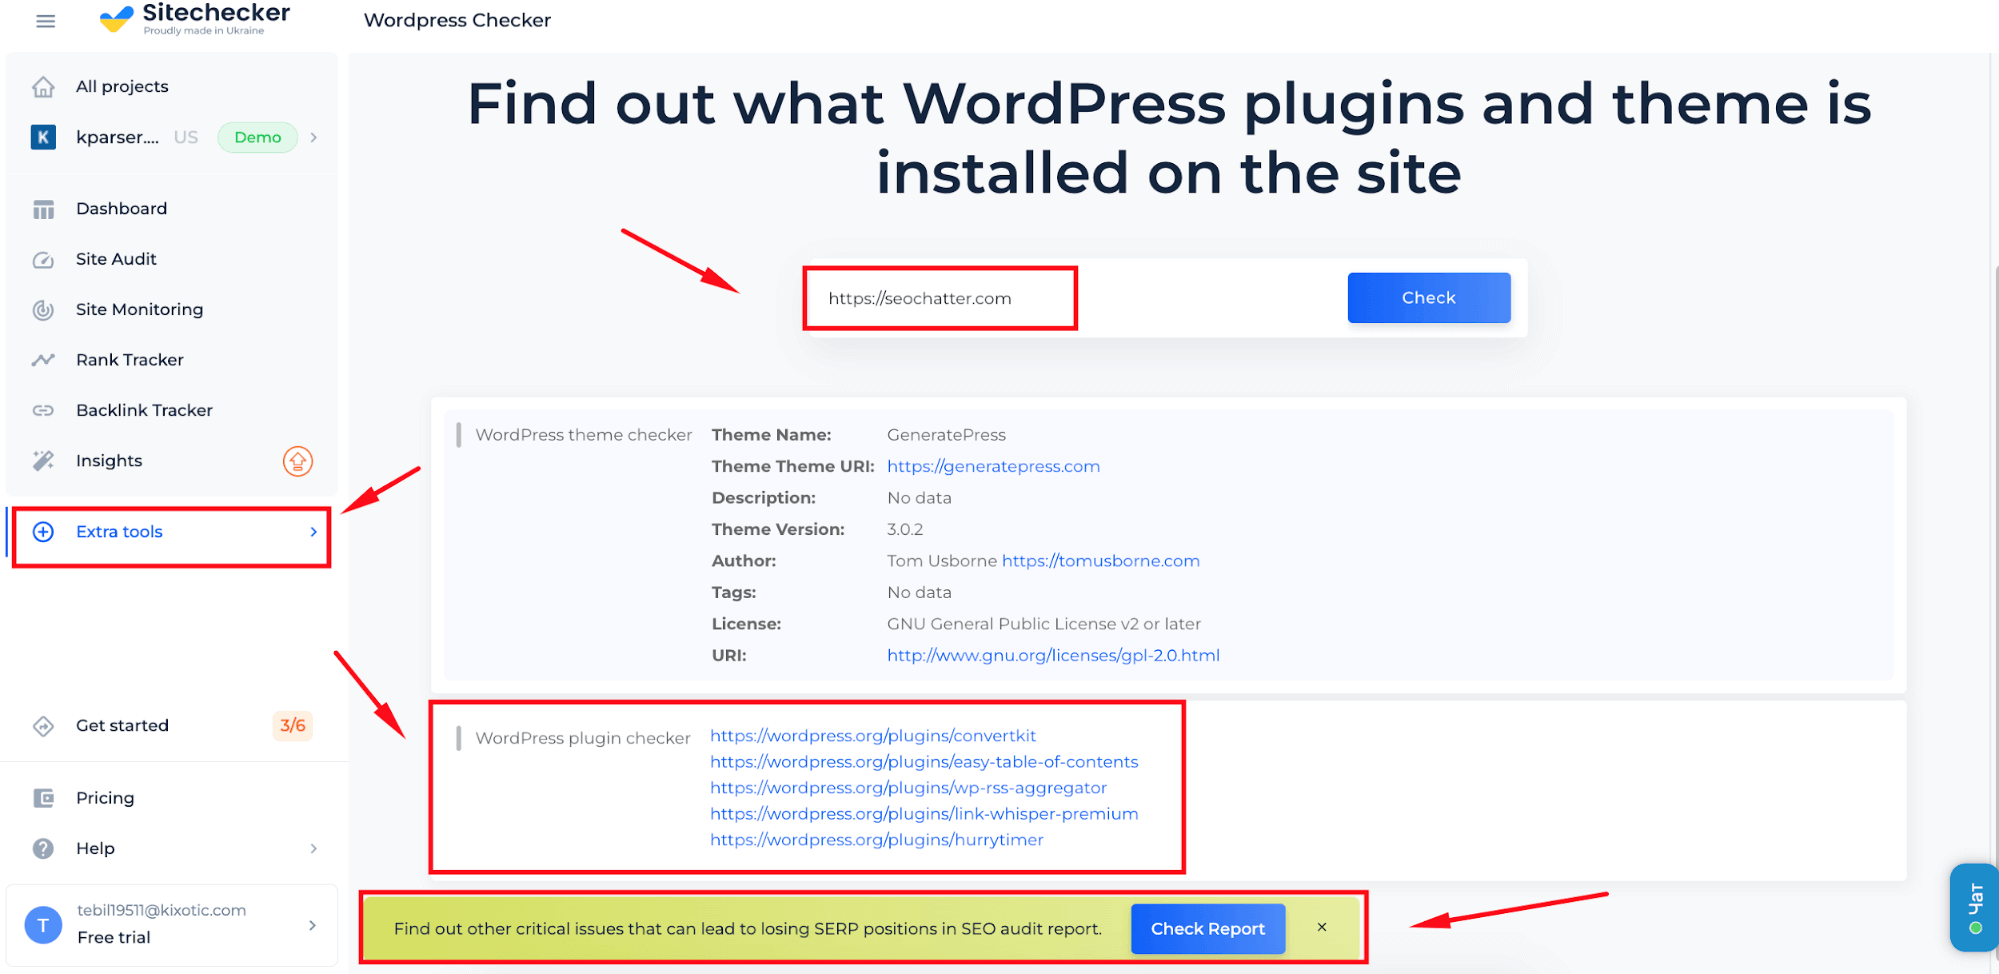
In addition to detecting plugins, the tool offers detailed descriptions for each identified plugin, assisting users in understanding their primary functions. Furthermore, its swift scanning capability ensures users receive results in mere moments, making it a must-have for quick and efficient WordPress site analysis.
Discover the Plugins Behind Any Site!
Plug into our Detector and instantly reveal the WordPress plugins a site uses.
Final Thoughts
In the fast-paced digital realm, every second counts. A swift-loading website doesn’t just enhance user satisfaction; it can significantly affect your bottom line, whether through increased sales, higher ad revenue, or improved engagement metrics. By leveraging browser caching effectively, you’re investing in a smoother, more responsive user journey, building trust and loyalty along the way.
